Newsletter Subscribe
Enter your email address below and subscribe to our newsletter

All voices matter
All voices matter
 ByTravis
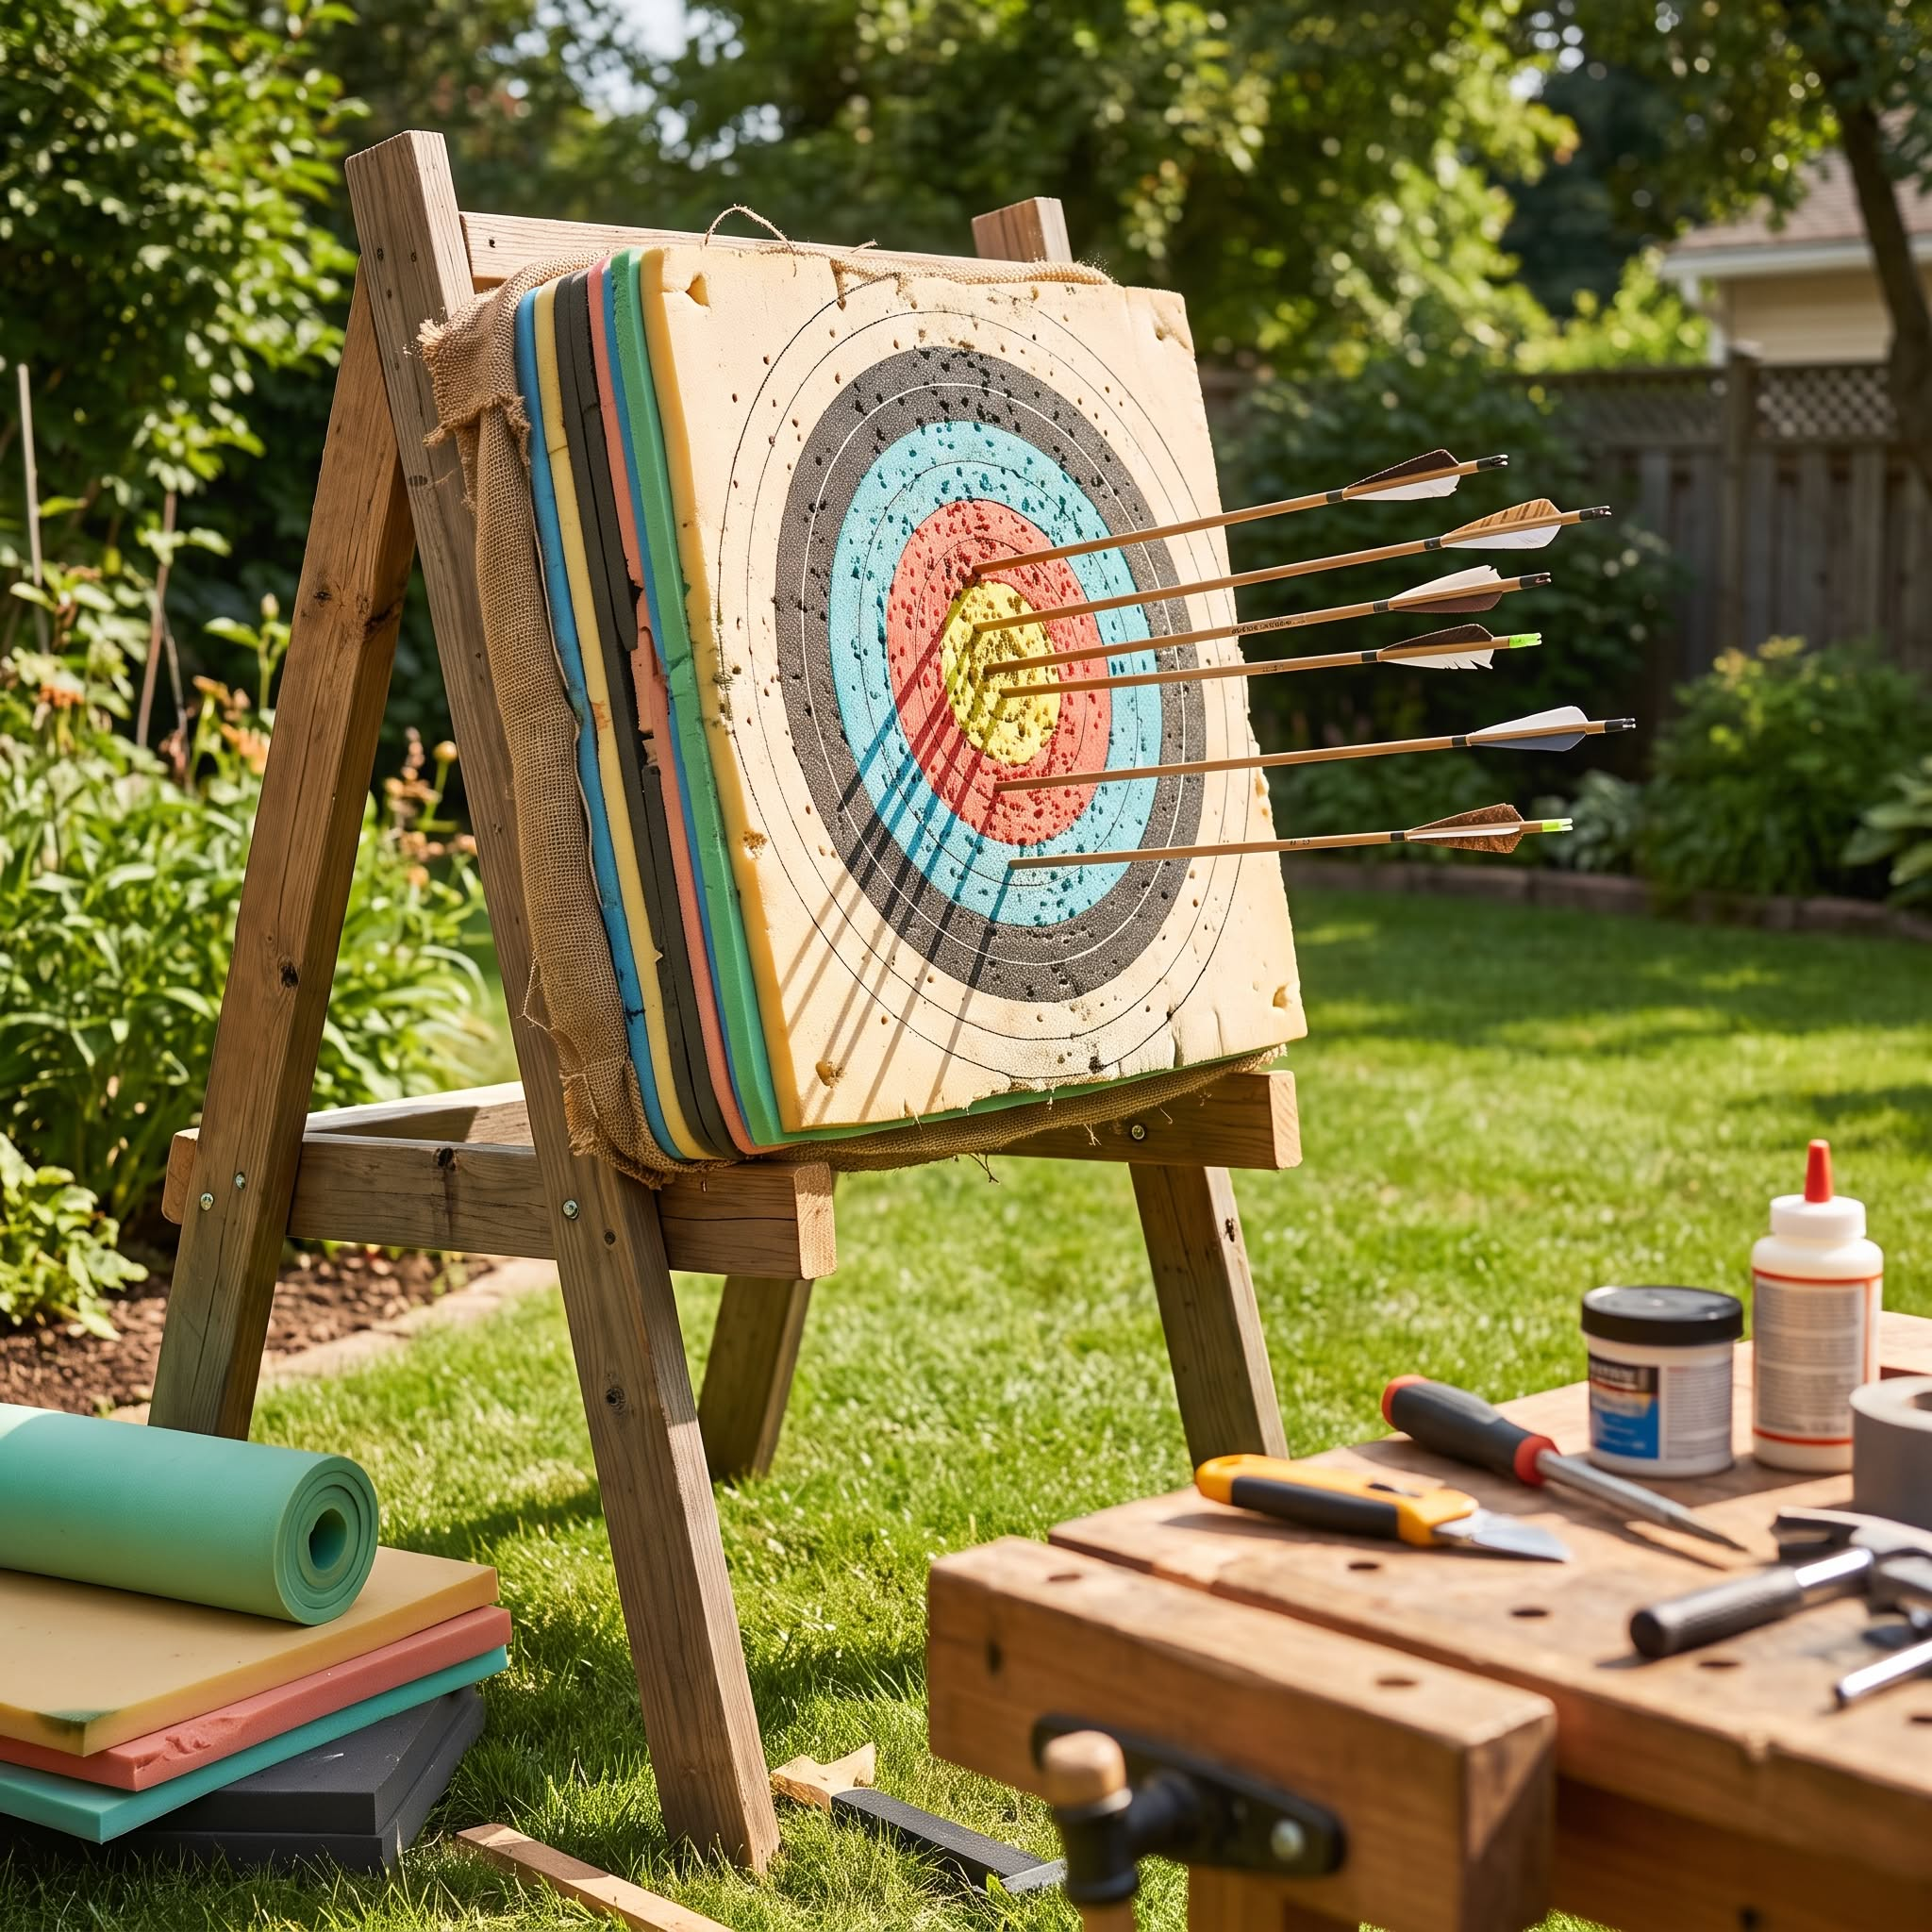
A DIY archery target needs 12-18 inches of layered dense foam in a wooden frame with a weatherproof cover for outdoor use - total cost runs - depending on materials.
Affiliate Disclaimer: We are a participant in the Amazon Services LLC Associates Program, an affiliate advertising program designed to provide a means for sites to earn advertising fees by advertising and linking to Amazon.com. As an Amazon Associate I earn from qualifying purchases. We also participate in other affiliate programs.

Building a DIY archery target requires layering dense foam materials (carpet foam or polyethylene foam) to a minimum thickness of 12-18 inches, securing the layers in a wooden frame or with compression straps, and adding a weatherproof cover for outdoor use. The total cost ranges from $30-$80 depending on materials, compared to $100-$300 for commercial targets. A properly constructed homemade target will stop arrows from recurve bows, compound bows up to 50 pounds draw weight, and traditional bows when built with adequate density and thickness.
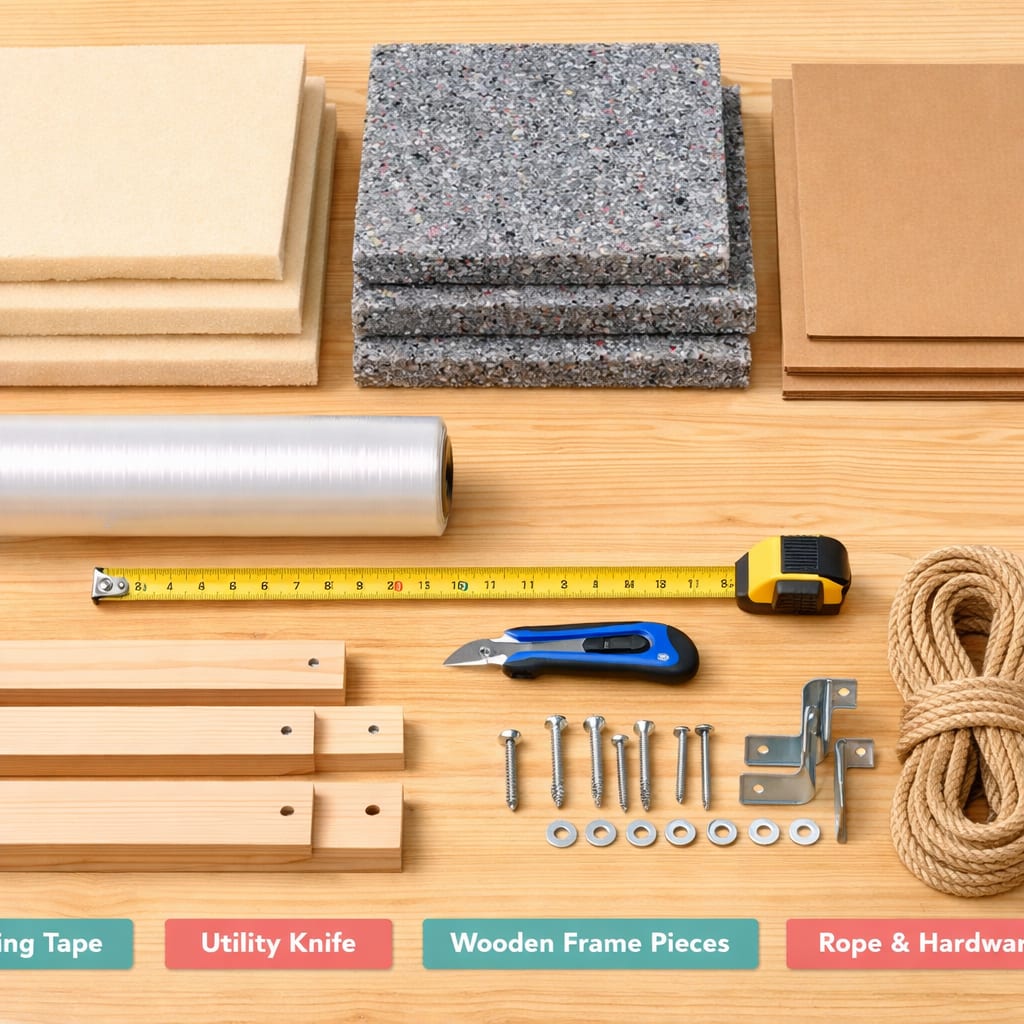
Building a DIY archery target requires dense foam as the primary stopping material, a frame or compression system to hold layers together, a target face for aiming, and weatherproofing materials for outdoor use. The specific materials depend on your bow type and draw weight, but most builds use carpet foam, polyethylene foam, or compressed cardboard as the core.
Essential materials for a basic foam target:
Optional but recommended additions:
The foam must be dense enough to grip arrow shafts without allowing pass-throughs. Carpet foam padding (the type used under carpets) works exceptionally well because it compresses under arrow impact but maintains enough resistance to stop the arrow within 8-10 inches of penetration. Avoid soft upholstery foam or packing foam, which lacks the density needed for archery.
Common mistake: Using foam with large air gaps or inconsistent density creates weak spots where arrows punch straight through. Test foam by pressing firmly with your thumb; it should resist compression and spring back slowly, not collapse easily.
For archers setting up a complete practice area, pairing your DIY target with proper archery training techniques ensures you get maximum value from your investment.
Making your own archery target costs between $30 and $80 for materials, depending on foam type and frame construction. This represents a 60-75% savings compared to commercial targets priced at $100-$300. The primary cost driver is the foam core, with carpet foam averaging $2-4 per square foot and polyethylene foam costing $3-6 per square foot.
Detailed cost breakdown for common DIY target builds:
Budget cardboard target (youth bows only):
Mid-range carpet foam target:
Premium layered foam target:
The cost-per-shot calculation favors DIY targets significantly. A homemade carpet foam target lasting 5,000-8,000 shots at $60 total cost equals $0.0075-0.012 per shot. A commercial target at $150 lasting 10,000 shots costs $0.015 per shot, making the DIY option roughly 50% cheaper per arrow fired.
Choose the budget option if you’re shooting a youth bow under 25 pounds draw weight or want to test archery before investing heavily. Choose the mid-range option if you shoot regularly with adult recurve or compound bows up to 50 pounds. Choose the premium option if you shoot high-poundage compound bows (50+ pounds) or need maximum durability for daily practice.
Material costs vary by region and supplier. Check carpet stores for foam remnants, which often sell at 50-70% discounts. Hardware stores occasionally have damaged lumber suitable for target frames at reduced prices.
DIY archery targets offer 60-75% cost savings and customization options, while commercial targets provide convenience, consistent quality, and often better arrow-stopping performance for high-poundage bows. The best choice depends on your budget, bow specifications, and willingness to invest 2-4 hours in construction.
Advantages of DIY targets:
Advantages of commercial targets:
Performance comparison:
| Factor | DIY Target | Commercial Target |
|---|---|---|
| Initial cost | $30-80 | $100-300 |
| Build time | 2-4 hours | 0 hours (ready to use) |
| Lifespan | 5,000-8,000 shots | 8,000-15,000 shots |
| Arrow removal ease | Moderate (varies by foam) | Easy (engineered foam) |
| Weatherproofing | Requires DIY effort | Built-in |
| Repairability | Excellent | Limited |
Choose DIY if you shoot recreationally (fewer than 100 arrows per week), have basic woodworking tools, shoot bows under 50 pounds draw weight, or want a learning project. Choose commercial if you shoot daily, use high-poundage compound bows (50+ pounds), practice with broadheads regularly, or prioritize convenience over cost savings.
The quality gap between DIY and commercial targets has narrowed considerably. A well-constructed layered foam DIY target performs comparably to entry-level commercial targets for most recreational archers. However, commercial targets maintain their edge for serious competitors and bowhunters who need consistent performance across thousands of shots.
For beginners exploring whether archery fits their lifestyle, a DIY target provides an affordable entry point. Once you’ve determined your commitment level, you can upgrade to commercial targets or continue refining your DIY design.
Carpet foam padding (also called rebond foam) provides the best combination of arrow-stopping power, easy removal, and affordability for DIY archery targets. This dense, recycled foam material stops arrows within 8-12 inches of penetration while allowing relatively easy extraction without damaging arrow shafts or fletching.
Top foam options ranked by performance:
1. Carpet foam (rebond foam):
2. Polyethylene foam (closed-cell):
3. EVA foam (ethylene-vinyl acetate):
Foam to avoid:
The key characteristic of effective archery foam is progressive resistance,the foam should compress gradually under arrow impact, slowing the arrow over several inches rather than stopping it abruptly (which damages arrows) or offering no resistance (allowing pass-throughs).
Testing foam density: Press your thumb firmly into the foam. Quality archery foam should resist compression, requiring significant pressure to indent 1/4 inch. It should spring back slowly (over 2-3 seconds) rather than instantly or not at all.
Common mistake: Mixing foam types with dramatically different densities in the same target creates inconsistent arrow penetration. Arrows hitting softer sections penetrate deeper, potentially passing through, while arrows hitting denser sections stop abruptly and become difficult to remove. Use consistent foam throughout or arrange layers from softer (front) to denser (back) for progressive resistance.
For compound bow users practicing for hunting, understanding proper target construction complements learning proper archery stance and posture for consistent shot placement.
Outdoor archery targets require weatherproofing measures to prevent water absorption, UV degradation, and foam breakdown from temperature cycling. A properly weatherproofed DIY target lasts 2-3 years outdoors compared to 3-6 months for unprotected foam targets.
Essential weatherproofing steps:
1. Seal all foam edges:
2. Create a protective cover:
3. Elevate the target:
4. Apply UV protection:
5. Provide overhead protection:
Seasonal maintenance schedule:
Climate-specific considerations:
Common mistake: Wrapping targets too tightly in non-breathable plastic traps moisture inside, accelerating foam breakdown. Leave small ventilation gaps at the bottom edge to allow moisture escape while preventing rain entry from above.
For archers building a complete outdoor practice setup, weatherproofing your target is just one component of creating a safe backyard archery range that withstands the elements.
Arrows pass through homemade targets due to insufficient thickness (under 12 inches), inadequate foam density, poor layer compression, or using foam with air gaps. The most common cause is underestimating the stopping power required for your specific bow’s draw weight and arrow speed.
Primary causes of pass-throughs:
1. Insufficient thickness:
2. Inadequate compression:
3. Wrong foam type:
4. Worn-out target core:
5. High-performance arrow setup:
Solutions by cause:
| Problem | Solution | Implementation |
|---|---|---|
| Too thin | Add 4-6 more foam layers | Stack additional foam sheets behind existing layers |
| Poor compression | Tighten straps or rebuild frame | Use ratchet straps or add more frame bolts |
| Wrong foam | Replace with carpet foam | Source 6-8 lb/ft³ density rebond foam |
| Worn channels | Rotate or replace layers | Move outer layers to center, replace damaged layers |
| High-energy setup | Add plywood backstop | Mount 3/4″ plywood 2 inches behind foam |
Quick diagnostic test: Shoot three arrows at the target from your normal practice distance. Measure penetration depth. If arrows penetrate more than 75% of the target thickness, you need more stopping material. If arrows penetrate less than 50%, your foam may be too dense, making removal difficult and potentially damaging arrows.
Edge case: Arrows consistently passing through only one section of the target indicate uneven compression or a damaged foam layer in that area. Disassemble the target and inspect individual layers for tears, compression damage, or density variations.
For archers experiencing accuracy issues alongside pass-through problems, addressing target panic may improve shot consistency and help diagnose whether the issue is target construction or shooting form.
Cardboard works for DIY archery targets when shooting youth bows under 20 pounds draw weight or adult bows under 30 pounds, but requires 18-24 inches of tightly compressed layers to stop arrows effectively. Cardboard targets are the most affordable option ($10-20) but have the shortest lifespan (500-1,000 shots) and become unsafe for higher-poundage bows.
Cardboard target construction method:
Performance characteristics:
Advantages of cardboard targets:
Disadvantages of cardboard targets:
When to choose cardboard: Use cardboard targets for youth archery programs, temporary practice setups, testing DIY target construction before investing in foam, or situations where cost is the primary constraint. Cardboard works well for beginner archery practice with low-poundage equipment.
When to avoid cardboard: Don’t use cardboard for compound bows over 30 pounds, outdoor permanent installations, daily practice (wear occurs quickly), or situations where arrow pass-throughs create safety concerns.
Common mistake: Failing to compress cardboard layers tightly enough. Loose cardboard layers with air gaps provide minimal stopping power. Each layer should be pressed firmly against the previous layer, with compression maintained by frame pressure or threaded rods tightened to near-maximum tension.
A DIY archery target should be 12-18 inches thick for most recreational bows, with specific thickness determined by bow type, draw weight, and arrow specifications. Recurve bows require 12-14 inches, compound bows under 50 pounds need 14-16 inches, and compound bows over 50 pounds require 18-24 inches of dense foam to prevent pass-throughs.
Thickness guidelines by bow type:
Recurve bows:
Compound bows:
Traditional bows (longbow, flatbow):
Youth bows:
Factors that increase required thickness:
Safety margin calculation: Always add 4-6 inches beyond the maximum observed arrow penetration depth. If arrows penetrate 10 inches into your target, the total thickness should be at least 14-16 inches to provide a safety buffer for occasional deeper penetration.
Testing your target thickness: Shoot five arrows at your normal practice distance. Measure the deepest penetration. Your target thickness should be at least 1.5 times the deepest penetration depth. If arrows penetrate 12 inches, your target should be at least 18 inches thick.
Common mistake: Building targets based on bow draw weight alone without considering arrow specifications. A 50-pound compound bow shooting lightweight carbon arrows penetrates significantly deeper than the same bow shooting heavier aluminum arrows. Calculate thickness based on your specific arrow setup, not just bow specifications.
Edge case: Shooting from very close distances (under 10 yards) increases arrow velocity and penetration depth by 10-15%. If you practice at close range, add an extra 2-4 inches to your target thickness or move back to 15-20 yards for practice.
A properly constructed DIY archery target is safe for beginners when built with adequate thickness (12-18 inches), dense foam materials, and used with appropriate safety protocols including backstops and clear shooting lanes. Safety depends more on target construction quality and range setup than whether the target is homemade or commercial.
Safety requirements for beginner-safe DIY targets:
1. Adequate stopping power:
2. Stable mounting:
3. Backstop protection:
4. Target face visibility:
Safety advantages of DIY targets for beginners:
Safety considerations specific to beginners:
When DIY targets are unsafe:
Beginner safety checklist:
For beginners setting up their first practice area, combining a properly built DIY target with knowledge of how often to practice archery creates a safe, effective learning environment.
Carpet foam (rebond foam) offers better arrow-stopping power and durability for DIY archery targets, while layered polyethylene foam provides easier arrow removal and lighter weight. For most recreational archers shooting bows under 50 pounds, carpet foam delivers the best performance-to-cost ratio at $2-4 per square foot.
Detailed comparison:
Carpet foam (rebond foam):
Layered polyethylene foam:
Performance by bow type:
| Bow Type | Carpet Foam Performance | Polyethylene Foam Performance |
|---|---|---|
| Youth bow (under 20 lbs) | Excellent, may be too dense | Excellent, ideal match |
| Recurve (30-40 lbs) | Excellent | Good with extra layers |
| Compound (40-50 lbs) | Excellent | Fair, requires 16+ inches |
| Compound (50+ lbs) | Good with 18+ inches | Poor, insufficient stopping |
Arrow removal comparison: Polyethylene foam releases arrows with 30-40% less pull force than carpet foam. This matters for archers shooting 50+ arrows per session, as repeated hard pulls cause fatigue and potential injury. However, carpet foam’s firmer grip prevents arrows from falling out during transport or in windy conditions.
Durability factors: Carpet foam maintains consistent density longer because its bonded structure resists compression. Polyethylene foam develops permanent compression channels after 2,000-3,000 shots, requiring layer rotation or replacement. However, polyethylene foam resists moisture better, making it superior for outdoor targets in humid climates.
Choose carpet foam if: You shoot compound or recurve bows over 30 pounds, need maximum durability, have a permanent target location, and don’t mind moderate arrow removal difficulty.
Choose polyethylene foam if: You shoot youth or traditional bows, need a portable target, prioritize easy arrow removal, or practice in humid climates where moisture resistance matters.
Hybrid approach: Some experienced DIY builders layer carpet foam in the back half (for stopping power) and polyethylene foam in the front half (for easier removal). This combines the strengths of both materials but requires careful layer alignment to prevent arrows from finding gaps between different foam types.
Common mistake: Assuming all carpet foam is identical. Carpet foam quality varies significantly by manufacturer and recycled content. Test foam samples before buying in bulk; some carpet foam is too soft (under 5 lbs/cubic foot) and performs poorly for archery.
Building an archery target for compound bows requires 16-24 inches of high-density foam (6-8 lbs per cubic foot), strong compression to eliminate air gaps, and a robust frame to handle the kinetic energy from compound bow speeds of 250-350 fps. Compound bow targets need 30-50% more stopping material than recurve targets due to higher arrow velocity and energy transfer.
Step-by-step construction for compound bow target:
Step 1: Gather materials
Step 2: Build the frame
Step 3: Prepare foam layers
Step 4: Stack and compress foam
Step 5: Apply compression
Step 6: Weatherproof and finish
Compound bow-specific considerations:
Higher compression requirements: Compound bows generate 40-60 foot-pounds of kinetic energy compared to 20-30 for recurves. This requires compression tight enough that you cannot separate foam layers by hand. Retighten compression bolts every 100 shots for the first 500 shots as foam settles.
Backstop necessity: Always use a 3/4-inch plywood backing board 2 inches behind the foam core. This catches any arrows that penetrate deeper than expected and prevents dangerous pass-throughs. Position the plywood so arrows hit foam first, with plywood serving only as emergency backup.
Broadhead compatibility: If practicing with broadheads for hunting, increase target thickness to 20-24 inches. Broadheads cut through foam rather than pushing it aside, penetrating 20-30% deeper than field points. Consider dedicating one target to broadheads and another to field points, as broadheads accelerate foam wear.
Target size: Compound bow accuracy allows smaller target faces, but beginners should use 24″ x 24″ minimum to ensure consistent hits. Advanced shooters can reduce to 18″ x 18″ for challenge practice.
Common mistakes specific to compound bow targets:
Testing your compound bow target: Before regular use, shoot five arrows from your maximum practice distance. Measure penetration depth. Arrows should penetrate no more than 70% of target thickness. If penetration exceeds 70%, add 4-6 more foam layers.
For compound bow shooters looking to improve accuracy alongside target practice, mastering how to aim with a multi-pin sight complements proper target construction for effective practice sessions.
The most common mistakes when building DIY archery targets are insufficient thickness for bow draw weight, inadequate foam compression leaving air gaps, using low-density foam, and neglecting weatherproofing for outdoor targets. These errors result in arrow pass-throughs, rapid target degradation, and potential safety hazards.
Critical mistakes and solutions:
1. Underestimating required thickness
2. Insufficient compression
3. Using wrong foam type
4. Neglecting weatherproofing
5. No backstop protection
6. Inadequate frame strength
7. Mixing incompatible materials
8. Ignoring foam orientation
9. Insufficient target size
10. Skipping maintenance
Mistake severity ranking:
| Mistake | Safety Risk | Performance Impact | Cost to Fix |
|---|---|---|---|
| Insufficient thickness | High | Severe | $20-40 (add layers) |
| No backstop | High | N/A | $0-50 (reposition or build) |
| Wrong foam type | Medium | Severe | $30-60 (replace foam) |
| Poor compression | Medium | Moderate | $5-10 (add straps/rods) |
| No weatherproofing | Low | Moderate | $10-20 (add protection) |
Prevention mindset: Build targets assuming your bow shoots 10 pounds heavier than actual draw weight. This safety margin accommodates variations in arrow weight, shooting distance, and foam degradation over time. It’s easier to build adequate stopping power initially than to retrofit additional layers after discovering pass-through problems.
Weatherproofing a DIY archery target requires wrapping the foam core in heavy-duty plastic sheeting (6 mil minimum), adding a removable waterproof cover, elevating the target off the ground, and providing overhead protection when possible. Proper weatherproofing extends outdoor target life from 3-6 months to 2-3 years.
Comprehensive weatherproofing process:
Phase 1: Core protection (during construction)
Plastic wrap application:
Frame sealing:
Drainage design:
Phase 2: External protection (after construction)
Removable cover:
Elevation system:
Overhead shelter (optional but recommended):
Phase 3: Ongoing maintenance
Monthly inspection:
Quarterly maintenance:
Annual overhaul:
Climate-specific weatherproofing:
Desert/arid climates:
Humid/tropical climates:
Cold/freeze climates:
Rainy climates:
Weatherproofing effectiveness test: After heavy rain, remove cover and inspect target. If plastic wrap is dry inside and foam shows no moisture, weatherproofing is adequate. If moisture is present, identify entry points and reseal.
Common weatherproofing mistakes:
Cost-benefit analysis: Weatherproofing adds $15-30 to initial target cost but extends lifespan by 18-24 months. Without weatherproofing, a $60 target lasts 6 months ($10/month). With weatherproofing, a $75 target lasts 30 months ($2.50/month), representing 75% cost savings over time.
For archers maintaining a complete outdoor practice facility, weatherproofing targets is one component of overall backyard archery range maintenance that ensures year-round usability.
How long does a DIY archery target last? A properly constructed DIY archery target lasts 5,000-8,000 shots (approximately 1-2 years of regular recreational use) before requiring foam layer replacement. Weatherproofed outdoor targets last 2-3 years, while indoor targets can last 3-4 years. Lifespan depends on bow draw weight, shot frequency, and maintenance quality.
Can I use old carpet for an archery target? Old carpet works as a target face covering but not as the core stopping material. Carpet padding (the foam underneath carpet) is excellent for archery targets, but the carpet itself is too thin. Use carpet padding foam (rebond foam) as your core material and attach carpet or canvas as a replaceable face.
What’s the best DIY target for broadheads? Layered carpet foam 20-24 inches thick provides the best DIY broadhead target. Broadheads cut through foam 20-30% deeper than field points, requiring extra thickness. Avoid cardboard targets for broadheads as cutting heads shred cardboard quickly. Dedicated broadhead targets should be separate from field point targets to extend lifespan.
How do I make my arrows easier to remove from a DIY target? Use lower-density polyethylene foam (2-4 lbs per cubic foot) in the front 4-6 inches of your target, with denser carpet foam behind for stopping power. Alternatively, apply a thin layer of plastic sheeting between foam layers to reduce friction. Waxing arrow shafts also helps with removal but may affect accuracy.
Can I repair a DIY archery target? Yes, DIY targets are easily repairable by replacing individual damaged foam layers. Disassemble the target, remove worn layers with arrow channels, insert new foam sheets, and reassemble with fresh compression. This costs $10-20 and extends target life by 2,000-3,000 shots. Repairability is a major advantage of DIY over commercial targets.
What size should I make my DIY archery target? Build 24″ x 24″ targets for beginners and general practice, 18″ x 18″ for experienced archers, or 36″ x 36″ for youth programs with multiple shooters. Larger targets reduce misses that damage frames and create safety issues. Match target size to shooter skill level and practice distance (larger for longer distances).
Do I need a frame for my DIY archery target? A frame is not strictly required but highly recommended for targets over 12 inches thick. Frames maintain foam compression, provide mounting points, protect foam edges, and extend target life. Frameless targets using compression straps work for portable applications but lack the durability of framed targets for permanent installations.
How much does a DIY archery target weigh? A typical 24″ x 24″ x 16″ carpet foam target weighs 40-60 pounds, while polyethylene foam targets weigh 20-35 pounds. Add 10-15 pounds for wooden frame and backing board. Weight increases with thickness and foam density. Consider portability needs when selecting materials; lighter foam works better for targets moved frequently.
Can I make a hanging archery target? Yes, hanging targets work well for indoor ranges or covered outdoor areas. Use lighter polyethylene foam (20-35 lbs total weight), attach heavy-duty eye bolts to the frame, and hang from ceiling joists or a sturdy overhead beam using chain or rope rated for 3x the target weight. Ensure the target hangs stable without swinging.
What’s the best target for compound bow hunting practice? Build a 20-24 inch thick carpet foam target with 3/4-inch plywood backing for compound bow hunting practice. Use this target exclusively for broadheads to prevent rapid wear. Practice with field points on a separate target, switching to the broadhead target for final pre-hunt verification. This approach extends both targets’ lifespan significantly.
How do I dispose of a worn-out DIY archery target? Disassemble the target and separate materials. Foam can be recycled at foam recycling facilities or repurposed as packing material. Wood frames can be reused for new targets or disposed of as construction waste. Plastic sheeting goes in regular trash. Some archery clubs accept used foam for beginner targets or youth programs.
Can I use a DIY target for crossbow practice? DIY targets work for crossbows under 150 pounds draw weight if built with 24-30 inches of high-density carpet foam and a 3/4-inch plywood backing. Crossbows generate significantly more kinetic energy than vertical bows, requiring extra stopping material. Commercial crossbow targets are recommended for crossbows over 150 pounds due to extreme penetration forces.
Building a DIY archery target delivers substantial cost savings (60-75% compared to commercial options) while providing customizable, repairable practice equipment suitable for most recreational archery applications. Success requires matching target thickness and foam density to your specific bow type, with 12-18 inches of carpet foam serving most archers shooting bows under 50 pounds draw weight.
The construction process takes 2-4 hours and costs $30-80 for materials, resulting in a target that stops 5,000-8,000 arrows before requiring layer replacement. Proper weatherproofing extends outdoor target life to 2-3 years, making DIY targets a practical long-term solution for backyard practice.
Key action steps to build your target:
For archers committed to regular practice, a well-constructed DIY target paired with proper archery training techniques and a safe backyard range creates an effective, affordable practice environment that supports skill development for years to come.
Start with a basic design matching your current bow specifications, then refine your target construction based on performance observations. The skills learned building your first target will inform improvements for future builds, creating increasingly effective practice equipment tailored to your specific archery needs.