
Newsletter Subscribe
Enter your email address below and subscribe to our newsletter

All voices matter
All voices matter

 ByTravis
Each pin on a multi-pin sight corresponds to a set distance - pick the pin matching your target's range, place it on your aim point, and execute a smooth release.
Affiliate Disclaimer: We are a participant in the Amazon Services LLC Associates Program, an affiliate advertising program designed to provide a means for sites to earn advertising fees by advertising and linking to Amazon.com. As an Amazon Associate I earn from qualifying purchases. We also participate in other affiliate programs.
Learning how to aim with a multi-pin sight requires understanding that each pin corresponds to a specific distance, with the top pin set for the closest range and lower pins for progressively farther targets. To aim accurately, select the pin that matches your target distance, place that pin on your aiming point, maintain proper anchor and form, and execute a smooth release. The multi-pin system eliminates guesswork at known distances and allows quick target acquisition in hunting and competitive scenarios.

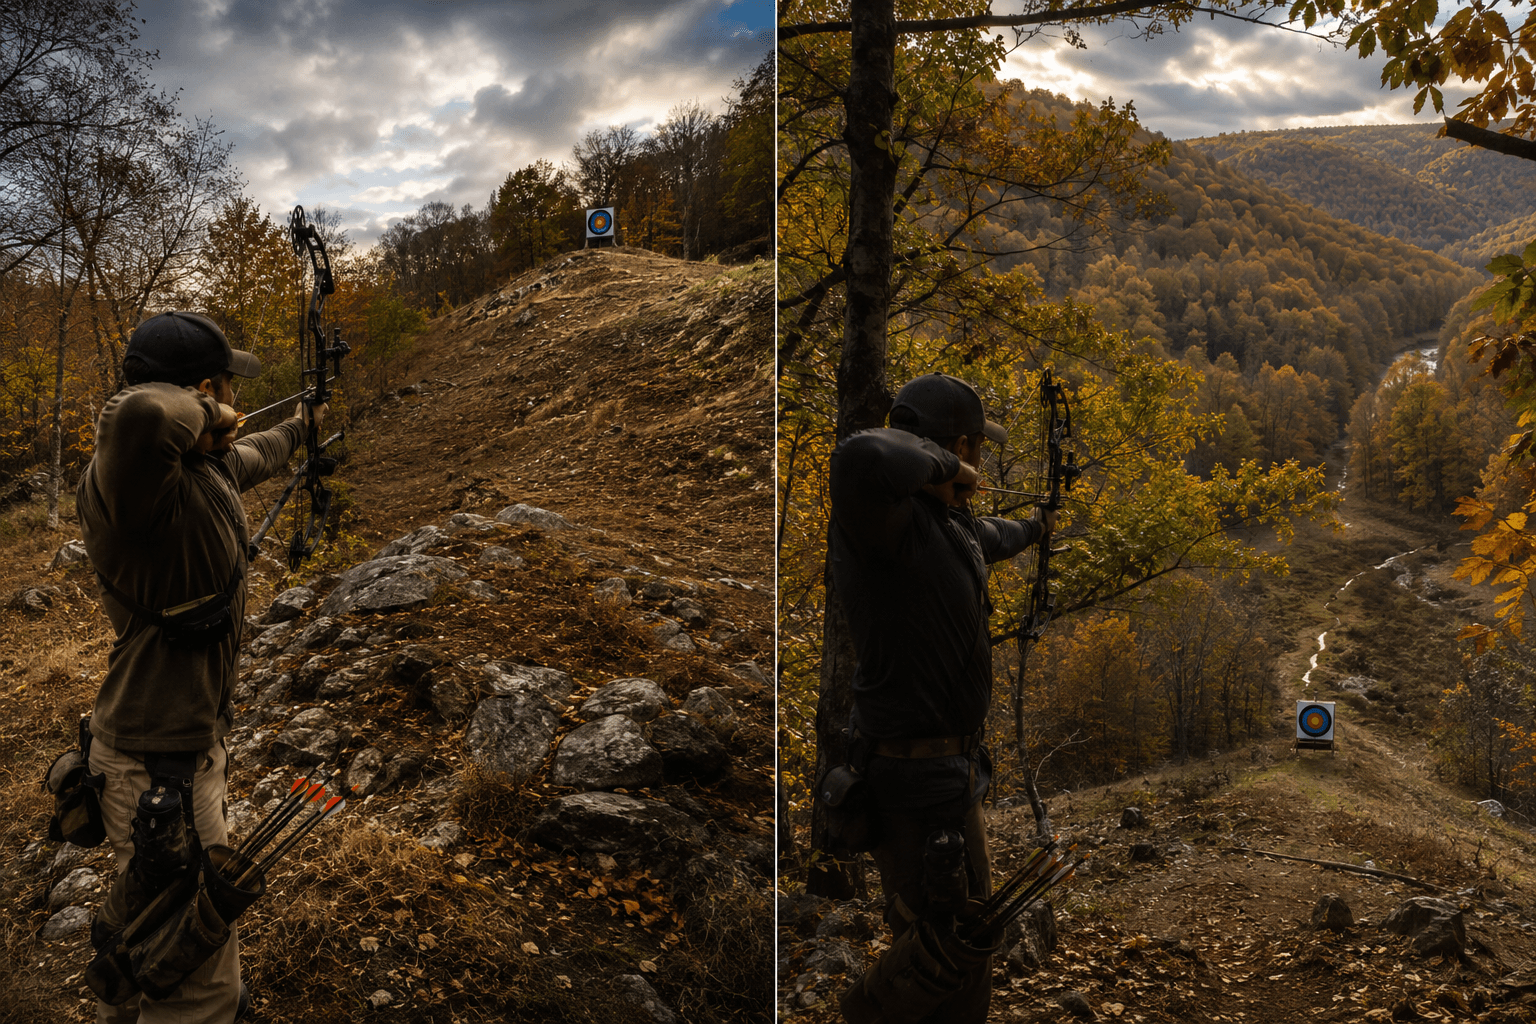
A multi-pin bow sight is a targeting device mounted on a bow that features multiple aiming points (pins) arranged vertically, with each pin calibrated to a different distance. The sight works by providing fixed reference points that compensate for arrow drop at various ranges, allowing archers to aim directly at their target without calculating holdover.
The mechanical principle behind multi-pin sights is straightforward. As arrow velocity decreases over distance, gravity pulls the arrow downward in an arc. Each pin is positioned at a height that accounts for this drop at its designated range. When you align a specific pin with your target and maintain proper form, the arrow’s trajectory intersects with your line of sight at that exact distance.
Key components of a multi-pin sight include:
Most multi-pin sights use fiber optic technology, where thin strands of fiber collect ambient light and channel it to the pin tip, creating a bright aiming point even in dawn or dusk conditions. This makes them particularly valuable for bowhunters who often shoot during low-light periods.
The sight picture when using a multi-pin system involves aligning your eye with the peep sight (a small ring in your bowstring), looking through the sight housing, selecting the appropriate pin for your target distance, and placing that illuminated pin tip on your intended impact point. Unlike single-pin sights that require adjustment between shots, all pins remain fixed and ready for immediate use.
Multi-pin sights are generally better for beginners because they eliminate the need to adjust the sight between shots at different distances, reducing decision-making complexity and allowing new archers to focus on fundamental form and execution. A beginner can simply learn which pin corresponds to which distance and select accordingly, making the aiming process more intuitive during practice and hunting situations.
Single-pin sights require the archer to estimate distance accurately and then physically adjust the sight to that yardage before each shot. While this system offers an uncluttered sight picture and works well for experienced archers who shoot with rangefinders, it adds an extra step that can overwhelm beginners who are still mastering stance, draw, anchor, and release.
Advantages of multi-pin sights for beginners:
When a single-pin sight might suit a beginner:
The learning curve for multi-pin sights is gentler because the system is more forgiving. If a beginner misjudges distance by a few yards, they can often still make an ethical shot by choosing the nearest pin and aiming slightly high or low. With a single-pin sight, a distance estimation error requires stopping to readjust the sight, which disrupts rhythm and can cause missed opportunities.
For bowhunting specifically, multi-pin sights offer a significant advantage to beginners. Game animals rarely stand still long enough for new hunters to range them, adjust a single-pin sight, draw, and shoot. Having pre-set pins for common hunting distances (20, 30, 40 yards) allows beginners to react quickly when opportunities arise.
Setting up and calibrating a multi-pin bow sight involves mounting the sight securely to your bow, rough-sighting the pins at your chosen distances, shooting groups to verify accuracy, and making fine adjustments until each pin consistently delivers arrows to the target center at its designated range. This process typically takes 30 to 60 minutes and requires a measured shooting range or field.
Step-by-step setup process:
Common calibration mistakes to avoid:
The “follow your arrows” principle is critical. If your arrows impact to the right of center, your sight needs to move right so you’ll aim further right to compensate. This feels counterintuitive at first but becomes second nature with practice. For vertical adjustments, if arrows hit low, move the pin down so you’ll hold lower on the target, which raises your bow and the arrow’s point of impact.
After initial calibration, verify your setup by shooting multiple groups at each distance on different days. Environmental factors like temperature can affect arrow speed and therefore impact point, so periodic verification ensures your pins remain accurate throughout the season.
Pin distances should be set based on your shooting discipline, typical engagement ranges, and personal accuracy limits, but most hunting setups use 20, 30, 40, and 50 yards for a four-pin configuration, while target archers often use tighter intervals like 20, 30, 40, 50, and 60 yards for five-pin setups. The key is choosing distances that cover your effective range without creating gaps too large to estimate accurately.
Standard pin configurations by use:
Three-pin hunting setup (most common for whitetail deer):
Five-pin hunting setup (for western hunting and longer shots):
Five-pin target setup (for 3D competitions):
The 10-yard interval is the most popular because it provides adequate coverage without creating gaps so large that estimating in-between distances becomes difficult. With 10-yard spacing, you’re never more than 5 yards from a calibrated pin, which translates to only a few inches of holdover or hold-under at typical hunting distances.
Factors that should influence your pin spacing:
A common mistake is setting pins for distances beyond your effective range. Just because you can set a 70-yard pin doesn’t mean you should take 70-yard shots at game animals. Ethical hunting requires limiting shots to distances where you can reliably hit the vitals, which for most archers is 40 yards or less.
For deer hunting specifically, many experienced bowhunters recommend a 20, 30, 40 setup because the vast majority of ethical shot opportunities occur within this range. The fourth and fifth pins on a five-pin sight often go unused in the field, though they can be valuable for practice and skill development.
When aiming uphill or downhill with a multi-pin sight, use the pin corresponding to the horizontal distance to your target rather than the actual line-of-sight distance, because gravity only affects the arrow over the horizontal plane. This means a 40-yard shot at a steep angle requires using your 30-yard or 35-yard pin if the horizontal distance is only 30 or 35 yards.

The physics behind this principle is that gravity pulls the arrow downward perpendicular to the earth, not perpendicular to your line of sight. On steep angles, the arrow spends less time fighting gravity over the horizontal distance it must travel, resulting in less drop than a flat-ground shot of the same line-of-sight distance. Failing to account for this causes high impacts on both uphill and downhill shots.
Practical methods for angle compensation:
Rangefinder with angle compensation: Modern hunting rangefinders display both line-of-sight distance and horizontal distance. Use the horizontal distance reading to select your pin. If the rangefinder shows 35 yards line-of-sight but 28 yards horizontal, use your 30-yard pin.
The rule of thirds estimation: For moderate angles without a rangefinder, estimate the angle and reduce your pin selection by roughly one-third of the difference. A 30-yard shot at a 45-degree angle might require using your 20-yard pin instead.
Shoot-through method: Some experienced archers simply aim low on steep angles, using their normal distance pin but placing it on the bottom third of the vitals rather than center. This works but requires practice to calibrate.
The steeper the angle, the more significant the compensation. At angles beyond 30 degrees, the difference between line-of-sight and horizontal distance becomes substantial enough to cause complete misses if ignored. A 40-yard shot straight down from a tree stand at a 60-degree angle has a horizontal distance of only 20 yards and requires using your 20-yard pin despite the target appearing much farther away.
Common angle-shooting mistakes:
To practice angle shooting, find a hill or elevated platform and set targets at known horizontal distances both uphill and downhill from your shooting position. Verify that your chosen pin delivers accurate hits at each angle. Many archers discover they need to adjust their mental compensation after seeing actual results, as the visual perception of steep angles can be deceiving.
The most common mistakes when aiming with multi-pin sights include using the wrong pin for the distance, focusing on the pins instead of the target, rushing the shot without proper form, and allowing the sight housing to drift across the target rather than maintaining a steady hold. These errors stem from poor practice habits and insufficient understanding of proper aiming mechanics.
Target panic and pin fixation: Many archers develop target panic, a psychological condition where they fixate on the pins or punch the trigger when the pin crosses the target rather than executing a controlled release. This manifests as flinching, jerking the release, or being unable to hold the pin steady on the target. The solution involves back-tension release training, blind bale shooting (practicing form without aiming at a target), and rebuilding shot execution from the ground up.
Inconsistent anchor point: If your anchor point (where your hand or release touches your face) varies between shots, your eye position relative to the peep sight changes, which alters where each pin actually aims. This causes vertical stringing of arrows and makes calibration impossible. Establish a firm, repeatable anchor with multiple reference points (corner of mouth, jawbone, nose touching string) and use it identically for every shot.
Wrong pin selection: In the excitement of a hunting situation or competition, archers sometimes select the wrong pin for their target distance. This is especially common with five-pin and seven-pin setups where pins are closely spaced. Color-coding your pins (bright green for 20, yellow for 30, orange for 40) and practicing pin selection during simulated scenarios reduces this error.
Sight housing drift: Rather than settling the appropriate pin on the target and executing the shot, many archers let the entire sight housing drift up and down or side to side, trying to time their release for when the pin crosses the bullseye. This creates inconsistent results. Instead, establish a solid hold with the pin on target (some movement is natural and acceptable) and focus on executing proper back tension and release mechanics.
Peep sight rotation: If your peep sight rotates in the string, your view through it changes, which affects pin alignment and accuracy. Check that your peep is tied in securely and returns to the same position at full draw every time. A rotated peep can cause left-right misses that no sight adjustment will fix.
Torquing the bow: Twisting the bow handle during the shot (torque) causes the sight to move off target just as the arrow releases. This typically results from gripping the bow too tightly or having improper hand position on the grip. Use a relaxed, consistent grip with pressure on the same part of your palm for every shot.
Environmental factors ignored: Wind, rain, and extreme temperatures affect arrow flight, but many archers fail to account for these conditions. Wind requires aiming off-target (holding into the wind), while temperature changes can alter arrow speed enough to shift impact points by several inches at longer distances.
To diagnose which mistake is affecting your accuracy, shoot from a stable rest or shooting machine to eliminate form variables. If the bow shoots tight groups from the machine but you can’t replicate that performance, the problem is your execution, not your equipment or sight setup.
Use the top pin for closer targets and progressively lower pins as distance increases, because the top pin is calibrated for the shortest range (typically 20 yards) and each subsequent pin below it is set for longer distances. This arrangement matches the natural trajectory of an arrow, which drops more over longer distances and requires aiming higher to compensate.
The vertical arrangement of pins directly corresponds to arrow trajectory. When shooting at close range, the arrow hasn’t dropped significantly, so you aim with the highest pin. As distance increases, gravity pulls the arrow downward more, requiring you to aim higher on the target (using a lower pin in your sight picture) to achieve the same impact point.
Pin selection by distance (standard hunting setup):
This system becomes intuitive with practice. If you misjudge distance and use a pin set for longer range than your actual target distance, your arrow will impact high because you’re aiming higher than necessary. Conversely, using a closer-range pin on a distant target results in a low impact because you’re not compensating enough for arrow drop.
Memory aids for pin selection:
For in-between distances, use the nearest pin and adjust your aiming point on the target. If your target is at 25 yards and you have pins at 20 and 30, use your 20-yard pin and aim slightly low on the target (bottom third of the vitals on a deer), or use your 30-yard pin and aim slightly high. With practice, you’ll develop an intuitive sense of how much to adjust.
Choose a three-pin sight if you primarily hunt in close-range situations (under 40 yards) and want a clean, uncluttered sight picture with large, easy-to-see pins. Select a five-pin sight for versatile hunting and target shooting that includes occasional longer shots up to 60 yards. Opt for a seven-pin sight only if you regularly shoot at extended ranges beyond 60 yards or compete in 3D archery where precise pin options for multiple distances provide an advantage.
Three-pin sight best for:
Five-pin sight best for:
Seven-pin sight best for:
The trade-off is between sight picture clarity and distance coverage. More pins mean more aiming options but also more visual clutter, smaller individual pins, and increased chance of selecting the wrong pin under pressure. Fewer pins provide a cleaner view and faster target acquisition but create larger gaps between calibrated distances.
Pin size considerations: Three-pin sights typically use .019 or .029 diameter pins, which are large and highly visible. Five-pin sights often use .019 diameter pins, while seven-pin sights may require .010 or .019 diameter pins to fit all pins in the housing without excessive crowding. Smaller pins are harder to see in low light, which matters for dawn and dusk hunting.
Most experienced bowhunters settle on a five-pin configuration as the optimal balance. It covers the practical hunting range of 20-60 yards, provides enough options for varied terrain, and maintains reasonable pin visibility. The three-pin setup works well for specialized applications like eastern whitetail hunting, while seven-pin sights serve competitive shooters and western hunters who regularly engage targets beyond 60 yards.
Before committing to a pin configuration, honestly assess your typical shooting distances. Many hunters set up five-pin or seven-pin sights but discover they never use the bottom two pins because their actual shot opportunities occur within 40 yards. In these cases, the extra pins provide no benefit and only clutter the sight picture.
Left and right misses with a multi-pin sight typically result from torquing the bow (twisting the grip during the shot), inconsistent anchor point, peep sight rotation, or windage misalignment rather than pin calibration issues, because pins primarily address vertical drop and don’t compensate for horizontal errors. Diagnosing horizontal accuracy problems requires systematic elimination of form and equipment variables.
Most common causes of horizontal misses:
Bow torque: Gripping the bow handle too tightly or inconsistently causes the bow to twist as the arrow releases, sending it left or right. The solution is maintaining a relaxed, consistent grip with pressure on the same part of your palm (typically the meaty pad at the base of your thumb) for every shot. Many archers benefit from using a wrist sling, which allows an even more relaxed grip since the bow can’t fall.
Inconsistent anchor point: If your hand position on your face varies between shots, your eye position relative to the peep sight changes horizontally, which shifts your point of aim left or right. Establish multiple reference points (release knuckle behind jawbone, nose touching string, corner of mouth) and replicate them exactly for each shot.
Peep sight alignment: A peep sight that rotates in the bowstring or isn’t centered in your vision causes horizontal aiming errors. At full draw, you should see a perfect circle of light through the peep with the sight housing centered. If the peep is oval or the housing appears off-center, your peep needs adjustment or your head position is inconsistent.
String clearance issues: If your arrow fletching or the string contacts your arm, chest, or clothing during the shot, it deflects the arrow horizontally. This is especially common with archers who have shorter draw lengths or larger chest/arm dimensions. Ensure proper stance, consider using an arm guard, and verify adequate clearance.
Wind drift: At distances beyond 40 yards, crosswinds can push arrows several inches off target. Unlike vertical drop (which pins compensate for), wind requires aiming off-target into the wind direction. A 10 mph crosswind can move an arrow 6-8 inches at 40 yards.
Sight windage misalignment: If all your pins consistently hit left or right of center at all distances, your entire sight housing needs horizontal adjustment. Loosen the windage adjustment screws and move the housing in the direction of your misses (follow your arrows).
To diagnose the cause, shoot from a stable rest or have an experienced archer shoot your bow. If the equipment shoots accurately for others or from a rest, the problem is your form. If the equipment consistently misses in one direction regardless of shooter, check for peep rotation, sight mounting issues, or arrow spine problems (arrows too stiff or too weak for your bow can cause horizontal misses).
Systematic diagnosis process:
Many archers discover that horizontal accuracy improves dramatically when they focus on grip relaxation and consistent anchor, as these two factors account for the majority of left-right misses. Equipment issues are less common than form inconsistencies.
Multi-pin sights excel at hunting because they provide instant aiming solutions for multiple distances without adjustment, which is critical when game animals offer brief shooting opportunities and don’t allow time for rangefinding and sight adjustment. While they also work well for target shooting, their primary advantage is speed and versatility in unpredictable field conditions where quick target acquisition determines success.
Hunting advantages of multi-pin sights:
Target shooting considerations:
Multi-pin sights work perfectly well for target archery, especially 3D competitions where targets appear at varied, unmarked distances. However, single-pin adjustable sights are more popular in precision target disciplines like outdoor target archery and indoor spots because they offer:
The choice between multi-pin and single-pin for target shooting depends on the discipline. For 3D archery, where you walk a course and shoot foam animal targets at unknown distances, multi-pin sights are extremely popular because they mirror hunting conditions. For Olympic-style target archery at known distances, single-pin sights or scope sights dominate because precision at one distance matters more than versatility.
Real-world hunting scenario: A whitetail buck approaches your tree stand, stopping at 35 yards. You draw your bow, settle your 30-yard pin slightly high on the vitals, and execute the shot within seconds. The deer moves to 20 yards before offering another angle. You instantly switch to your top pin without any adjustment. This scenario illustrates why multi-pin sights dominate bowhunting: they accommodate the unpredictable nature of live game.
Professional bowhunters and hunting guides overwhelmingly choose multi-pin sights for their reliability and speed. While some western hunters use single-pin sights with rangefinders for long-range shots in open country, the vast majority of bowhunters in varied terrain prefer the instant versatility of multiple pre-set pins.
To aim at distances between your sight pins, use the nearest pin and adjust your aiming point on the target, holding slightly high if the target is farther than that pin’s setting or slightly low if it’s closer. For example, if your target is at 25 yards and you have pins at 20 and 30 yards, use your 20-yard pin and aim at the bottom third of the vitals, or use your 30-yard pin and aim at the top third.
Gap shooting method: With practice, you can estimate the vertical space between two pins and visualize where the “invisible pin” would be for your target distance. If your target is at 35 yards and you have pins at 30 and 40 yards, imagine a pin halfway between them and use that mental reference point for aiming. This requires practice but becomes intuitive over time.
Aiming point adjustment guidelines:
The exact amount of adjustment depends on your arrow speed and trajectory. Faster bows (over 300 fps) have flatter trajectories and require less compensation, while slower bows need more dramatic aiming adjustments for the same distance gap.
Practice drill for in-between distances: Set targets at 25, 35, and 45 yards (assuming you have pins at 20, 30, 40, and 50). Practice shooting at these unmarked distances using your nearest pin and adjusting your hold. Shoot multiple groups and note where your arrows impact relative to where you aimed. This builds the experience needed to make accurate adjustments in hunting situations.
When precision matters most: For ethical hunting shots, if your target distance falls significantly between two pins (more than 5 yards from either), take the time to range the target accurately and make a deliberate aiming decision. On a deer, a 5-yard estimation error can mean the difference between a vital hit and a wounded animal. When in doubt, use the closer pin and aim low rather than risk shooting over the animal’s back.
Many experienced archers develop an intuitive sense of trajectory and can accurately estimate holds for any distance within their effective range. This skill comes from hundreds of practice shots at varied distances, not from theoretical knowledge. The more you practice at unmarked distances, the better your gap estimation becomes.
For deer hunting, sight in your pins at 20, 30, and 40 yards for a three-pin setup, or 20, 30, 40, and 50 yards for a four-pin configuration, as these distances cover the vast majority of ethical bowhunting opportunities in both tree stand and ground hunting scenarios. Most experienced deer hunters take 80 percent of their shots within 30 yards, making the 20 and 30-yard pins the most critical.
Recommended deer hunting pin setups:
Eastern whitetail (dense cover, tree stands):
Western mule deer or open-country whitetail:
All-around versatile setup:
The 20-yard pin serves as your primary aiming point for most tree stand hunting, where shots from 15 to 25 yards are standard. The 30-yard pin covers mid-range opportunities when deer approach but don’t come directly under your stand. The 40-yard pin provides an option for longer shots while remaining within most archers’ effective range.
Factors that should influence your pin distances:
Ethical considerations: Just because you can set a 60 or 70-yard pin doesn’t mean you should take those shots at live animals. Ethical bowhunting requires limiting your range to distances where you can reliably hit the vitals under field conditions (not just on a calm practice range). For most hunters, this maximum is 40 yards, with 30 yards being a more conservative and ethical limit.
Practice at your pin distances regularly, but also practice at in-between distances (25, 35, 45 yards) to develop the skills needed for real hunting situations where deer rarely stand at exactly 20 or 30 yards. The more comfortable you become with estimating and adjusting for in-between distances, the more confident you’ll be when opportunities arise.
Yes, multi-pin sights are excellent for 3D archery competitions and are the most popular sight choice among 3D competitors because they provide multiple aiming options for the varied, unmarked distances typical of 3D courses. The ability to quickly select an appropriate pin for estimated target distance without mechanical adjustment gives multi-pin users a speed advantage over single-pin competitors who must dial their sight for each target.
3D archery involves shooting foam animal targets placed at unmarked distances throughout a wooded course, typically ranging from 10 to 60 yards. Competitors must estimate distance, select an appropriate aiming strategy, and execute the shot, all while dealing with uneven terrain, elevation changes, and natural obstacles. This format closely mirrors bowhunting conditions and rewards the same skills.
Advantages of multi-pin sights in 3D competition:
Competitive 3D pin setup (five-pin example):
This configuration covers the full range of most 3D courses with 10-yard intervals, allowing competitors to get within 5 yards of any target distance with a calibrated pin. Experienced 3D shooters become highly skilled at estimating distance and selecting the appropriate pin or gap-shooting between pins.
Competition strategy with multi-pin sights:
Some 3D competitions have equipment classes that restrict sight types, so verify the rules before competing. Most “Known” classes allow any sight, while some “Unknown” classes may restrict or prohibit adjustable sights to emphasize distance estimation skills.
The main competition for multi-pin sights in 3D archery comes from single-pin adjustable sights with yardage tapes, which allow precise dialing to any estimated distance. However, this requires more time and introduces potential for mechanical error. Top 3D competitors are split between both systems, with personal preference and shooting style determining which works best for each individual.
To adjust for wind when using a multi-pin bow sight, aim off-target into the wind direction (aim left in a right-to-left wind, aim right in a left-to-right wind) because multi-pin sights only compensate for vertical arrow drop and cannot adjust for horizontal wind drift. The amount of compensation depends on wind speed, arrow speed, distance to target, and arrow profile, with typical adjustments ranging from 2 to 8 inches at 40 yards in moderate winds.
Unlike single-pin sights with windage adjustment knobs, multi-pin sights require the archer to hold off-target to compensate for wind. This is a skill that develops through experience and practice in various wind conditions.
Wind compensation guidelines:
Light wind (5-10 mph):
Moderate wind (10-15 mph):
Strong wind (15+ mph):
Factors affecting wind drift:
Reading wind conditions: Learn to assess wind speed and direction by observing vegetation movement, feeling wind on your face and arms, and watching for consistent patterns versus gusts. Consistent winds are easier to compensate for than swirling, variable winds that change during your shot.
Practice methods for wind shooting:
Hunting considerations: In hunting situations, strong winds often reduce game movement and make shot opportunities less likely. When opportunities do arise in windy conditions, limit shots to closer distances where wind compensation is minimal and more predictable. A 20-yard shot in 15 mph wind is far more ethical than a 40-yard shot in the same conditions.
Some competitive archers mark reference points on their sight housing or use the width of their sight pins as measuring tools for wind holds. For example, if your sight pin is 0.019 inches in diameter and appears to cover 4 inches at 40 yards, you can use “one pin width” as a mental reference for a 4-inch hold.
Wind compensation is one of the most challenging aspects of archery and separates experienced shooters from beginners. The only way to develop this skill is through extensive practice in varied conditions, building the experience needed to make accurate estimates under pressure.
How many pins should a beginner use on a bow sight?
Beginners should start with a three-pin or five-pin sight, as three pins (20, 30, 40 yards) provide adequate coverage for learning without overwhelming new archers, while five pins (20, 30, 40, 50, 60 yards) offer more versatility as skills develop. Three-pin setups are simpler and have larger, more visible pins, making them ideal for absolute beginners.
Can you adjust individual pins on a multi-pin sight?
Yes, each pin on a multi-pin sight can be adjusted independently for elevation (up and down) to calibrate it to a specific distance. The entire sight housing also adjusts for windage (left and right) and overall elevation, but individual pins only move vertically within the housing to set their specific yardage.
What color pins are best for low-light hunting?
Green and yellow fiber optic pins gather the most light and appear brightest in low-light conditions, making them the best choices for dawn and dusk hunting. Many hunters use green for their most-used distance (typically 20 or 30 yards) and alternate colors for other pins to aid quick identification.
How often should I check my pin calibration?
Check pin calibration at the beginning of each season, after any bow maintenance or string changes, when traveling to different elevations or climates, and anytime accuracy seems inconsistent. Temperature changes of 30 degrees or more can affect arrow speed enough to shift impact points by 2-3 inches at 40 yards.
Do I need a peep sight with a multi-pin bow sight?
Yes, a peep sight is essential for accurate aiming with a multi-pin bow sight because it ensures your eye is in the same position relative to the sight pins for every shot. Without a peep sight, your eye position can vary, making consistent accuracy impossible regardless of how well your pins are calibrated.
What’s the maximum effective range for a multi-pin sight?
The maximum effective range depends on the archer’s skill and the bow’s performance, but most multi-pin sights are set up for 20 to 60 yards, with ethical hunting shots typically limited to 40 yards or less for most archers. Some long-range target shooters use multi-pin sights out to 80 or 100 yards, but this requires exceptional skill and equipment.
Can you use a multi-pin sight for compound and recurve bows?
Multi-pin sights are designed primarily for compound bows and work best with them due to the consistent draw length and mechanical release that compounds provide. While technically mountable on recurve bows, most recurve archers prefer single-pin sights, instinctive aiming, or gap shooting methods that better suit the recurve shooting style.
How do you prevent your pins from moving out of calibration?
Ensure all mounting screws are properly tightened, use thread-locking compound on adjustment screws after calibration, protect your sight from impacts during transport, and periodically check that pins haven’t shifted. Quality sights with robust adjustment mechanisms are less prone to losing calibration than budget models.
Should I use a sight level on my multi-pin bow sight?
Yes, a sight level (bubble level) helps ensure your bow is held vertically at full draw, which is critical for accuracy because canting the bow left or right causes arrows to impact off-target horizontally. Most modern multi-pin sights include an integrated bubble level in the sight housing.
What’s the difference between fiber optic and LED pins?
Fiber optic pins gather ambient light through fiber strands and channel it to the pin tip, requiring no batteries and working in all lighting conditions. LED pins use battery-powered lights and can be brighter in very low light but require battery maintenance and can fail. Most hunters prefer fiber optic pins for reliability.
How close together can you set pins on a multi-pin sight?
Pin spacing depends on your arrow’s trajectory, but most setups use 10-yard intervals (20, 30, 40, 50 yards) as closer spacing provides minimal practical benefit and creates a cluttered sight picture. Faster bows with flatter trajectories can use wider spacing (15-yard intervals), while slower bows may benefit from tighter spacing at closer ranges.
Can you hunt legally with a multi-pin sight in all states?
Yes, multi-pin sights are legal for hunting in all U.S. states and Canadian provinces, as they are considered standard archery equipment. However, some areas restrict electronic sights with battery-powered illumination or rangefinding capabilities, so verify local regulations if your sight includes these features.
Mastering how to aim with a multi-pin sight requires understanding the fundamental principle that each pin corresponds to a specific distance, with proper calibration, consistent form, and practiced execution determining accuracy. The top pin serves your closest shots, lower pins extend your range, and the system’s fixed nature provides instant aiming solutions without mechanical adjustment between shots.
Success with multi-pin sights comes from thorough initial setup, regular practice at varied distances, and developing the skills to estimate and compensate for in-between ranges, angles, and environmental conditions. Whether you choose a three-pin setup for simplicity or a five-pin configuration for versatility, the key is matching your sight to your actual shooting situations and practicing enough to make pin selection and aiming automatic under pressure.
Actionable next steps:
The multi-pin sight remains the most popular choice among bowhunters and 3D competitors because it balances versatility, reliability, and speed. By investing time in proper setup and deliberate practice, you’ll develop the skills needed to make accurate, ethical shots across the full range of distances you’re likely to encounter in the field.


