Newsletter Subscribe
Enter your email address below and subscribe to our newsletter

All voices matter
All voices matter

 ByTravis
Porpoising is when arrows fly in an up-and-down wave instead of straight - almost always caused by nocking point height, rest position, or a spine mismatch.
Affiliate Disclaimer: We are a participant in the Amazon Services LLC Associates Program, an affiliate advertising program designed to provide a means for sites to earn advertising fees by advertising and linking to Amazon.com. As an Amazon Associate I earn from qualifying purchases. We also participate in other affiliate programs.

Arrow porpoising happens when your arrows fly in a vertical up-and-down wave pattern instead of traveling straight to the target. This vertical oscillation is almost always caused by incorrect nocking point height, improper arrow rest position, or a mismatch between your arrow spine and bow setup. The good news is that porpoising is one of the most fixable arrow flight problems through systematic bow tuning.
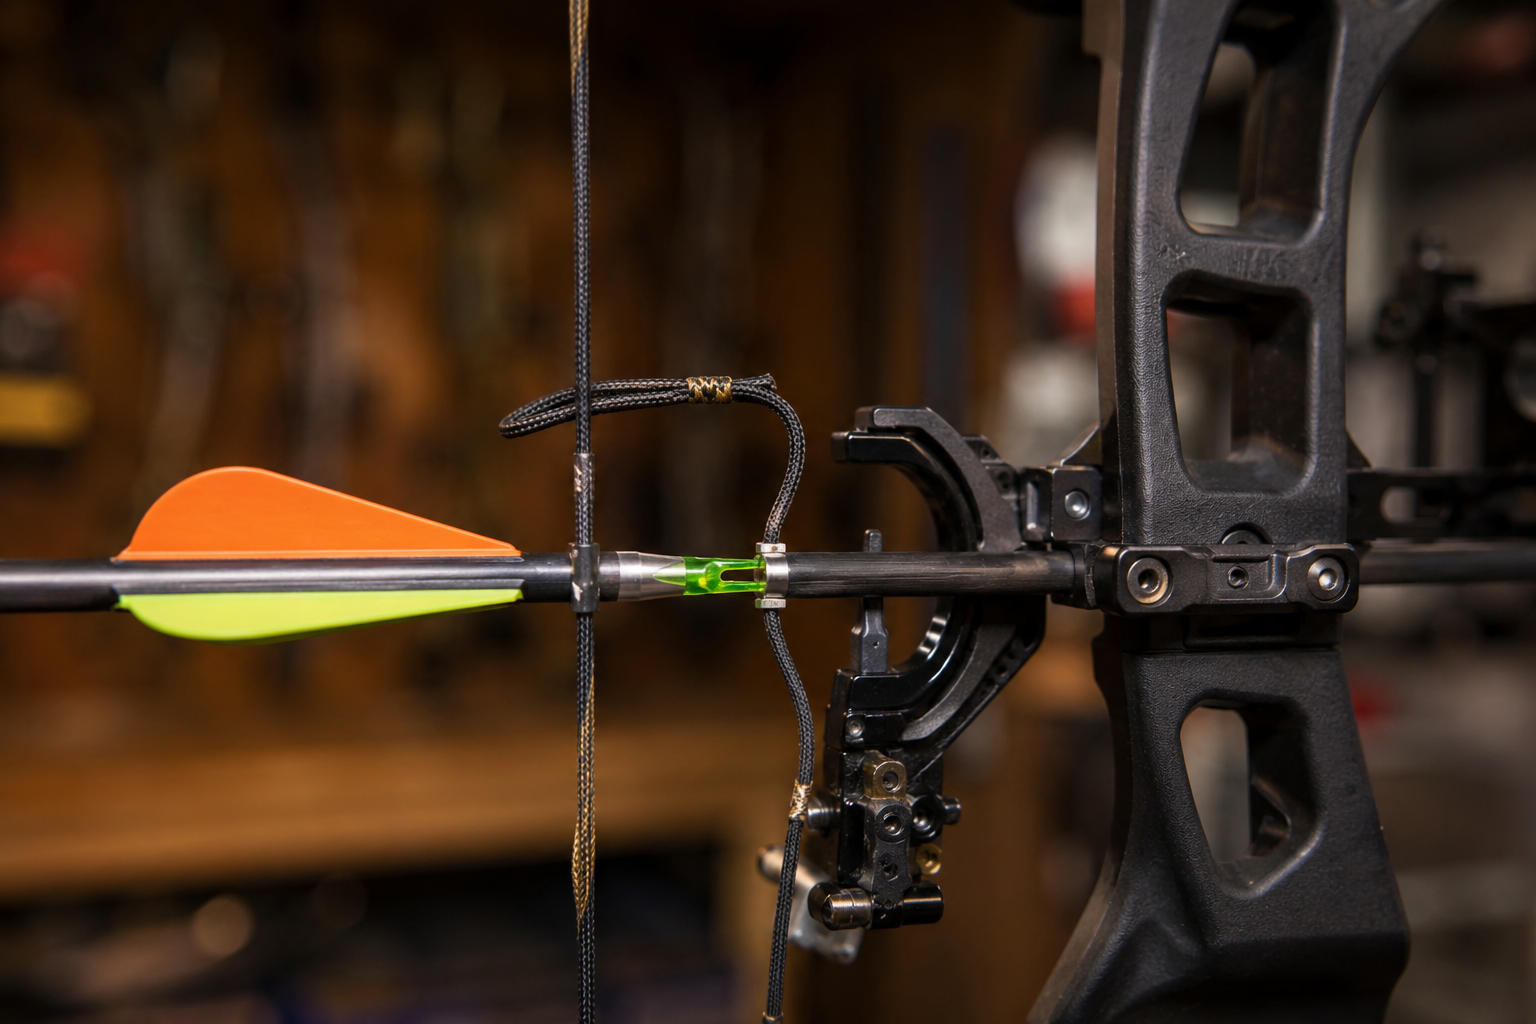
Arrow porpoising refers to the vertical up-and-down oscillation an arrow makes during flight, similar to how a porpoise swims through water in a wave-like motion. Instead of flying straight from bow to target, a porpoising arrow travels in a vertical sine wave pattern that can severely impact accuracy and penetration.
When you release an arrow, it naturally flexes and recovers during the first several yards of flight, this is called archer’s paradox. However, porpoising is different from normal arrow flex. It’s an exaggerated, sustained vertical movement that indicates something is wrong with your bow setup or arrow selection.
Visual indicators of porpoising include:
Porpoising becomes more noticeable at longer distances because the oscillation has more time to develop. Many archers first notice the problem when they extend their shooting range beyond 30 yards or when they switch from field points to broadheads.
Arrows porpoise primarily due to improper vertical launch dynamics at the moment of release. The nocking point height, arrow rest position, and the relationship between these two components determine whether your arrow leaves the bow on a clean horizontal plane or starts oscillating vertically.
Primary causes of arrow porpoising:
Incorrect nocking point height – When the nocking point is too high, the arrow’s nock end is pushed upward during release, causing the arrow nose to dive down. Conversely, a nocking point that’s too low forces the nock down and the nose up.
Misaligned arrow rest – If your rest sits too high or too low relative to the nocking point, the arrow can’t achieve proper clearance during the shot cycle, creating vertical oscillation.
Inconsistent release technique – Plucking the string or torquing the bow during release can introduce vertical forces that trigger porpoising, even with proper equipment setup.
Arrow spine issues – Arrows that are too stiff or too weak for your draw weight and bow setup can exhibit porpoising, especially when combined with other tuning problems.
Worn or damaged equipment – Frayed serving at the nocking point, damaged arrow rests, or bent arrows can all contribute to inconsistent vertical flight.
The interaction between these factors matters more than any single cause. For example, a slightly incorrect nocking point might not cause noticeable porpoising with field points but becomes obvious when you add the wind resistance of broadheads.
Porpoising and fishtailing are two distinct arrow flight problems that require different solutions. Porpoising is vertical oscillation (up and down), while fishtailing is horizontal oscillation (side to side). Understanding which problem you’re experiencing is essential for effective troubleshooting.
Key differences:
| Characteristic | Porpoising | Fishtailing |
|---|---|---|
| Direction of movement | Vertical (up/down) | Horizontal (left/right) |
| Primary cause | Nocking point height, rest position | Arrow spine, centershot alignment |
| Paper tear pattern | High or low tear | Left or right tear |
| Common fix | Adjust nocking point | Change arrow spine or centershot |
| Visibility in flight | Nose dips or rises | Tail wags side to side |
Many archers experience both problems simultaneously, creating a diagonal tear on paper tuning tests. In these cases, you’ll need to address both the vertical component (porpoising) and horizontal component (fishtailing) through systematic tuning adjustments.
Pro tip: Always fix porpoising first before addressing fishtailing. Vertical tuning establishes the foundation for horizontal tuning, and attempting to fix both simultaneously often leads to confusion and wasted time.
Fixing arrow porpoising requires a systematic approach starting with the most common causes and working toward more complex adjustments. Most porpoising issues can be resolved through nocking point and arrow rest adjustments without changing arrows or other equipment.
Step-by-step porpoising fix:
Perform a paper tuning test – Shoot through paper at 6-8 feet to see your tear pattern. A high tear (nock above point) means your nocking point is too low. A low tear (nock below point) means it’s too high.
Adjust your nocking point – Move the nocking point in small increments (1/16 inch at a time). If you have a high tear, move the nocking point up. If you have a low tear, move it down. This seems counterintuitive but is correct.
Check arrow rest height – Your arrow should sit approximately 1/8 to 1/4 inch above perpendicular (90 degrees) from the berger hole. Use a bow square to verify proper rest height.
Verify arrow spine – Ensure your arrows match the manufacturer’s spine chart for your bow’s draw weight and draw length. Arrows that are significantly mismatched can’t be fully corrected through tuning alone.
Test and repeat – After each adjustment, shoot another paper test. Continue making small adjustments until you achieve a bullet hole (clean round tear with minimal fletching marks).
Confirm at distance – Once paper tuning is clean, shoot groups at 20, 30, and 40 yards to verify the porpoising is eliminated at practical distances.
Common mistake: Making adjustments that are too large. Small 1/16-inch changes in nocking point height can make significant differences in arrow flight. Patience and incremental adjustments produce better results than dramatic changes.
For those new to bow tuning, our archery for beginners resources provide additional guidance on fundamental setup procedures.
The relationship between nocking point position and porpoising direction is counterintuitive but follows consistent physics. A nocking point that’s too high causes the arrow to porpoise with the nose diving down, while a nocking point that’s too low causes nose-up porpoising.
Here’s why: When your nocking point is too high, the string pushes the nock end of the arrow upward during release. This upward force on the back of the arrow causes the front (point) to dive downward, creating a nose-down oscillation. The arrow essentially pivots around the arrow rest during the critical first milliseconds of launch.
Nocking point troubleshooting guide:
The ideal nocking point position creates a scenario where the arrow leaves the bow traveling perfectly horizontal to the ground, with minimal vertical deviation. Most properly tuned bows have the nocking point set between 1/8 and 1/2 inch above perpendicular, though this varies by bow design and arrow rest type.
Important consideration: Different arrow rest styles (whisker biscuit, drop-away, shoot-through) may require slightly different nocking point positions. Drop-away rests typically need the nocking point slightly higher than fixed rests because the rest falls away during the shot cycle.
Arrow spine can contribute to porpoising, though it’s rarely the sole cause. Spine refers to the stiffness of the arrow shaft, and when arrows are significantly too stiff or too weak for your bow setup, they can exhibit both horizontal and vertical oscillation during flight.
An arrow that’s too weak (not stiff enough) for your bow will flex excessively during launch. This excessive flex can manifest as porpoising when combined with even minor nocking point or rest alignment issues. Conversely, arrows that are too stiff won’t flex properly through the bow’s power stroke, potentially causing erratic flight including vertical oscillation.
How spine affects porpoising:
Before assuming spine is your problem, verify your nocking point and rest position are correct through paper tuning. If you achieve a clean bullet hole with field points but experience porpoising with broadheads, spine mismatch is more likely the culprit.
Spine selection tip: Use the arrow manufacturer’s spine selection chart based on your actual draw weight and draw length. If you’re between recommendations, choose the stiffer option when shooting compound bows with aggressive cams, and the weaker option for recurve bows or smooth-drawing compounds.

The arrow rest position plays a critical role in preventing porpoising because it determines the vertical launch angle of your arrow. Proper rest height ensures the arrow clears the rest cleanly without vertical interference that could trigger oscillation.
For most modern compound bow setups, the arrow rest should position the arrow approximately 1/8 to 1/4 inch above a line drawn perpendicular (90 degrees) from the berger hole (the threaded hole in the riser where the rest mounts). This slight upward angle is called “positive nock travel” and helps ensure clean arrow clearance.
Rest adjustment procedure:
Rest-specific considerations:
If you’ve adjusted your nocking point multiple times without success, the arrow rest height is often the overlooked variable. The nocking point and rest work together as a system, both must be correctly positioned for optimal arrow flight.
Porpoising becomes significantly more noticeable with fixed-blade broadheads compared to mechanical (expandable) broadheads or field points. Fixed-blade broadheads act like wings or rudders, amplifying any existing flight instability including vertical oscillation.
Fixed-blade broadheads have large, rigid blades that catch air during flight. When an arrow is porpoising even slightly, these blades magnify the vertical movement by creating additional aerodynamic forces. A porpoising problem that’s barely noticeable with field points can become severe with fixed-blade broadheads, causing arrows to hit 6-12 inches off target at 40 yards.
Broadhead impact on porpoising:
This is why experienced bowhunters always verify their bow tune with the actual broadheads they plan to hunt with, not just field points. The process called “broadhead tuning” specifically addresses the flight characteristics of your hunting setup.
Broadhead tuning strategy: Start by achieving a perfect bullet hole with field points through paper tuning. Then switch to your broadheads and shoot groups at 20 yards. If broadheads group separately from field points or show signs of porpoising, make micro-adjustments to your rest position (both vertical and horizontal) until both group together.
Many hunters choose mechanical broadheads specifically because they’re more forgiving of minor tuning imperfections. However, with proper tuning, fixed-blade broadheads can be just as accurate and offer better penetration for hunting applications.
Beginning archers commonly experience porpoising because they’re still developing consistent shooting form and often lack the knowledge to properly tune their equipment. Porpoising is one of the most frequent arrow flight issues for new archers, along with inconsistent grouping and target panic.
New archers face porpoising challenges for several reasons. First, many beginners purchase archery equipment that isn’t professionally set up, meaning the nocking point and arrow rest may not be properly positioned from the start. Second, inconsistent release technique, common among beginners, can introduce vertical forces that trigger or worsen porpoising.
Why beginners struggle with porpoising:
The good news is that porpoising is highly correctable. Once a beginner learns basic paper tuning and makes proper adjustments, the problem typically disappears. Many archery shops offer tuning services that can establish a good baseline setup, allowing new archers to focus on developing consistent form.
Beginner recommendation: If you’re new to archery and experiencing porpoising, have an experienced archer or pro shop technician verify your bow is properly tuned before assuming it’s entirely a form issue. Starting with correctly tuned equipment makes learning proper technique much easier. Check out our guide on what draw weight beginners should start with for additional setup advice.
Arrows that fly straight at short distances but porpoise at longer ranges indicate a subtle tuning issue that becomes magnified over distance. The vertical oscillation is present from the moment the arrow leaves the bow, but it’s so slight that it doesn’t affect accuracy at 20 yards while causing significant problems at 40-60 yards.
This distance-dependent porpoising happens because arrow oscillation follows a wave pattern. At short distances, the arrow may only complete a fraction of one oscillation cycle, keeping it relatively close to the intended flight path. At longer distances, the arrow completes multiple oscillation cycles, and the cumulative vertical deviation becomes substantial enough to affect point of impact.
Why porpoising worsens with distance:
Additionally, slight spine mismatches often don’t manifest until longer distances. An arrow that’s marginally too weak or stiff may stabilize adequately for short-range shooting but shows instability as velocity decreases and the arrow’s natural frequency changes during extended flight.
Distance-specific tuning approach: If your arrows group well at 20 yards but porpoise at 40+ yards, make very small nocking point adjustments (1/32 inch increments) and test at your problem distance. Sometimes the “perfect” paper tune at 6 feet doesn’t translate to perfect flight at extended range, requiring minor compromises in your setup.
Bow tuning can fix the vast majority of porpoising problems, with success rates exceeding 90% when performed correctly. Proper tuning addresses the root causes of vertical oscillation by optimizing the relationship between your bow, arrows, and release technique.
The tuning process systematically adjusts the variables that affect arrow flight: nocking point height, arrow rest position (both vertical and horizontal), cam timing (on compound bows), and tiller (on recurve bows). By methodically working through these adjustments using paper tuning as feedback, you can eliminate porpoising in most cases.
Effective bow tuning steps for porpoising:
When tuning won’t fix porpoising:
For most archers shooting quality equipment with reasonable arrow selection, dedicated tuning will resolve porpoising issues. If you’ve exhausted tuning options without success, consider having a professional archery technician evaluate your setup, sometimes a fresh perspective identifies issues you’ve overlooked.
Ignoring arrow porpoising leads to consistently poor accuracy, reduced effective range, and potential safety hazards. While you might achieve acceptable groups at very short distances, porpoising severely limits your ability to shoot accurately beyond 30 yards and can cause dangerous arrow deflections.
Porpoising arrows lose significant energy during flight because the vertical oscillation creates drag and reduces penetration efficiency. For bowhunters, this energy loss can mean the difference between a clean, ethical harvest and a wounded animal. The vertical movement also makes it nearly impossible to develop consistent aiming references at various distances.
Consequences of unaddressed porpoising:
Safety concern: Severely porpoising arrows can contact the bow riser, arrow rest, or even the archer’s hand during flight, potentially causing injury or equipment damage. This is especially dangerous with broadheads, which can cause serious cuts if they contact anything during the shot cycle.
The time investment to fix porpoising, typically 30-60 minutes of paper tuning and adjustment, is minimal compared to the ongoing frustration and limitations of shooting with poorly tuned equipment. Every archer, from beginners to experts, benefits from addressing porpoising promptly rather than trying to compensate through aiming adjustments.
Paper tuning is the gold standard diagnostic method for identifying and correcting arrow porpoising. This simple test provides immediate visual feedback about your arrow’s vertical and horizontal flight characteristics, allowing you to make precise tuning adjustments.
The paper tuning process involves shooting an arrow through a sheet of paper suspended in a frame at close range (6-8 feet). The tear pattern in the paper reveals exactly how your arrow is leaving the bow. A perfect tune produces a “bullet hole”, a clean round tear with minimal fletching marks. Vertical tears indicate porpoising issues.
Paper tuning setup:
Reading paper tear patterns for porpoising:
Paper tuning adjustment process:
Pro tip: Always shoot at least three arrows through paper before making adjustments. A single arrow might produce an unusual tear due to release inconsistency, but three arrows will show the true pattern. If two of three arrows produce the same tear, that’s your actual tune.
Paper tuning works for both compound bows and recurve bows, though the specific adjustments differ slightly between bow types. Compound shooters primarily adjust nocking point and rest position, while recurve shooters may also need to adjust tiller and string height.
Can a damaged arrow cause porpoising?
Yes, bent or damaged arrows frequently cause porpoising because the shaft no longer spins true during flight. Even minor bends invisible to the naked eye can create vertical oscillation. Always inspect arrows for straightness using an arrow spinner before assuming your bow tune is the problem.
How much does nocking point position affect porpoising?
Nocking point position has a dramatic effect on porpoising, changes as small as 1/16 inch can transform a severely porpoising arrow into one that flies perfectly straight. This is why paper tuning requires patience and small incremental adjustments rather than large changes.
Will heavier arrows reduce porpoising?
Heavier arrows don’t fix porpoising caused by tuning issues, but they can make minor porpoising less noticeable because the added mass dampens oscillation more quickly. However, proper tuning is always preferable to compensating with arrow weight.
Can I fix porpoising by changing my release technique?
Improving release technique can reduce porpoising caused by string plucking or torquing, but it won’t fix porpoising caused by incorrect nocking point or rest position. Address equipment issues first, then refine your form for optimal results.
Does arrow length affect porpoising?
Arrow length indirectly affects porpoising through its impact on arrow spine. Longer arrows are effectively weaker (more flexible) than shorter arrows of the same spine rating, which can contribute to porpoising if the spine becomes mismatched to your bow setup.
How do I know if porpoising is from my bow or my form?
Have another archer with good form shoot your bow through paper. If they produce the same tear pattern you do, the problem is equipment-related. If they get a clean bullet hole while you get a vertical tear, focus on improving your release consistency.
Can porpoising damage my bow?
Porpoising itself won’t damage your bow, but severely porpoising arrows may contact the riser, rest, or cables during flight, potentially causing wear or damage to these components over time. This is another reason to address porpoising promptly.
Should I tune with field points or broadheads?
Always establish your baseline tune with field points first, achieving a perfect bullet hole through paper. Then verify your tune with broadheads and make minor adjustments if needed. This two-step process is more efficient than trying to tune with broadheads from the start.
How often should I check for porpoising?
Check your arrow flight whenever you change any equipment component (arrows, rest, string, nocking point), at the beginning of each season, and any time you notice accuracy degradation. Regular paper tuning maintenance prevents small issues from becoming major problems.
Can weather conditions cause porpoising?
Weather doesn’t cause porpoising directly, but extreme temperature changes can affect bow performance (limb stiffness, string stretch) enough to reveal borderline tuning issues. If arrows fly well in moderate conditions but porpoise in extreme heat or cold, your tune may need seasonal adjustment.
Is porpoising more common with certain bow types?
Porpoising can occur with any bow type, but compound bows with aggressive cams are often less forgiving of tuning errors, making porpoising more noticeable. Traditional recurve bows may show porpoising more subtly due to their simpler design and lower arrow speeds.
Can I use a bow press to fix porpoising?
A bow press is necessary for certain adjustments like changing string length or cam timing that might affect porpoising, but most porpoising fixes (nocking point and rest adjustments) don’t require pressing the bow. Start with simple adjustments before considering press-required modifications.
Arrow porpoising is a common but highly fixable problem that affects accuracy, consistency, and shooting confidence. The vertical oscillation that defines porpoising stems primarily from incorrect nocking point height and arrow rest position, though arrow spine mismatch and release technique can also contribute to the issue.
The systematic approach to eliminating porpoising starts with paper tuning to diagnose the problem, followed by small incremental adjustments to your nocking point or rest height. Remember that high tears require moving the nocking point up (counterintuitively), while low tears require moving it down. Most porpoising issues resolve within 30-60 minutes of focused tuning work.
Take action now:
Don’t let porpoising limit your archery potential. With proper tuning, your arrows will fly straight and true, allowing you to focus on developing your skills and enjoying the sport. Whether you’re a beginner just learning the fundamentals or an experienced archer preparing for hunting season, addressing porpoising is one of the highest-impact improvements you can make to your shooting setup.
For more guidance on bow setup and archery training, explore our comprehensive resources at Compound Bow Guide.