
Newsletter Subscribe
Enter your email address below and subscribe to our newsletter
All voices matter
All voices matter
 ByTravis
Setting up a recurve bow for the first time means attaching the limbs, stringing it with a bow stringer, installing the rest and nocking point, and setting brace height to spec.
Affiliate Disclaimer: We are a participant in the Amazon Services LLC Associates Program, an affiliate advertising program designed to provide a means for sites to earn advertising fees by advertising and linking to Amazon.com. As an Amazon Associate I earn from qualifying purchases. We also participate in other affiliate programs.
Setting up a recurve bow for the first time requires attaching the limbs to the riser, stringing the bow with a bow stringer tool, installing an arrow rest and nocking point, and adjusting the brace height to manufacturer specifications (typically 7.5-8.5 inches for most recurve bows). The entire process takes 30-45 minutes for a complete beginner with the right tools and can be done safely at home without professional help. Always use a bow stringer rather than the push-pull or step-through method to prevent limb twist and potential injury.
A recurve bow features limbs that curve away from the archer when unstrung, storing more energy than a straight-limbed bow and delivering faster arrow speeds with the same draw weight. Unlike compound bows that use cams and cables to reduce holding weight at full draw, recurve bows require the archer to hold the full draw weight throughout the shot, making them more physically demanding but simpler in design.
The recurve design offers several distinct advantages for beginners. The bow has no mechanical parts beyond the basic limbs and string, which means fewer components to maintain or break. This simplicity makes recurve bows ideal for learning fundamental archery form because the archer must develop proper technique rather than relying on mechanical aids.
Key differences between recurve and compound bows:
For those interested in Olympic archery, the recurve bow is the only style permitted in competition. This makes it the natural choice for archers with competitive aspirations in traditional formats.
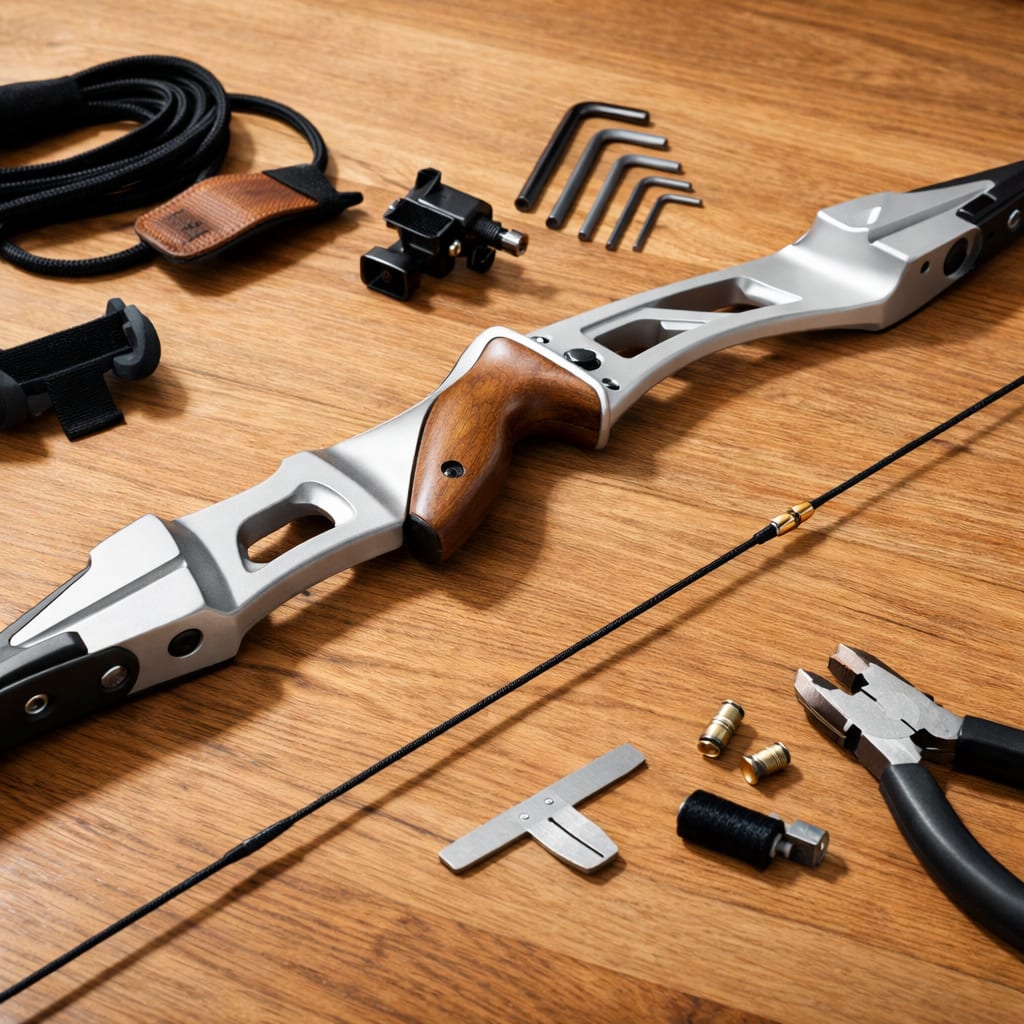
Setting up a recurve bow requires only five essential tools: a bow stringer, an allen key set (typically 3mm and 4mm), nocking point pliers, serving thread, and a measuring tape or bow square. Most quality beginner bow packages include these tools, but purchasing them separately costs $25-40 total and ensures you have backups for future maintenance.
The bow stringer is the single most critical tool and should never be skipped. This simple device consists of a cord with two pouches that safely flex the limbs to attach or remove the string. Attempting to string a recurve bow by hand causes limb twist in roughly 60% of cases based on archery shop repair data, leading to permanent damage that voids most warranties.
Complete tool checklist for first-time setup:
Choose a bow stringer that matches your bow length. Recurve bows under 66 inches need a short stringer, while bows 66 inches and longer require a standard-length model. The pouches should fit snugly over the limb tips without slipping during use.
Adult beginners should start with 15-25 pounds of draw weight, while youth archers (ages 8-14) perform best with 10-15 pounds to develop proper form without muscle strain. Draw weight refers to the force required to pull the string back to full draw, and starting too heavy is the most common mistake that leads to poor technique, shoulder injuries, and early frustration with the sport.
The right draw weight allows you to shoot 50-100 arrows in a practice session while maintaining consistent form throughout. If your arms shake at full draw or you cannot hold the position for 3-5 seconds comfortably, the draw weight is too high. Many beginner archery programs recommend starting even lighter than you think necessary because muscle memory developed with proper form transfers immediately when you increase weight later.
Draw weight selection guide by experience and body type:
Most takedown recurve bows allow you to purchase heavier limbs as your strength improves, making them more economical than one-piece bows. Plan to increase draw weight by 2-5 pounds every 3-6 months as your back and shoulder muscles adapt to the repetitive motion. For more guidance on starting weights, see our detailed guide on what draw weight beginners should start with.
Choose draw weight based on your intended use. Target shooting at 20 yards requires only 15-20 pounds, while hunting most game animals legally requires 40-50 pounds minimum depending on your state regulations.
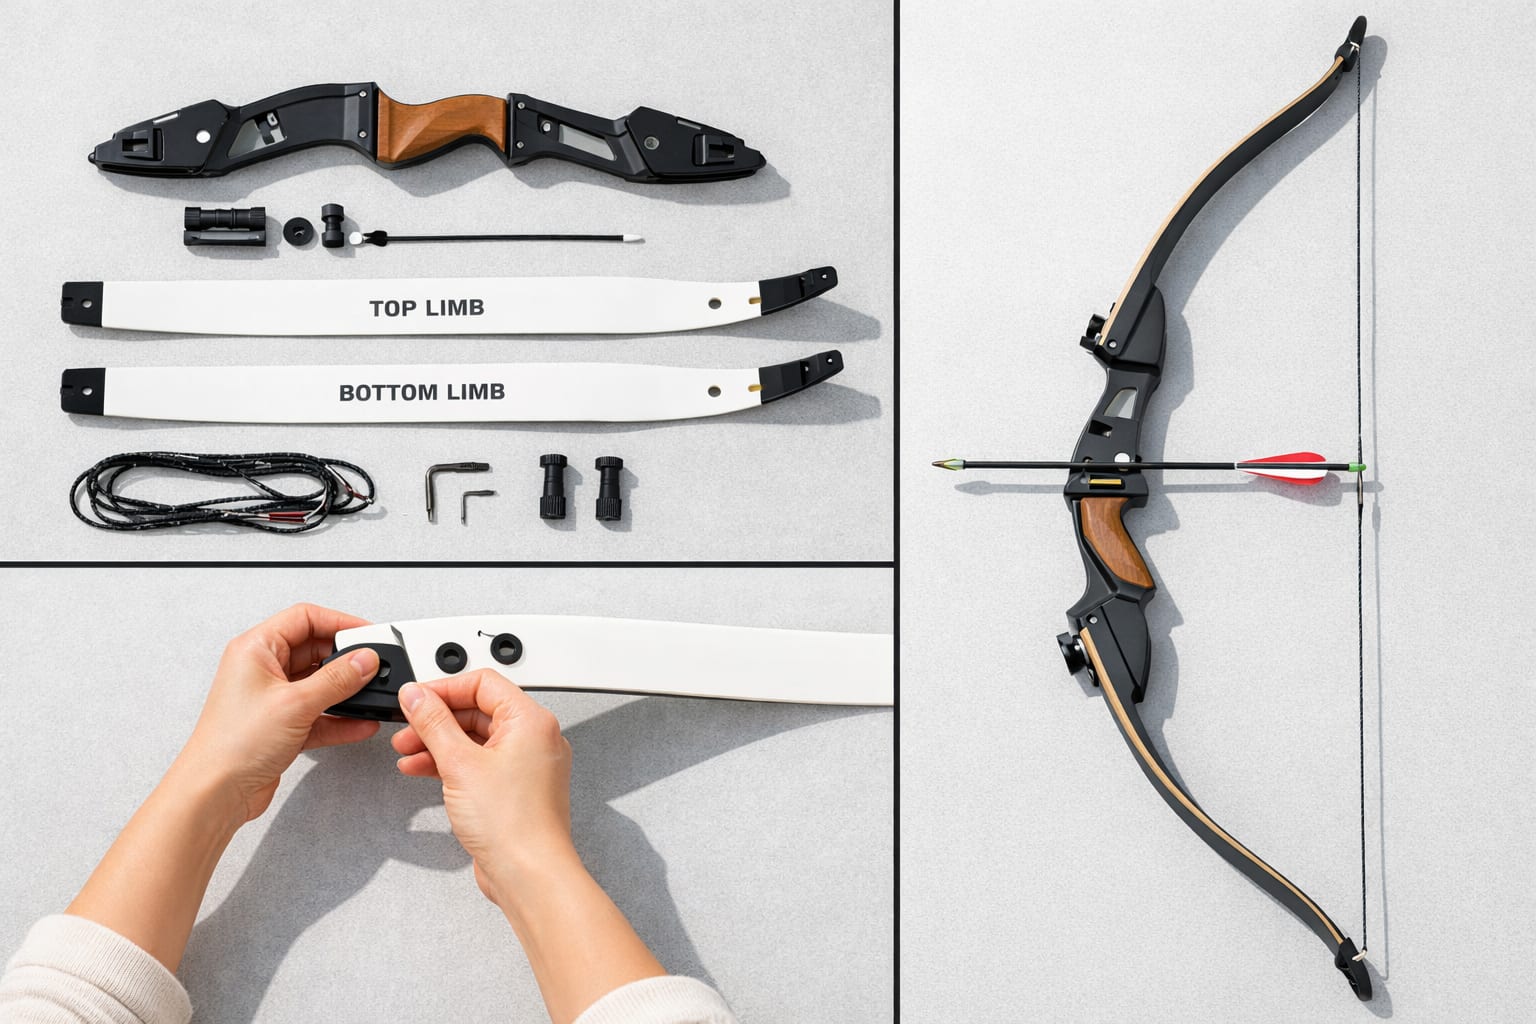
Assembling a takedown recurve bow involves attaching the limbs to the riser, tightening the limb bolts to proper torque, and verifying alignment before stringing. The process takes 10-15 minutes for first-time assembly and requires only an allen key and careful attention to limb orientation.
Complete assembly sequence:
Identify limb orientation: Look for markings that say “upper” or “lower” on each limb. The upper limb typically has slightly less draw weight and may be marked with a single line or “U.”
Insert the lower limb first: Slide the limb dovetail into the riser pocket at a slight angle, then press it flush against the riser face. The string groove should face away from you.
Hand-tighten the lower limb bolt: Insert the allen key and turn clockwise until the limb sits firmly against the riser. Do not fully tighten yet.
Attach the upper limb: Repeat the process with the upper limb, ensuring the limb sits flat in the pocket without gaps.
Tighten both limb bolts evenly: Alternate between upper and lower bolts, making 2-3 full turns on each until both limbs are secure. The bolts should be snug but not over-torqued, stop when you feel significant resistance.
Check limb alignment: Hold the bow at arm’s length and sight down the limbs. Both should curve symmetrically without twisting left or right. If you see twist, loosen the bolts and reseat the limbs.
Verify string groove alignment: The string grooves on both limb tips should align perfectly when viewed from the side. Misalignment indicates improper limb seating.
Never force limb bolts past their natural stopping point. Over-tightening can crack the riser or strip the threads, requiring expensive repairs. Most manufacturers specify 2-3 full turns past finger-tight as the correct torque.
Attaching a bowstring requires a bow stringer tool that safely flexes the limbs while you slide the string loops into the limb tip grooves. Never use the push-pull or step-through method, as these techniques cause limb twist in the majority of attempts and can result in the bow snapping back and causing facial injuries.
The bow stringer method distributes pressure evenly across both limbs, preventing the uneven stress that damages limb alignment. Professional archery shops refuse warranty service on bows damaged by improper stringing methods, making the $10-15 investment in a bow stringer essential insurance for your equipment.
Safe bow stringing procedure:
Attach the string to the bow: Slide the larger loop (usually marked) onto the upper limb tip and the smaller loop onto the lower limb tip. Let the string hang loose, it won’t stay in the grooves yet.
Position the bow stringer: Place the bow stringer’s upper pouch over the upper limb tip (covering the string loop) and the lower pouch or saddle over the lower limb tip.
Step on the stringer cord: Place both feet on the stringer cord with your feet shoulder-width apart. The bow should be vertical with the riser between your legs.
Apply even pressure: Pull the riser straight up while keeping the bow vertical. This flexes both limbs equally and reduces tension on the string.
Seat the string loops: While maintaining upward pressure, slide both string loops into their respective grooves on the limb tips. Check that each loop sits fully in the groove.
Release pressure slowly: Gradually lower the riser while keeping the bow vertical. The string will tension as the limbs straighten.
Remove the bow stringer: Once the bow is fully strung, slide the stringer pouches off the limb tips.
Inspect the string alignment: The string should run perfectly centered down the middle of the riser when viewed from above. If it’s off-center, the string loops aren’t seated properly, repeat the process.
Check your brace height (the distance from the string to the deepest part of the grip) after stringing. Most recurve bows specify 7.5-8.5 inches as the correct range. Adjust brace height by twisting or untwisting the string, each full twist changes brace height by approximately 1/8 inch.
Recurve bows are better for beginners because their curved limb design stores more energy than a longbow of equal draw weight, resulting in faster arrow speeds and flatter trajectory that makes aiming easier at varying distances. Longbows require more refined technique to shoot accurately and offer fewer options for adding accessories like sights or stabilizers that help beginners develop consistency.
The recurve’s mechanical advantage means a 25-pound recurve bow delivers similar arrow speed to a 30-35 pound longbow, allowing beginners to start with lighter draw weights while still achieving effective range. This reduced physical demand lets new archers focus on form rather than struggling with the draw.
Comparison for beginner archers:
| Factor | Recurve Bow | Longbow |
|---|---|---|
| Learning curve | Moderate, forgiving of minor form errors | Steep, requires precise technique |
| Accessory compatibility | Excellent, accepts sights, stabilizers, clickers | Limited, traditional shooting only |
| Draw weight efficiency | High, curved limbs store more energy | Lower, straight limbs less efficient |
| Portability | Good, takedown models disassemble | Excellent, one piece, no assembly |
| Cost (entry level) | $150-250 | $200-300 |
| Maintenance | Low, simple design | Very low, fewer parts |
Longbows excel in specific scenarios. Hunters who prefer traditional methods often choose longbows for their quiet shot and historical appeal. The longer sight picture of a longbow (typically 68-72 inches vs. 62-68 inches for recurves) can benefit archers with longer draw lengths.
For beginners focused on target archery or those interested in eventually competing, the recurve bow’s versatility and accessory options make it the clear choice. Most archery clubs and ranges cater primarily to recurve shooters, providing better access to instruction and group activities. Learn more about recurve archery techniques and community resources.
A complete beginner recurve bow setup costs $150-300 and includes the bow, arrows, basic accessories, and safety equipment needed to start shooting. Budget-conscious archers can start for $150-180 with a basic package, while those seeking better quality components that will last through skill progression should plan for $250-300.
The bow itself accounts for roughly half the total cost. Entry-level takedown recurve bows from reputable manufacturers like Samick, Southwest Archery, or PSE range from $80-150 depending on riser material and included accessories. Avoid bows under $60, as these often use inferior materials that warp or break within months.
Complete cost breakdown for first-time setup:
Total: $202-407 (most beginners spend $250-300)
Many archery shops offer package deals that bundle these items at 10-20% below individual pricing. Online retailers like Lancaster Archery or 3Rivers Archery frequently run beginner packages in the $180-220 range that include everything except the target.
Arrows represent an ongoing cost because beginners break or lose 20-30% of their arrows in the first six months. Carbon arrows ($5-10 each) outlast fiberglass arrows ($3-5 each) and provide better consistency, making them worth the extra investment. Purchase at least 6 arrows initially, but 12 arrows allow for longer practice sessions without constant retrieval trips.
Skip expensive accessories like sights, stabilizers, and clickers until you’ve developed consistent form. These items provide minimal benefit to beginners and add $50-150 to your initial investment without improving the learning experience.
The most common setup mistake is attempting to string the bow without a bow stringer, which causes limb twist in approximately 60% of hand-stringing attempts and can permanently damage the bow. Other frequent errors include installing the nocking point at the wrong height, over-tightening limb bolts, and using arrows with incorrect spine (stiffness) for the bow’s draw weight.
These mistakes typically stem from skipping the instruction manual or relying on outdated advice from well-meaning friends. Modern takedown recurve bows have specific assembly requirements that differ from older one-piece designs, and following manufacturer guidelines prevents most setup problems.
Critical mistakes to avoid:
Stringing by hand: Always use a bow stringer. The push-pull and step-through methods apply uneven pressure that twists limbs out of alignment. Repair costs for twisted limbs often exceed the cost of a new bow.
Incorrect nocking point height: The nocking point should sit 1/4 to 1/2 inch above perpendicular to the arrow rest. Placing it too high causes arrows to porpoise (fishtail vertically), while too low creates erratic flight. Use a bow square to measure precisely.
Over-tightening limb bolts: Limb bolts should be snug but not torqued with full strength. Over-tightening cracks risers or strips threads. Stop when you feel firm resistance, typically 2-3 full turns past finger-tight.
Mismatched arrow spine: Arrows must flex appropriately for your draw weight and length. Too stiff and arrows fly right (for right-handed archers); too soft and they fly left. Consult an arrow spine chart before purchasing.
Ignoring brace height: Brace height affects arrow speed, noise, and forgiveness. Too low (under 7 inches) makes the bow harsh and loud; too high (over 9 inches) reduces arrow speed. Follow manufacturer specifications.
Installing the arrow rest backward: Stick-on arrow rests have a specific orientation. The arrow should rest on the horizontal shelf with the vertical arm supporting it from the side. Backward installation causes arrows to fall off during draw.
Skipping string wax: New strings need waxing before first use and every 2-3 weeks thereafter. Unwaxed strings fray quickly and can break mid-draw, causing injury.
Check your setup before every shooting session. Inspect the string for fraying, verify that limb bolts remain tight, and confirm that the nocking point hasn’t slipped. These 30-second checks prevent equipment failure that could cause injury or damage arrows.
You absolutely need a bow stringer, hand-stringing methods like push-pull or step-through are dangerous and damage the bow in the majority of attempts. A bow stringer costs $8-15 and prevents the limb twist, personal injury, and warranty voids that result from improper stringing techniques.
The physics of hand-stringing create uneven pressure on the limbs. When you push or step through the bow, one limb flexes more than the other, causing the limbs to rotate in their pockets. This rotation misaligns the string grooves and creates permanent twist that affects arrow flight. Professional bow technicians report that limb twist is the most common damage they see in beginner-owned bows, and it’s almost always caused by hand-stringing.
Why hand-stringing fails:
Bow stringers distribute force evenly across both limbs by pulling the riser upward while the limbs flex symmetrically. This controlled motion eliminates twist and reduces the force required by approximately 40% compared to hand methods.
Some experienced traditional archers successfully use hand-stringing methods, but they’ve developed the technique over years and accept the increased risk. For beginners, the minimal cost of a bow stringer makes it an obvious choice. Every archery organization, from USA Archery to the National Field Archery Association, recommends bow stringers as mandatory safety equipment.
Purchase a stringer that matches your bow length and keep it with your equipment. The five minutes saved by skipping the stringer isn’t worth the risk of a $100-200 bow replacement or a trip to the emergency room.
Installing an arrow rest requires cleaning the riser’s arrow shelf, positioning the rest 1/8 inch above the shelf, and securing it with the adhesive backing or mounting screws provided. The entire process takes 5-10 minutes and requires only an allen key for screw-on models or a clean cloth for adhesive models.
Most beginner recurve bows use stick-on arrow rests that attach directly to the riser’s side plate. These simple plastic rests cost $5-12 and provide adequate support for learning basic technique. More advanced archers eventually upgrade to magnetic or plunger-style rests, but these aren’t necessary for initial setup.
Arrow rest installation steps:
Clean the mounting surface: Use rubbing alcohol and a clean cloth to remove any oil, dust, or residue from the riser’s side plate where the rest will attach. Let it dry completely.
Determine rest position: The arrow rest should sit approximately 1/8 inch above the arrow shelf (the horizontal ledge on the riser). This height allows the arrow to clear the shelf during release.
Mark the position (optional): Use a pencil to lightly mark where the rest will sit. This helps ensure straight alignment.
Remove the adhesive backing: Peel off the protective paper from the rest’s adhesive pad. Avoid touching the adhesive with your fingers.
Press the rest firmly: Position the rest at your marked location and press it firmly against the riser for 30 seconds. Apply even pressure across the entire adhesive surface.
Let it cure: Wait 24 hours before shooting to allow the adhesive to fully bond. Shooting immediately can cause the rest to shift or detach.
Verify alignment: Place an arrow on the rest and check that it points straight ahead when viewed from above. The arrow should align with the center of the string when nocked.
For screw-on arrow rests, drill a pilot hole if necessary (check manufacturer instructions), insert the mounting screw through the rest, and tighten it into the riser’s threaded insert. Don’t over-tighten, the rest should be secure but not compressed.
The arrow rest position affects arrow flight significantly. If arrows consistently fly left or right despite proper form, the rest may need repositioning. Most beginners benefit from having an experienced archer or pro shop technician verify rest placement during initial setup. For more on proper shooting fundamentals, explore our guide on recurve bow technique.
A recurve bow works effectively for both hunting and target shooting, but hunting requires higher draw weights (40-50+ pounds depending on game and state regulations) than target shooting (15-30 pounds for most recreational archers). The same bow can serve both purposes if you purchase limbs in multiple draw weights, making takedown recurve bows particularly versatile for archers who want to do both.
Target shooting with a recurve bow requires only enough draw weight to reach your intended distance with accuracy. Most indoor ranges shoot at 18-20 meters, requiring just 20-25 pounds of draw weight. Outdoor target archery at 50-70 meters benefits from 30-35 pounds for flatter arrow trajectory and better wind resistance.
Hunting demands significantly more power to ensure ethical, quick kills. State regulations typically mandate minimum draw weights of 40 pounds for deer and 50-60 pounds for larger game like elk. These requirements ensure arrows achieve sufficient kinetic energy for complete penetration and humane harvests.
Hunting vs. target shooting requirements:
| Aspect | Target Shooting | Hunting |
|---|---|---|
| Minimum draw weight | 15-20 lbs | 40-50 lbs (varies by state/game) |
| Arrow type | Target points, lightweight | Broadheads, heavier shafts |
| Accuracy requirement | Tight groups at fixed distances | Consistent placement at varying ranges |
| Bow accessories | Sight, stabilizer, clicker | Minimal, often shot instinctively |
| Practice volume | 100-200 arrows per session | 20-50 arrows (higher draw weight) |
Many bowhunters prefer recurve bows for their reliability in cold weather, quiet shot, and lighter weight compared to compound bows. The lack of mechanical parts means nothing can freeze or break in the field. However, the higher draw weight and lack of let-off make recurve hunting more physically demanding than compound hunting.
If you plan to hunt with a recurve bow, start with target-weight limbs (20-25 pounds) to develop proper form, then gradually increase to hunting weight over 6-12 months. Jumping directly to 45-50 pounds causes shoulder injuries and ingrains bad habits that are difficult to correct. For more on bowhunting preparation, see our bowhunting category.
String twisting usually indicates improper stringing technique, incorrect string length, or uneven limb alignment that causes the string to rotate during draw and release. The most common cause is hand-stringing the bow instead of using a bow stringer, which applies uneven pressure that twists the limbs and causes the string to spiral.
A properly strung recurve bow should have a string that hangs perfectly straight down the center of the riser when viewed from above. If the string appears twisted or spirals when you draw the bow, something in your setup needs correction.
Common causes and solutions:
Hand-stringing damage: If you’ve been stringing the bow by hand, the limbs may have twisted in their pockets. Remove the string, loosen the limb bolts, reseat both limbs carefully, retighten the bolts evenly, and use a bow stringer for all future stringing.
Incorrect string length: A string that’s too long or too short can twist during use. Check your brace height, it should match manufacturer specifications (typically 7.5-8.5 inches). If brace height is correct but the string still twists, the string may be defective.
Uneven limb bolt tension: If one limb bolt is tighter than the other, the limbs will flex unevenly and cause string rotation. Loosen both bolts, then tighten them alternately in small increments until both are equally snug.
Worn string grooves: Inspect the string grooves on both limb tips. If one groove is worn deeper than the other, the string will sit unevenly and twist. This requires limb replacement.
Poor release technique: Plucking the string (pulling it sideways during release) can introduce twist. Focus on a clean release where your fingers relax straight back. Consider working with an instructor on your recurve bow grip and release.
To test for limb twist, remove the string and sight down the limbs from the riser. Both limbs should curve symmetrically without any rotation. If you see twist, the limbs need replacement, twisted limbs cannot be straightened and will continue causing string problems.
Prevent string twist by always using a bow stringer, maintaining even limb bolt tension, and waxing your string regularly. A well-maintained string on a properly aligned bow should remain straight for thousands of shots.
The only essential accessories for your first recurve bow are a bow stringer, arrow rest, nocking points, arm guard, and finger tab, everything else is optional until you develop consistent form and identify specific needs. This minimal setup costs $30-50 beyond the bow itself and provides everything required to shoot safely and effectively.
Many beginners waste money on accessories they don’t need yet. Sights, stabilizers, clickers, and plungers offer minimal benefit until you can shoot consistent groups at 20 yards with basic equipment. Focus your initial budget on the bow, quality arrows, and safety gear rather than accessories that won’t improve your learning curve.
Must-have accessories (total: $30-50):
Useful but not immediately necessary ($50-150):
Skip these until you’re more experienced:
Purchase arrows that match your draw weight and length, this is more important than any accessory. Mismatched arrows cause more accuracy problems than any equipment addition can solve. Consult an arrow spine chart or ask a pro shop to recommend appropriate arrows for your specific setup.
As you progress, you’ll naturally identify which accessories address your specific challenges. Some archers never use sights and prefer instinctive shooting, while others add every available accessory. Let your shooting style and goals guide future purchases rather than buying everything upfront.
Setting up a recurve bow for the first time takes 30-45 minutes for a complete beginner following instructions carefully, including limb assembly, stringing, arrow rest installation, and nocking point placement. With practice, this reduces to 10-15 minutes for routine assembly and under 5 minutes for experienced archers who only need to string the bow before shooting.
The initial setup takes longer because you’re learning each step and verifying that everything is correct. Subsequent setups go much faster because you’ve already installed permanent components like the arrow rest and nocking points, you only need to attach the limbs and string the bow.
Time breakdown for first-time setup:
Total first-time setup: 33-61 minutes (most beginners complete it in 40-45 minutes)
Plan to set up your bow the day before your first shooting session to allow adhesive components like the arrow rest to cure fully. Rushing the setup or shooting before adhesives cure leads to equipment failure and frustration.
After your initial setup, you’ll only need to string and unstring the bow before and after each use. This takes 2-3 minutes with a bow stringer once you’re comfortable with the process. Some archers leave their bows strung between sessions, but this isn’t recommended, keeping a bow strung for extended periods stresses the limbs and reduces their lifespan.
If you’re struggling with any setup step beyond the expected time, stop and consult the manufacturer’s instructions or watch a video tutorial specific to your bow model. Forcing components or guessing at proper technique can damage equipment that would otherwise last for years. Many archery shops offer free setup assistance if you purchase the bow from them, which can be valuable for first-time buyers.
Can I set up a recurve bow without any prior experience?
Yes, you can set up a recurve bow without prior experience by following the manufacturer’s instructions and using the proper tools, particularly a bow stringer. The process is straightforward and requires no special skills, though watching a video tutorial specific to your bow model can help clarify any confusing steps.
How often should I unstring my recurve bow?
Unstring your recurve bow after each shooting session or at least every 2-3 weeks if you shoot frequently. Leaving a bow strung for extended periods stresses the limbs and can cause them to take a permanent set (lose their curve), reducing performance and lifespan.
What is brace height and why does it matter?
Brace height is the distance from the deepest part of the grip to the string when the bow is strung, typically 7.5-8.5 inches for most recurve bows. Proper brace height affects arrow speed, noise level, and how forgiving the bow is of form errors, too low makes the bow harsh and loud, while too high reduces arrow speed.
Can I use any arrows with my recurve bow?
No, arrows must match your bow’s draw weight and your draw length to fly correctly. Using arrows with incorrect spine (stiffness) causes erratic flight and poor accuracy. Consult an arrow spine chart or ask a pro shop to recommend arrows matched to your specific setup.
How tight should limb bolts be on a recurve bow?
Limb bolts should be snug but not over-torqued, typically 2-3 full turns past finger-tight or until you feel firm resistance. Over-tightening can crack the riser or strip threads, while under-tightening allows limbs to shift during shooting. Both limb bolts should have equal tension.
Is it normal for my fingers to hurt when shooting a recurve bow?
Some finger discomfort is normal for beginners as your fingers adapt to string pressure, but sharp pain indicates you need a finger tab or glove with more protection, or your draw weight is too high. Proper finger protection should eliminate most discomfort within 2-3 shooting sessions.
How do I know if my bow is the right size for me?
Bow length should match your draw length, archers with draw lengths under 28 inches typically use 66-68 inch bows, while those with 28-31 inch draw lengths use 68-70 inch bows. A properly sized bow allows you to reach full draw comfortably without the string touching your face or chest.
Can I adjust the draw weight on a recurve bow?
Takedown recurve bows allow you to change draw weight by purchasing different limbs, but you cannot adjust the weight of a specific set of limbs. Some models offer 2-4 pounds of adjustment via limb bolts, but this is minimal. Plan to purchase new limbs as your strength increases.
What should I do if my arrows keep falling off the arrow rest?
Arrows falling off the rest usually indicate the nocking point is too low, the arrow rest is positioned incorrectly, or you’re canting (tilting) the bow excessively during draw. Check that your nocking point sits 1/4 to 1/2 inch above perpendicular and that you’re keeping the bow vertical during your shot sequence.
How long does a recurve bow string last?
A properly maintained recurve bow string lasts 2,000-5,000 shots or 1-3 years depending on shooting frequency and maintenance. Regular waxing every 2-3 weeks extends string life, while shooting in wet conditions or leaving the bow strung constantly shortens it. Replace strings when you see significant fraying or broken strands.
Do I need to tune my recurve bow after initial setup?
Basic tuning, adjusting brace height, nocking point position, and arrow rest alignment, should be done during initial setup. Advanced tuning like bare shaft testing and plunger adjustment can wait until you develop consistent form and can shoot tight groups at 20 yards.
Can I hunt with the same recurve bow I use for target practice?
Yes, if you purchase hunting-weight limbs (40-50+ pounds depending on game and regulations) for your takedown recurve bow. The same riser works for both target and hunting limbs, allowing you to practice with lighter weight and hunt with heavier weight using the same familiar equipment.
Setting up a recurve bow for the first time is a straightforward process that any beginner can complete in 30-45 minutes with the right tools and careful attention to instructions. The key steps, attaching limbs, stringing with a bow stringer, installing an arrow rest, and placing nocking points, require no special skills but do demand patience and precision to ensure safe, effective shooting.
The most critical takeaway is to always use a bow stringer rather than hand-stringing methods that damage equipment and risk injury. This single $10-15 tool prevents the majority of setup problems beginners encounter and protects your investment in the bow itself.
Start with appropriate draw weight for your strength level (15-25 pounds for most adults), focus on developing proper form before adding accessories, and don’t rush the setup process. A properly assembled recurve bow will provide years of reliable service for both target shooting and hunting once you’ve built the strength for heavier limbs.
Next steps to begin your archery journey:
For additional guidance on developing your skills, explore our resources on recurve bow aiming and archery training. With proper setup and consistent practice, you’ll be shooting accurate groups and enjoying this rewarding sport for years to come.

