Newsletter Subscribe
Enter your email address below and subscribe to our newsletter

All voices matter
All voices matter
 ByTravis
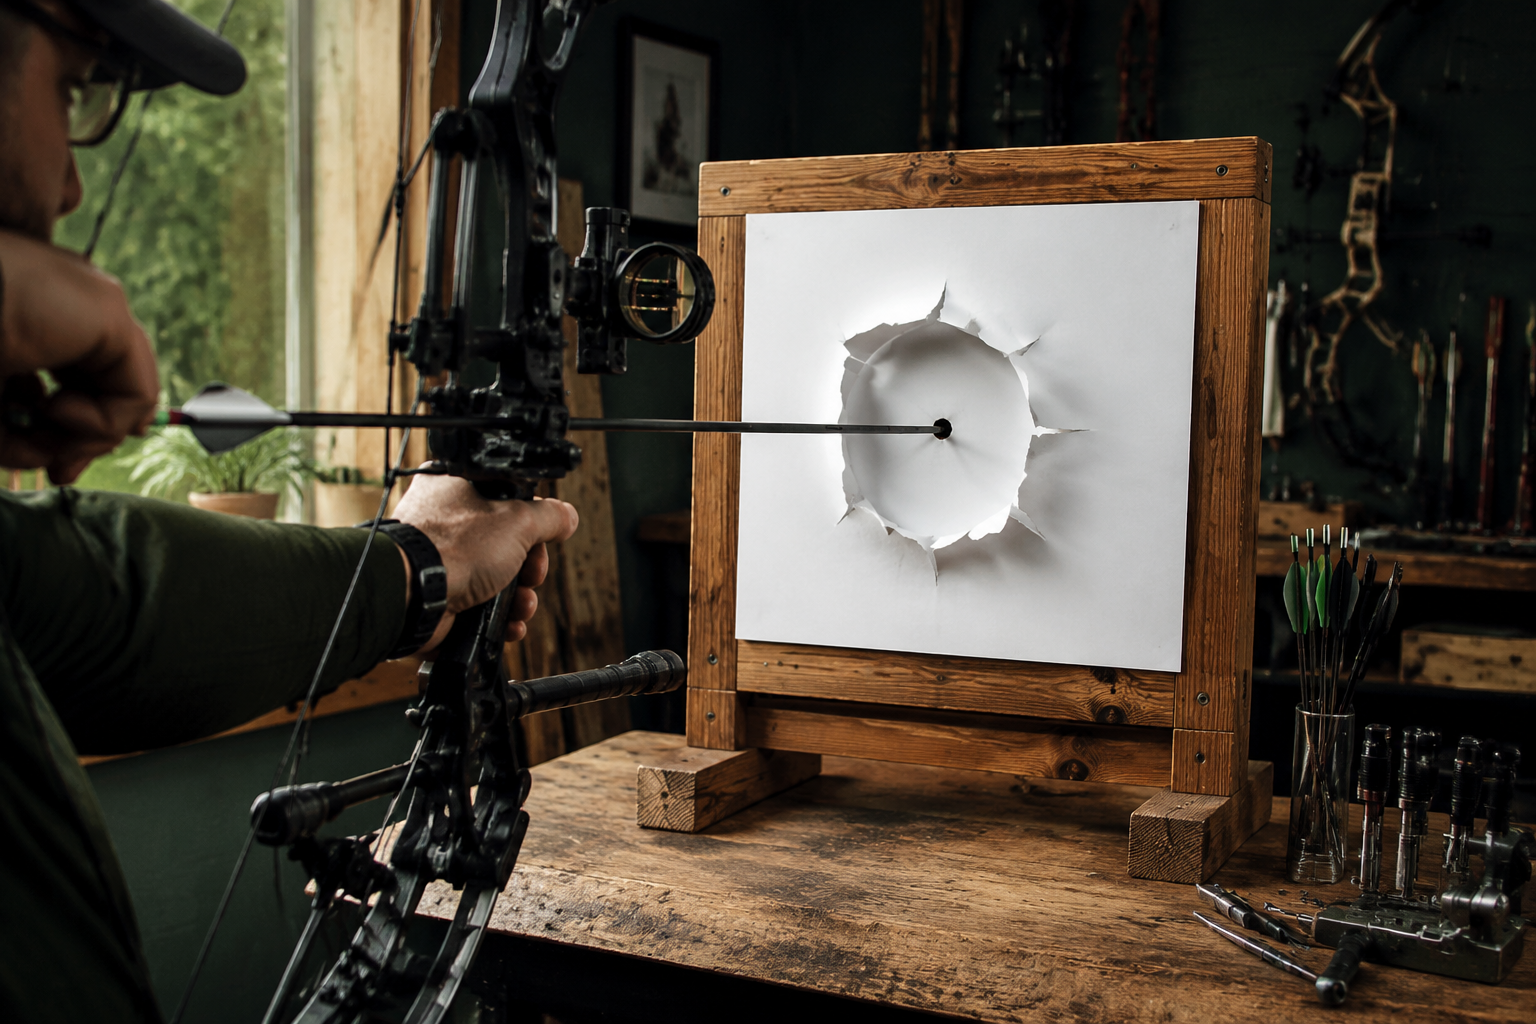
Learn how to paper tune a bow with step-by-step instructions, troubleshooting tips, and expert advice for perfect arrow flight and hunting accuracy.
Affiliate Disclaimer: We are a participant in the Amazon Services LLC Associates Program, an affiliate advertising program designed to provide a means for sites to earn advertising fees by advertising and linking to Amazon.com. As an Amazon Associate I earn from qualifying purchases. We also participate in other affiliate programs.
Paper tuning a bow is a diagnostic method that reveals arrow flight problems by shooting through a sheet of paper and analyzing the tear pattern. A perfect tune produces a clean bullet hole with minimal tearing, while irregular tears indicate issues with arrow spine, rest position, nocking point height, or cam timing that need adjustment. Most archers should stand 6-8 feet from the paper frame and use field points for initial tuning.
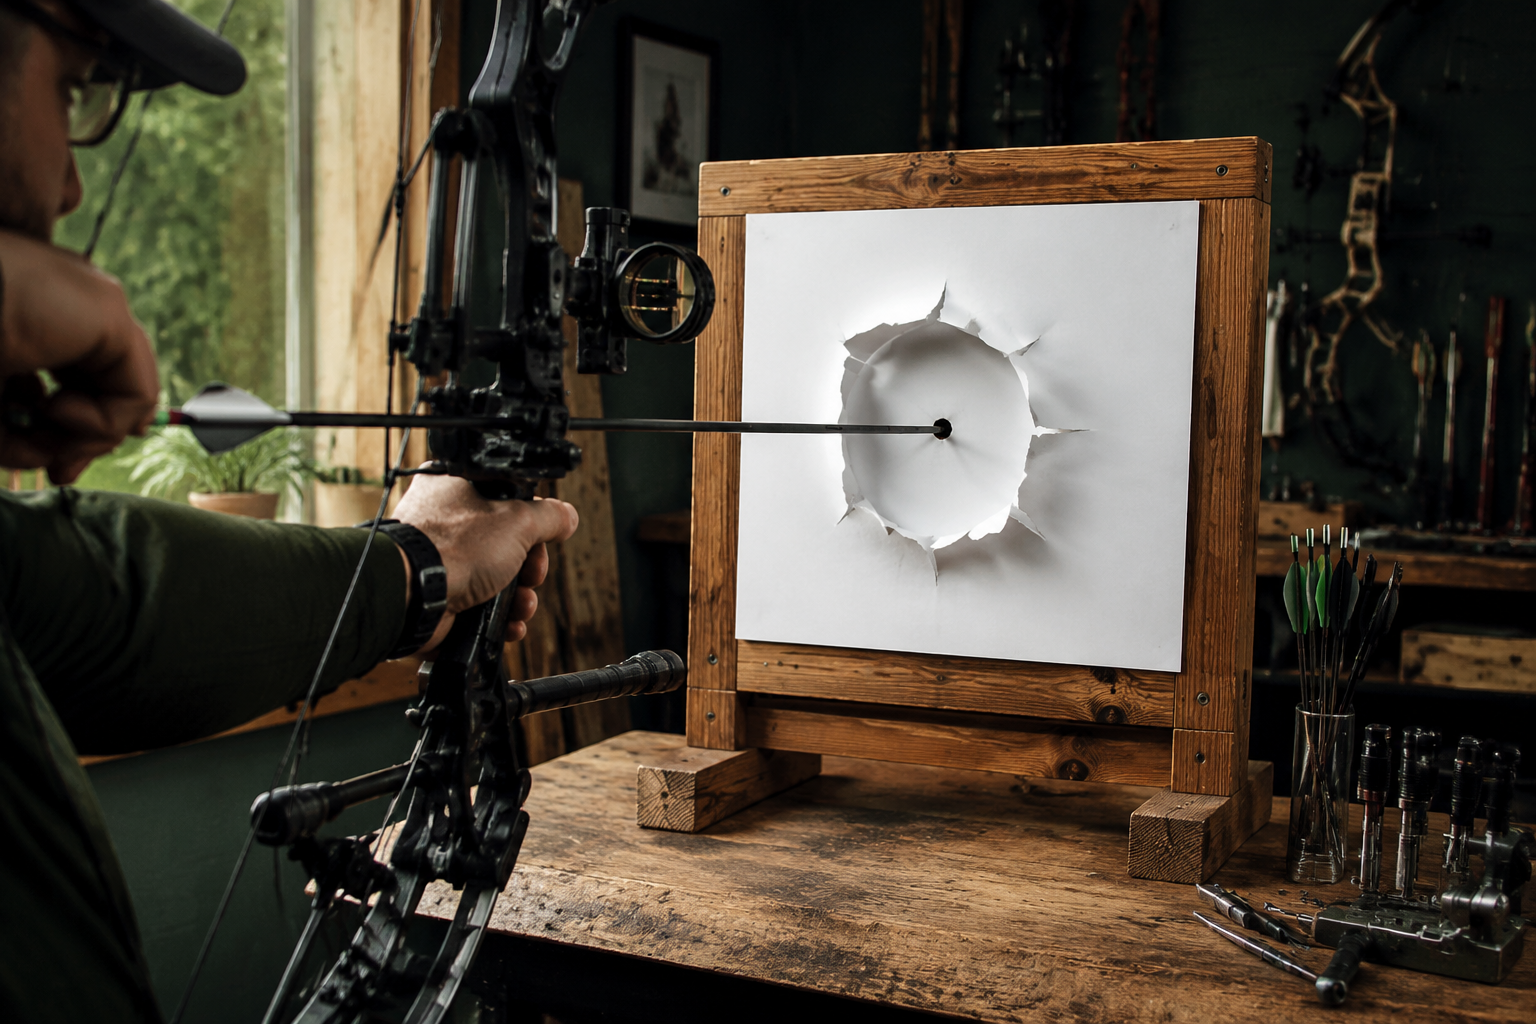
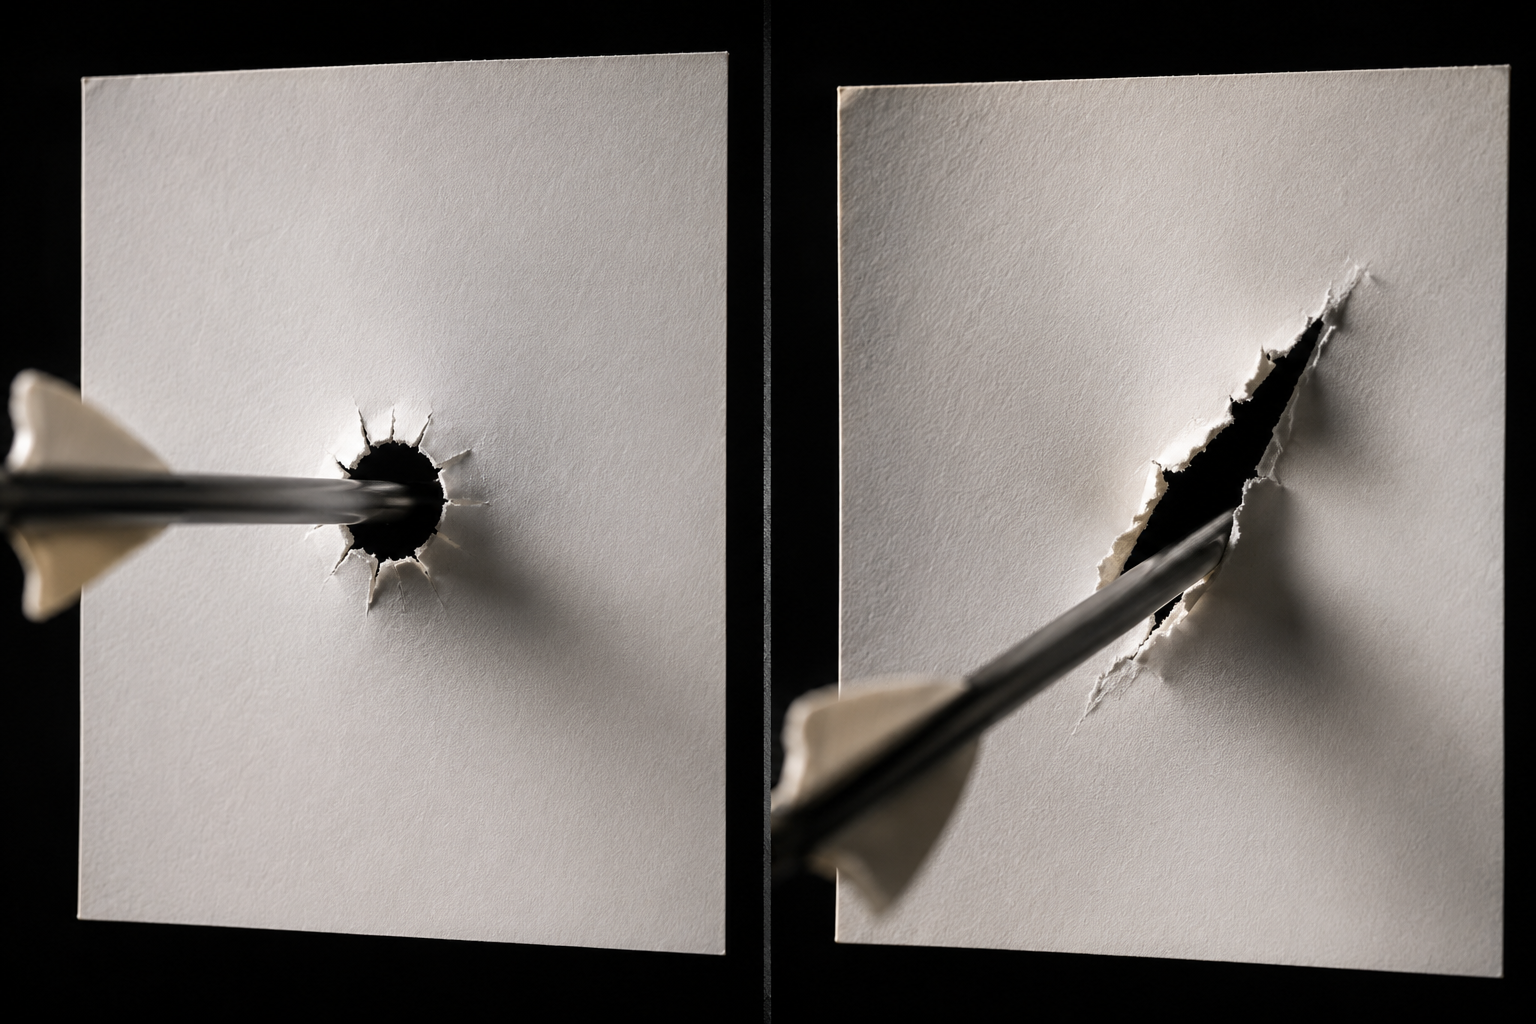
Paper tuning is a bow setup technique where you shoot an arrow through a sheet of paper stretched across a frame to diagnose arrow flight issues. The tear pattern left in the paper reveals whether your arrow is flying straight or if the fletching is making contact due to misalignment between the bow’s components.
When an arrow passes through paper cleanly, it creates a round hole with minimal tearing. If the arrow is wobbling or the fletching is hitting the rest or riser, the paper shows distinctive tear patterns, horizontal, vertical, or diagonal rips that point to specific setup problems.
Why paper tuning matters:
Paper tuning works because the paper captures the arrow’s orientation at a specific point in its flight path. Unlike shooting at a target where you only see where the arrow lands, paper tuning shows you how the arrow is flying. This diagnostic information is essential for fine-tuning your bow setup, especially after changing arrows, rest position, or other archery equipment components.
Setting up paper tuning for a compound bow requires a frame to hold the paper, proper lighting, and correct shooting distance. Start by building or purchasing a paper tuning frame, a rectangular structure that holds paper taut, typically 24-36 inches square to provide enough surface area for the arrow to pass through cleanly.
Materials needed:
Setup steps:
Common setup mistake: Placing the frame too close (under 6 feet) doesn’t give the arrow enough flight time to reveal problems, while distances over 10 feet make it harder to see subtle issues. For compound bows, 6-8 feet is the sweet spot where arrow flight characteristics become apparent.
Before shooting, verify your bow is properly set up with correct draw weight, draw length, and arrow spine for your setup. Paper tuning reveals alignment issues, but it can’t fix fundamental equipment mismatches. If you’re just getting started with archery, ensure your basic bow setup is correct first.
A perfect bullet hole in paper tuning appears as a clean, round tear approximately the diameter of your arrow shaft, with three small slits extending outward where the fletching passed through. The hole should be centered with no significant horizontal or vertical tearing, and the fletching marks should be evenly spaced around the main hole.
Characteristics of a perfect tear:
In reality, achieving a textbook perfect bullet hole is rare. Most well-tuned bows produce a hole that’s nearly round with slight imperfections. What matters is consistency, if you shoot three arrows and get three similar tear patterns that are close to round, your bow is well-tuned enough for excellent accuracy.
Acceptable variations:
The goal isn’t perfection for its own sake; it’s achieving arrow flight that delivers consistent accuracy. A slightly imperfect paper tear that produces tight groups at 40 yards is better than chasing a perfect hole that requires extreme adjustments. Many experienced archers accept a “good enough” tear and verify their tune by shooting at distance rather than endlessly tweaking for a flawless paper hole.
An arrow tearing left on paper (for a right-handed shooter) typically indicates the arrow’s nock end is passing to the right of the point, meaning your arrow rest is positioned too far left or your centershot needs adjustment. This horizontal tear reveals the arrow is fishtailing as it passes through the paper, with the fletching making contact on the right side.
Primary causes of left tears:
How to fix left tears:
Important distinction: Left tears for right-handed shooters indicate different problems than left tears for left-handed shooters. Always consider your shooting hand when diagnosing tears. Additionally, if you’re seeing left tears combined with vertical tears (high or low), address the horizontal issue first, then tackle the vertical component.
A common mistake is over-adjusting the rest in one session. Make small changes, shoot multiple arrows to confirm the pattern, then adjust again. Rushing through adjustments often leads to overshooting the correct position and creating new problems. If you’ve moved the rest significantly (more than 1/8 inch) without improvement, the issue likely isn’t rest position, check arrow spine compatibility with your bow’s draw weight and draw length.
High tears in paper tuning mean the arrow’s nock end is passing lower than the point, indicating your nocking point is too low or your arrow rest needs to move up. This vertical tear pattern shows the arrow is porpoising (moving up and down) as it flies, with the bottom fletching making contact with the rest or riser.
Step-by-step fix for high tears:
How much to adjust:
When high tears persist despite adjustments:
High tears are often easier to diagnose than horizontal tears because vertical adjustments have fewer variables. However, if you’re seeing both high tears and horizontal tears (left or right), fix the horizontal issue first. Horizontal alignment affects vertical flight, so addressing rest position before nocking point height produces better results.
For beginner bow setups, high tears sometimes indicate the archer is dropping their bow arm at release. Have someone watch your shooting form or record video to rule out technique issues before making equipment adjustments. Equipment can only compensate so much for inconsistent shooting mechanics.
Stand 6-8 feet from the paper when tuning a compound bow, which provides enough arrow flight time to reveal fletching contact and alignment issues without introducing accuracy variables from longer distances. This distance allows the arrow to stabilize slightly after leaving the bow while still capturing initial flight characteristics that indicate tuning problems.
Distance guidelines by bow type:
Why distance matters:
Shooting too close (under 4 feet for compounds) doesn’t give the arrow enough time to show problems. The arrow is still in the “paradox” phase where it’s flexing around the riser, and tear patterns don’t accurately reflect tuning issues. Shooting too far (over 10 feet) introduces too many variables, slight aiming errors, wind, or arrow drop can create tear patterns that aren’t related to bow tuning.
The 6-8 foot distance represents the sweet spot where the arrow has cleared the bow, the fletching has begun stabilizing the shaft, and any contact or misalignment issues show up clearly in the paper. At this distance, you’re capturing the arrow’s true flight path without the complications that come from longer ranges.
Adjusting distance for specific situations:
Position your backstop target 3-6 feet behind the paper frame to safely catch arrows. The backstop should be large enough to account for minor aiming variations, a 3-foot square target works well. Never paper tune without a proper backstop, even at close distances.
Paper tuning a recurve bow is less critical than for compound bows but still useful for diagnosing arrow flight issues, especially for target archery or when switching arrow spines. Recurve bows have simpler mechanics with fewer adjustable components, so many archers achieve good results through bare shaft tuning and shooting at distance instead.
When paper tuning helps recurve bows:
Recurve-specific considerations:
Unlike compound bows with rests that move in multiple directions, recurve bows typically use a plunger button (pressure button) and elevated rest. Paper tuning a recurve bow focuses more on plunger tension and nocking point height than rest position. The arrow paradox, how the arrow flexes around the riser, plays a bigger role in recurve tuning.
Alternative tuning methods for recurves:
Many traditional recurve archers skip paper tuning entirely, relying instead on shooting form consistency and bare shaft testing. For hunting or casual shooting, this approach works fine. However, competitive recurve archers often use paper tuning as one tool among several to optimize their setup.
If you do paper tune a recurve, stand closer to the paper (4-6 feet) than you would with a compound bow. Recurve arrows travel slower and the arrow paradox is more pronounced, so closer distances provide clearer diagnostic information. Expect less perfect tears than with compounds, recurve arrows naturally flex more, and achieving a perfect bullet hole is harder.
Always paper tune with field points first to establish baseline arrow flight, then verify broadhead flight separately since broadheads create more drag and can reveal tuning issues that field points don’t show. Paper tuning with broadheads risks damaging your broadheads and creates larger, harder-to-read tear patterns, but testing broadhead flight through paper after field point tuning confirms your setup works for hunting.
Proper sequence for tuning:
Why broadheads fly differently:
Broadhead-specific tuning tips:
For hunting bow setups, the ultimate test isn’t paper, it’s whether your broadheads group with your field points at hunting distances. Some bows that paper tune perfectly with field points still show broadhead flight differences due to arrow spine, rest design, or cam timing. If your broadheads won’t group despite good paper tuning, try walk-back tuning or French tuning methods that specifically address broadhead flight.
Common mistake: Assuming that because field points paper tune perfectly, broadheads will automatically fly the same. Always verify broadhead flight separately, either through paper or by shooting groups at distance. Many hunters discover tuning issues only after switching to broadheads before season.
Paper tuning and walk-back tuning serve different purposes, paper tuning diagnoses arrow flight and fletching contact issues at close range, while walk-back tuning verifies centershot alignment and arrow flight at multiple distances. Most archers benefit from using both methods: paper tune first to eliminate obvious problems, then walk-back tune to fine-tune centershot for long-range accuracy.
Paper tuning strengths:
Walk-back tuning strengths:
When to use each method:
Use paper tuning when you’re setting up a new bow, changing arrows, adjusting rest height, or diagnosing obvious flight problems. Paper tuning excels at revealing vertical issues (nocking point height) and confirming fletching clearance. It’s your first diagnostic tool when something is clearly wrong with arrow flight.
Use walk-back tuning after paper tuning shows acceptable results but you’re still seeing horizontal grouping issues at distance. Walk-back tuning fine-tunes your centershot (horizontal rest position) by shooting at 20, 30, 40, and 50 yards and observing whether arrows drift left or right as distance increases. This method catches subtle alignment problems that paper tuning might miss.
Ideal tuning sequence:
Neither method is universally “better”, they’re complementary tools that address different aspects of bow tuning. Paper tuning is faster and more diagnostic for specific problems, while walk-back tuning provides better real-world accuracy verification. Experienced archers often paper tune for quick checks and walk-back tune for precision setups.
Paper tuning isn’t strictly necessary for hunting accuracy, but it significantly improves consistency and arrow flight, especially at distances beyond 30 yards where small tuning issues become magnified. Many hunters achieve acceptable accuracy without paper tuning by relying on modern bow technology and shooting at closer ranges, but paper tuning provides an objective way to optimize your setup for maximum performance.
Benefits of paper tuning for hunters:
When you can skip paper tuning:
When paper tuning becomes critical:
For serious hunters, paper tuning is a valuable diagnostic tool that takes 30 minutes but can prevent missed opportunities in the field. Even if your bow shoots acceptably without tuning, paper testing confirms you’re getting maximum performance from your setup. The difference between a well-tuned and poorly-tuned bow might only be 2-3 inches at 40 yards, but that’s often the difference between a clean hit and a wounded animal.
Practical approach for hunters:
Paper tune your bow at the start of each season or whenever you change equipment. Verify the tune holds by shooting groups at various distances with both field points and broadheads. If everything groups well, you’re done, no need to obsess over perfect paper tears. If you’re seeing accuracy problems, return to paper tuning to diagnose the issue.
The most common paper tuning mistakes include making too many adjustments at once, using wrinkled or loose paper that creates false tear patterns, and failing to verify shooting form before blaming equipment. These errors lead to frustration and often make tuning problems worse rather than better.
Top paper tuning mistakes:
1. Over-adjusting: Moving the rest or nocking point too much in one session creates new problems. Make small adjustments (1/32 inch for rest, 1/16 inch for nocking point) and test after each change.
2. Poor paper tension: Loose, wrinkled, or torn paper produces inconsistent tear patterns. Replace paper frequently and ensure it’s stretched taut across the frame.
3. Ignoring shooting form: Torquing the bow grip, punching the release, or dropping the bow arm creates tear patterns that look like tuning issues. Have someone verify your form is consistent.
4. Wrong shooting distance: Standing too close (under 4 feet) or too far (over 10 feet) produces misleading tear patterns. Stick to 6-8 feet for compound bows.
5. Adjusting multiple variables: Changing rest position, nocking point, and draw weight simultaneously makes it impossible to know what fixed the problem. Change one thing at a time.
6. Using damaged arrows: Bent arrows, loose nocks, or damaged fletching create erratic tears. Verify your arrows are straight and undamaged before tuning.
7. Inadequate lighting: Poor lighting makes it hard to see subtle tear patterns. Use bright, even lighting or natural daylight.
8. Not shooting enough arrows: Judging tune from a single arrow is unreliable. Shoot 3-5 arrows through fresh paper to confirm patterns are consistent.
9. Chasing perfection: Obsessing over achieving a perfect bullet hole when your bow already shoots tight groups wastes time. Accept “good enough” and verify at distance.
10. Skipping baseline checks: Paper tuning can’t fix fundamental problems like wrong arrow spine, incorrect draw length, or damaged equipment. Verify basic setup first.
How to avoid these mistakes:
Start with a systematic approach: verify your equipment is in good condition, check that arrow spine matches your bow specifications, and confirm your shooting form is consistent. Make one small adjustment at a time, shoot multiple arrows to verify the change, then adjust again. Keep notes on what you changed and the results, this prevents going in circles.
If you’re new to paper tuning, consider having an experienced archer or pro shop technician watch your process. They can spot form issues or adjustment mistakes that aren’t obvious to beginners. Many tuning problems that seem like equipment issues are actually caused by inconsistent shooting technique.
When paper tuning isn’t working despite multiple adjustments, the problem usually lies with arrow spine mismatch, cam timing issues, or shooting form inconsistencies rather than rest position or nocking point height. Step back from micro-adjustments and verify your fundamental setup is correct before continuing to chase paper tears.
Troubleshooting checklist when paper tuning fails:
1. Verify arrow spine compatibility:
2. Check cam timing (compound bows):
3. Inspect equipment condition:
4. Evaluate shooting form:
5. Test with bare shafts:
Alternative tuning methods to try:
When to seek professional help:
If you’ve verified arrow spine, checked equipment condition, confirmed shooting form is consistent, and still can’t achieve acceptable paper tears, take your bow to a qualified pro shop. Some issues, particularly cam timing problems, limb alignment, or subtle rest design incompatibilities, require specialized tools and expertise to diagnose and fix.
Important perspective: Remember that paper tuning is a diagnostic tool, not the end goal. If your bow shoots tight groups at hunting or target distances despite imperfect paper tears, your tune is good enough. Some bow and arrow combinations never produce perfect bullet holes but still deliver excellent accuracy. Don’t let pursuit of perfect paper tears prevent you from shooting.
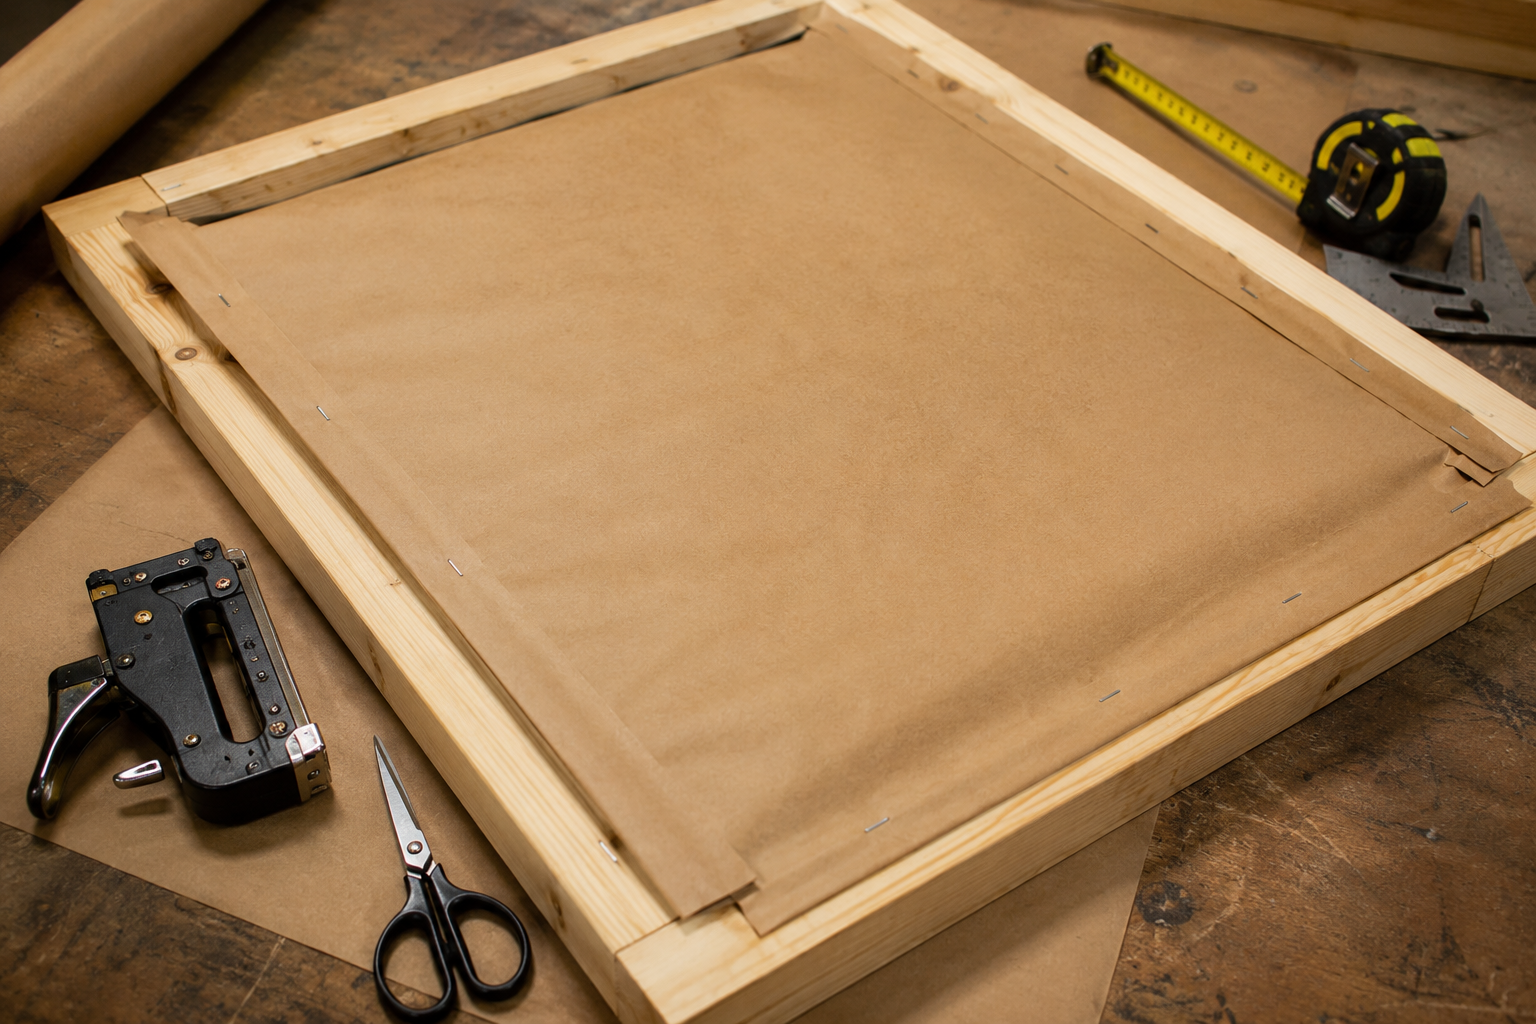
Building a DIY paper tuning frame takes about 30 minutes and costs under $20 using basic lumber and hardware store materials. A simple frame design using 2×2 or 2×4 lumber creates a sturdy, portable tuning station that works as well as commercial options costing ten times more.
Materials needed:
Step-by-step construction:
Design variations:
Cost breakdown:
Pro tips for DIY frames:
A homemade paper tuning frame works just as well as commercial options and can be customized to your space and needs. Many archers build multiple frames, a large one for home use and a smaller, portable version for travel. The simple design means repairs are easy and paper replacement takes less than a minute.
For archers just getting started with bow tuning, building your own frame is an excellent first project that pays dividends every time you need to check your bow’s tune. The frame becomes a permanent part of your archery toolkit, useful for initial setup, seasonal checks, and troubleshooting accuracy problems.
Beginners should have their first bow professionally tuned at a pro shop to establish a baseline, then learn paper tuning themselves for ongoing maintenance and adjustments. Professional tuning ensures your initial setup is correct and eliminates equipment issues that might be confused with learning curve challenges, while learning to paper tune yourself provides independence and deeper understanding of bow mechanics.
Benefits of professional tuning for beginners:
When beginners should learn DIY paper tuning:
Learning path for beginners:
What beginners should NOT attempt:
Cost considerations:
Professional bow tuning typically costs $30-60, which includes paper tuning, walk-back tuning, and verification at distance. This one-time investment ensures your bow is set up correctly and provides a reference point for future adjustments. Learning to paper tune yourself saves money on routine checks but doesn’t eliminate the need for occasional professional service.
For beginners working with a beginner bow setup, the most important factor is developing consistent shooting form. Even a perfectly tuned bow won’t shoot well with inconsistent technique. Focus on form fundamentals first, then learn tuning as your skills develop. Many beginners waste time chasing equipment adjustments when the real issue is shooting mechanics.
Practical recommendation: Get your bow professionally tuned initially, shoot for a few months to develop consistency, then learn paper tuning as your next skill. This progression builds competence without overwhelming you with technical details before you’re ready to apply them effectively.
How long does paper tuning a bow take? Paper tuning typically takes 30-60 minutes for a bow that’s close to proper tune, though bows with significant issues may require 2-3 hours of adjustments and testing. Most of the time is spent making small adjustments, shooting arrows, and replacing paper between shots.
Can you paper tune without a frame? Yes, you can paper tune by having someone hold a sheet of paper taut, though this is less consistent and safe than using a proper frame. The person holding the paper must keep it perfectly still and positioned correctly, which is difficult and potentially dangerous if they’re too close to the arrow path.
What type of paper works best for paper tuning? Brown kraft paper or newsprint works best because it tears cleanly and shows clear patterns without being too thick or too thin. Avoid glossy paper, cardboard, or tissue paper, they either don’t tear cleanly or tear too easily to show accurate patterns.
How often should you paper tune your bow? Paper tune your bow at the start of each season, after changing arrows or rest components, or whenever you notice accuracy problems. Bows that haven’t been adjusted typically hold their tune for months, so frequent paper tuning isn’t necessary unless you’re making equipment changes.
Does arrow weight affect paper tuning? Yes, arrow weight affects spine stiffness and flight characteristics, so changing arrow weight often requires re-tuning. Heavier arrows act stiffer while lighter arrows act weaker, which can change tear patterns even if the physical spine rating stays the same.
Can weather affect paper tuning results? Weather has minimal effect on paper tuning itself, though high humidity can make paper sag and wind can move the paper frame. Temperature affects bow performance slightly, but paper tuning indoors eliminates most weather variables and provides more consistent results.
What if my paper tears are inconsistent between shots? Inconsistent tear patterns usually indicate shooting form problems rather than bow tuning issues. Verify you’re using consistent grip pressure, release technique, and follow-through before making equipment adjustments. Damaged arrows or loose nocks can also cause inconsistent tears.
Should you paper tune with your hunting arrows or practice arrows? Always paper tune with the exact arrows you’ll use for hunting or competition, including the same weight, spine, length, and fletching configuration. Different arrows fly differently, so tuning with practice arrows doesn’t guarantee your hunting arrows will be properly tuned.
Can you paper tune a crossbow the same way? Yes, crossbows can be paper tuned using the same basic principles, though you should stand 8-10 feet from the paper due to higher arrow speeds. Crossbow tuning focuses more on bolt spine and rest position since there’s no archer’s paradox to account for.
What does a diagonal tear mean in paper tuning? A diagonal tear indicates both horizontal and vertical tuning issues occurring simultaneously. Fix the horizontal component (left/right tear) first by adjusting rest position, then address the vertical component (high/low tear) by adjusting nocking point height.
Is paper tuning accurate enough for competition archery? Paper tuning provides a good baseline for competition setups but should be verified with walk-back tuning and shooting groups at distance. Competitive archers use paper tuning as one diagnostic tool among several rather than relying on it exclusively for precision tuning.
Can you paper tune with mechanical broadheads? Yes, mechanical broadheads can be paper tuned since the blades are closed during flight, making them fly similarly to field points. However, always verify mechanical broadhead flight at distance since even closed blades create slightly different aerodynamics than field points.