Newsletter Subscribe
Enter your email address below and subscribe to our newsletter

All voices matter
All voices matter
 ByTravis
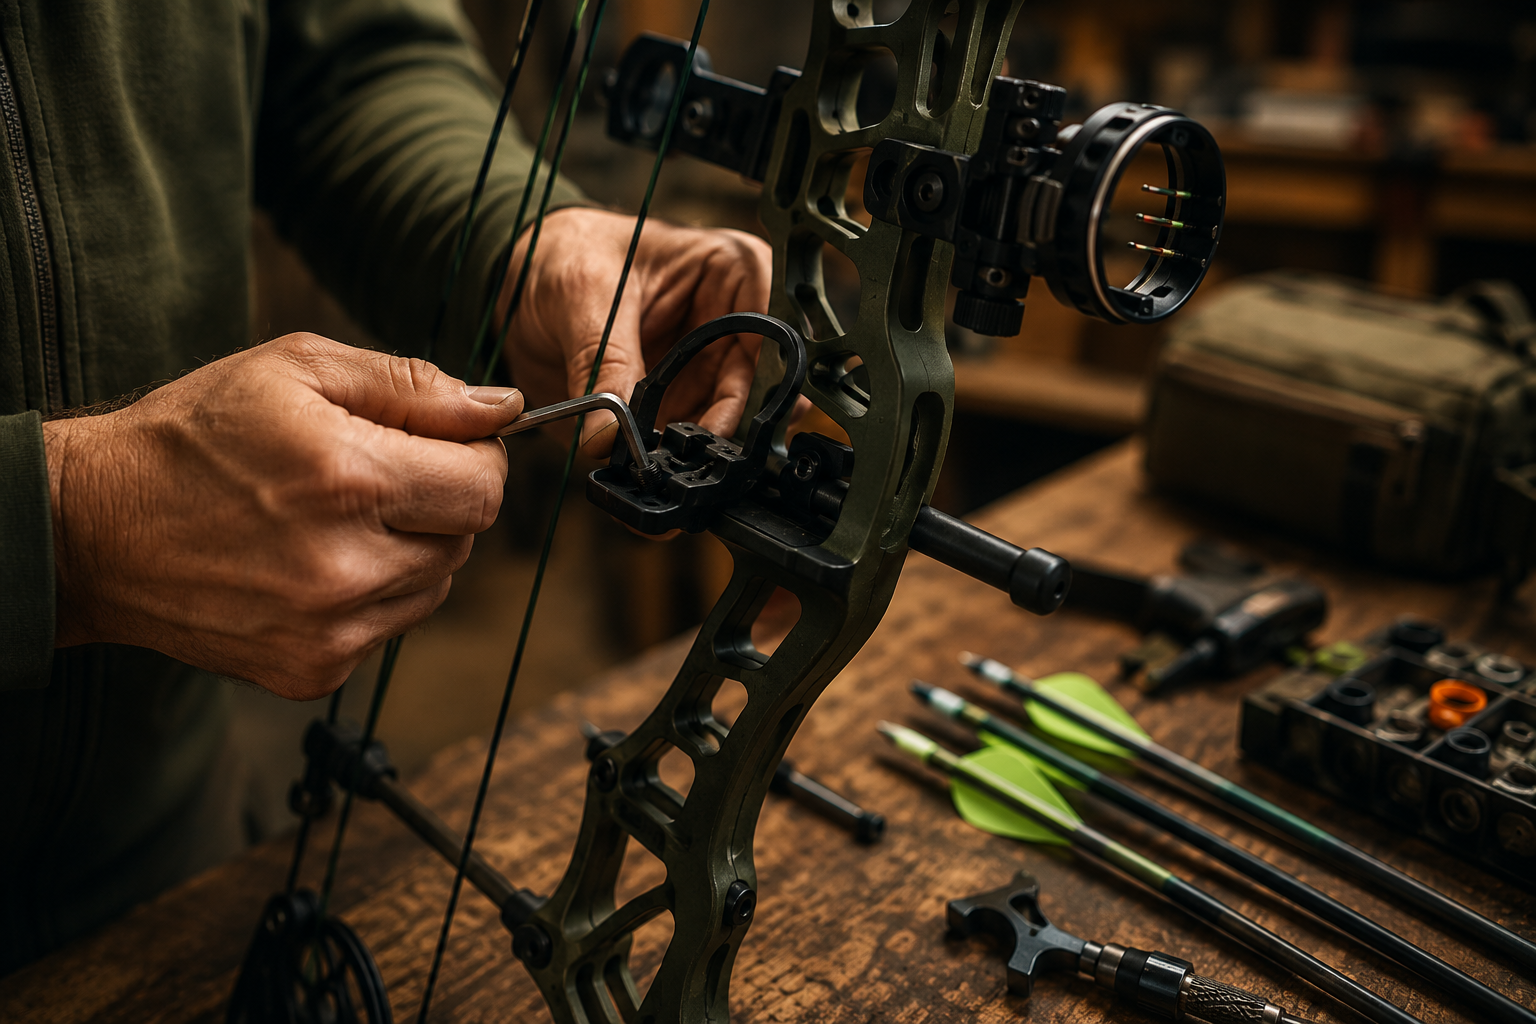
Bow tuning is the process of adjusting your bow's components - rest position, nocking point, cam timing, centershot - so arrows fly straight and consistently.
Affiliate Disclaimer: We are a participant in the Amazon Services LLC Associates Program, an affiliate advertising program designed to provide a means for sites to earn advertising fees by advertising and linking to Amazon.com. As an Amazon Associate I earn from qualifying purchases. We also participate in other affiliate programs.
Bow tuning is the process of adjusting your bow’s components so that arrows fly straight and consistently toward your target. It involves fine-tuning elements like arrow rest position, nocking point height, cam timing, and centershot alignment to eliminate arrow flight problems such as fishtailing, porpoising, or inconsistent grouping. Proper bow tuning dramatically improves accuracy and makes you a more effective archer, whether you’re shooting for recreation, competition, or hunting.
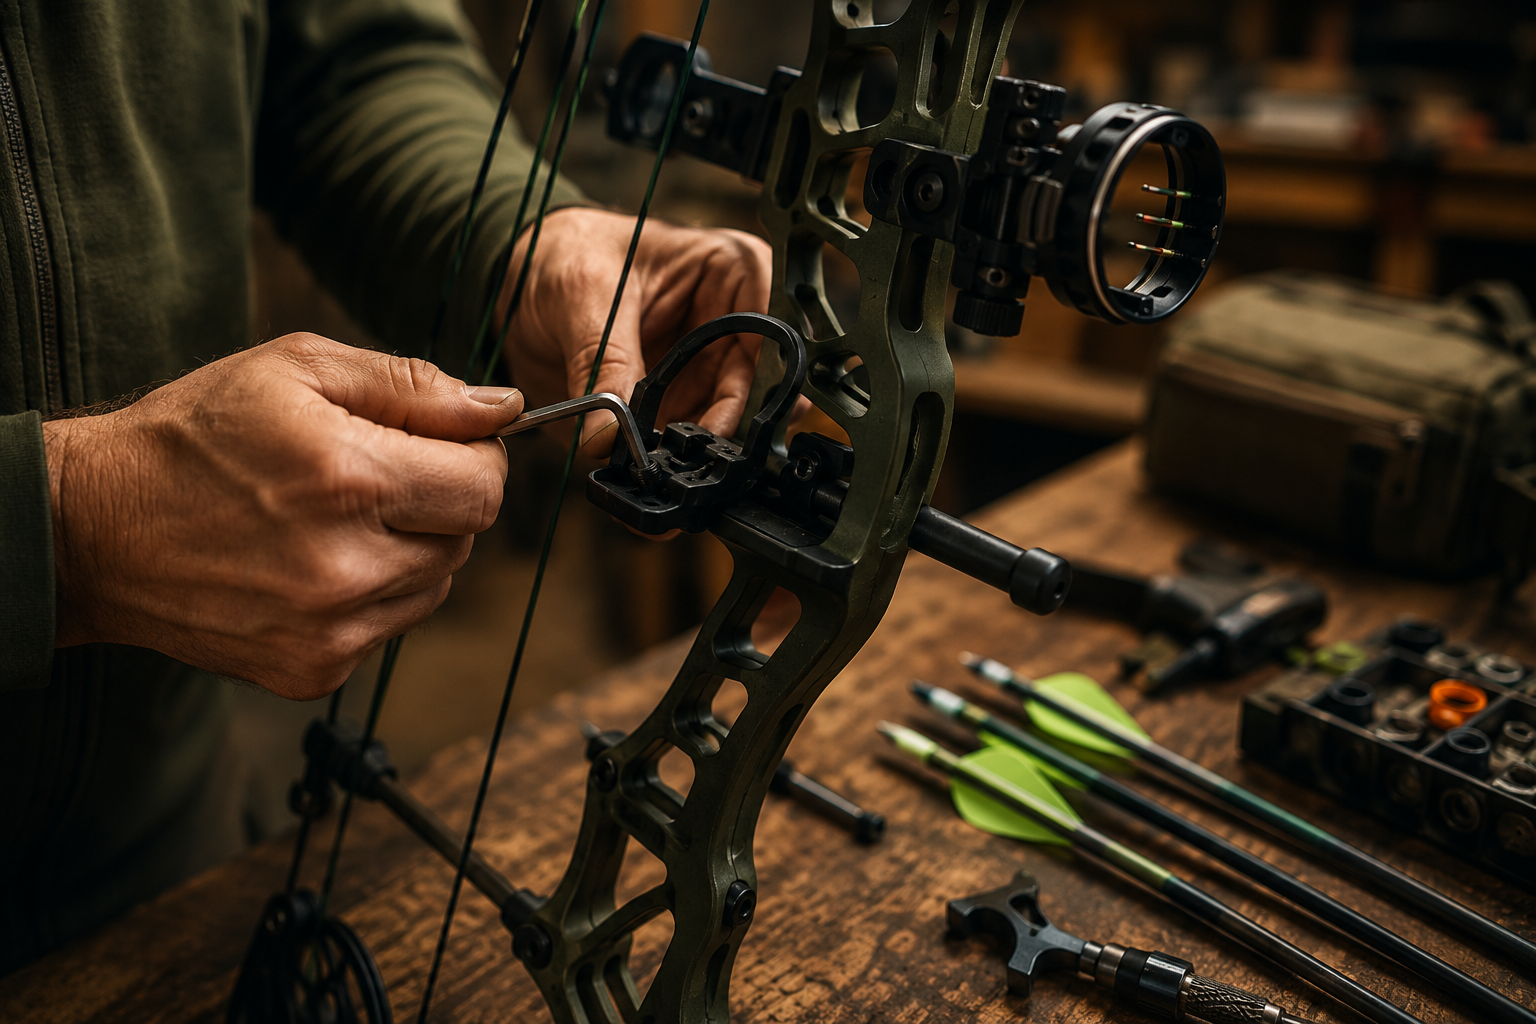
Bow tuning means making small mechanical adjustments to your bow so that arrows leave the string cleanly and fly in a perfectly straight line toward your aiming point. For beginners, think of it as aligning all the moving parts of your bow to work together harmoniously, similar to getting a wheel alignment on your car.
When you shoot an arrow, dozens of factors affect its flight path. The arrow must flex around the bow (called “archer’s paradox”), clear the rest without contact, and recover from the initial launch disturbance within the first few yards. Tuning ensures this process happens consistently shot after shot.
The main components adjusted during tuning include:
For someone just getting started with archery, bow tuning might seem intimidating, but it follows a logical sequence. Most beginners start with basic paper tuning or walk-back tuning methods that reveal exactly what adjustments are needed.
You need to tune your bow because even small misalignments cause arrows to fly erratically, reducing accuracy and making it nearly impossible to shoot consistent groups. An untuned bow forces you to compensate for mechanical problems with shooting technique, creating bad habits that limit your progress as an archer.
Tuning directly impacts these critical performance areas:
Think of it this way: if your arrow rest is positioned too far left, every arrow will start its flight path angled to the right. You might adjust your sight to compensate, but the arrows are still flying crooked. Wind, distance changes, or slight form variations will expose this underlying problem. Tuning fixes the root cause rather than masking symptoms.
For hunters, tuning becomes even more critical. An arrow that flies true at 20 yards on the practice range might veer off course at 40 yards in the field, resulting in wounded game. Competitive archers shooting target archery need tuning to achieve the precision required for scoring zones measured in millimeters.
Bow tuning and bow sighting are two distinct processes that work together but serve different purposes. Tuning adjusts the bow’s mechanical setup to make arrows fly straight, while sighting adjusts your aiming reference (sight pins) to match where those straight-flying arrows impact the target.
Here’s the key distinction:
Tuning happens first and addresses arrow flight quality. You’re looking at how the arrow leaves the bow, whether it fishtails (wobbles side to side), porpoises (wobbles up and down), or flies with the nock high or low. A properly tuned bow produces arrows that fly with minimal oscillation and recover quickly from the initial flex.
Sighting happens after tuning and addresses point of impact. Once arrows are flying cleanly, you adjust your sight pins so that when you aim at the bullseye, the arrow actually hits the bullseye at various distances. This is purely about aligning your aiming system with your arrow’s trajectory.
Common scenario that illustrates the difference:
A beginner notices arrows consistently hitting 6 inches to the right of where they aim. The instinct is to move the sight pin right. But if the arrows are also showing nock-right tears in paper tuning, the real problem is tuning, not sighting. Fix the tuning first (adjust rest position), then sight in. Otherwise, you’re building compensation into your sight settings that will cause problems later.
Professional archery shops always tune before sighting for this exact reason. Attempting to sight in an untuned bow is like trying to aim a bent rifle barrel, you might hit the target at one specific distance, but the underlying problem remains.
Professional bow tuning at an archery shop typically costs between $30 and $75, depending on the shop’s location, the complexity of your bow setup, and what specific services are included. Most shops offer basic tuning packages that cover essential adjustments, with premium packages available for competition-level precision tuning.
Typical pricing breakdown:
Many archery retailers include free basic tuning when you purchase a bow from them, and some offer discounted or free tuning for the first year of ownership. This is worth asking about when shopping for a beginner bow or compound bow.
What you get for your money:
A professional tuning session typically includes paper tuning to diagnose arrow flight, rest and nocking point adjustments, centershot alignment, cam timing verification (for compound bows), and often a preliminary sight-in at 20 yards. The technician should also check for any mechanical issues like loose screws, worn strings, or damaged components.
The investment is worthwhile for beginners who lack the tools, knowledge, or confidence to tune their own equipment. An experienced technician can complete in 30-45 minutes what might take a beginner several frustrating hours of trial and error. However, learning to tune your own bow eventually saves money and gives you the ability to make field adjustments during hunting trips or tournaments.
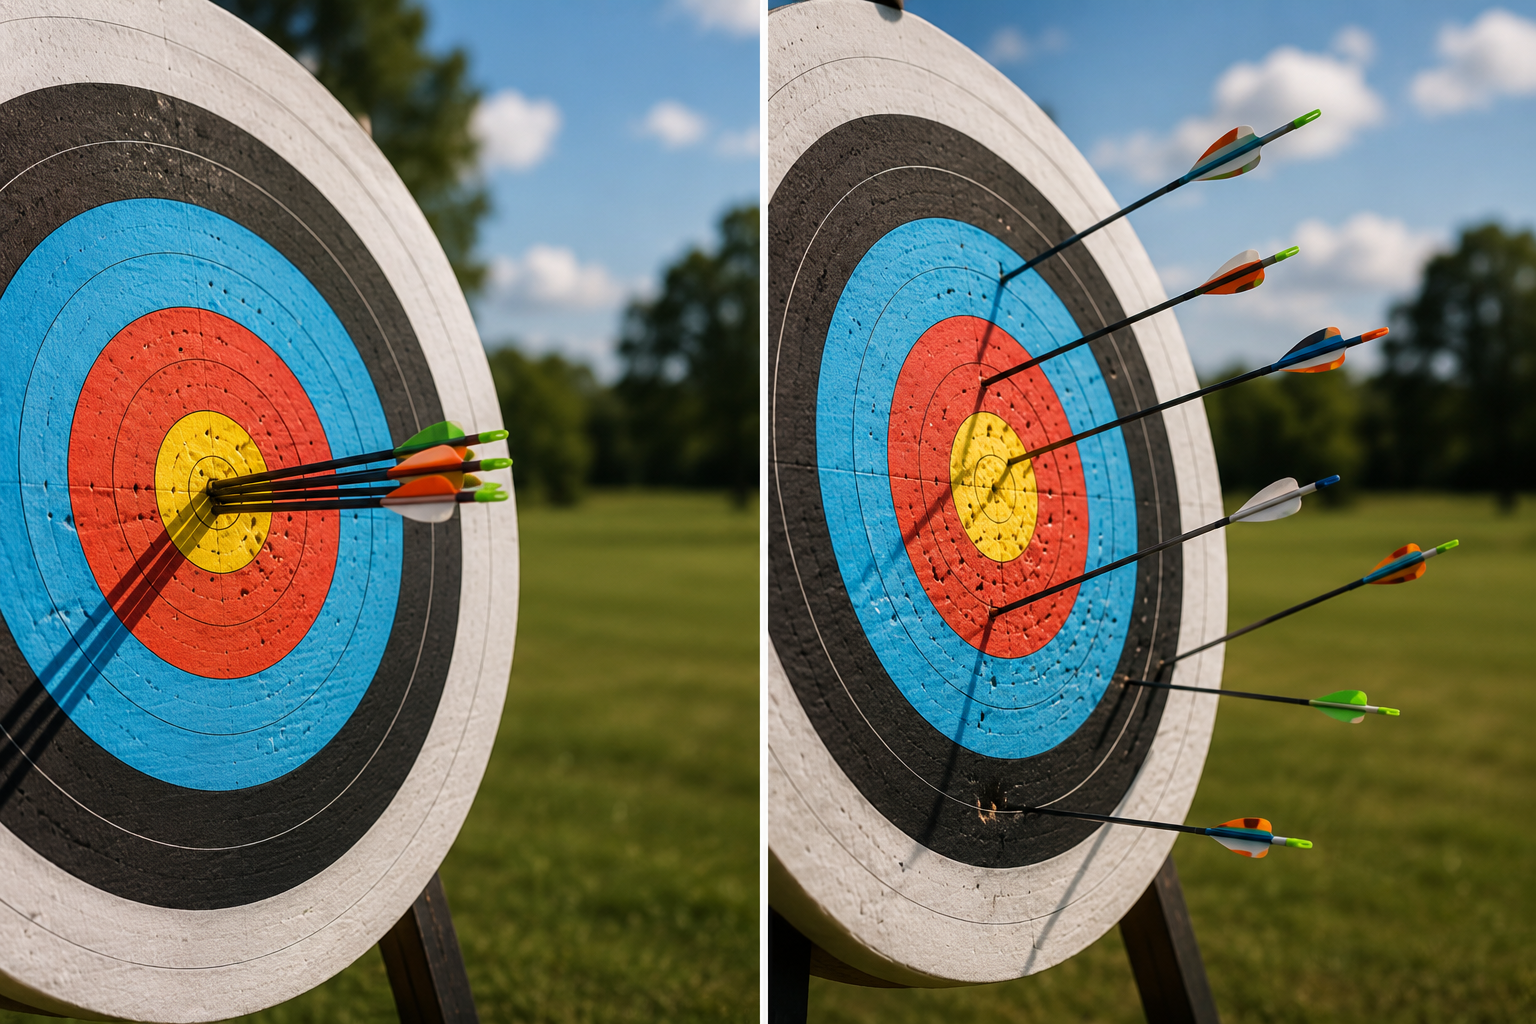
Yes, you can absolutely tune your bow yourself at home with basic tools, patience, and willingness to learn. Most tuning adjustments require only Allen wrenches and a few inexpensive accessories, making DIY tuning accessible to beginners who want to understand their equipment better and save on shop fees.
Essential tools for home tuning:
The paper tuning method is the most beginner-friendly approach. You shoot an arrow through a sheet of paper from about 6 feet away and examine the tear pattern. A perfect “bullet hole” (clean round tear with minimal fletching marks) indicates good tune. Tears showing nock-high, nock-low, nock-left, or nock-right patterns tell you exactly which adjustments to make.
Step-by-step basic tuning process:
When to seek professional help:
Some adjustments require specialized tools or expertise. Cam timing issues, draw length changes, and string replacement typically need a bow press and technical knowledge. If you’re making adjustments but seeing no improvement, or if your bow has mechanical problems, visiting a pro shop is the smart choice.
Many archers start by having their bow professionally tuned, then maintain that tune themselves with minor adjustments as needed. This hybrid approach builds skills gradually while ensuring your initial setup is correct.
Your bow needs tuning when arrows consistently fly erratically, group poorly, or show visible flight problems like fishtailing or porpoising. These symptoms indicate mechanical misalignment that no amount of practice or sight adjustment will fix.
Clear indicators your bow is out of tune:
Subtle signs often overlooked by beginners:
Even if your bow seems to shoot “okay,” subtle tuning issues might be limiting your performance. If you notice that your groups tighten significantly on calm days but open up in wind, your tune might be marginal. If arrows fly well at 20 yards but drift at 40+ yards, tuning refinement is needed.
Changes in your setup also necessitate retuning. Switching arrow types, changing draw weight, replacing strings, or adding accessories like stabilizers all affect tune. After any equipment modification, verify your tune with paper testing or group shooting.
The “good enough” trap:
Many recreational archers shoot with mediocre tune because their groups are “good enough” for their purposes. While this might work for casual backyard shooting, it creates a performance ceiling. Proper tuning transforms a 4-inch group into a 2-inch group at the same distance, doubling your effective accuracy with no additional practice required.
If you don’t tune your bow, you’ll experience inconsistent accuracy, premature equipment wear, and frustration that can stall your development as an archer. An untuned bow forces you to compensate for mechanical problems with shooting technique, creating bad habits that become increasingly difficult to correct over time.
Immediate consequences of shooting an untuned bow:
Long-term impact on skill development:
Beginners who shoot untuned bows often develop compensatory techniques to work around mechanical problems. You might unconsciously cant the bow, change your anchor point, or adjust your release to make arrows hit closer to target. These compensations become ingrained habits that must be unlearned later, essentially requiring you to relearn proper form from scratch.
For hunters, an untuned bow is particularly problematic. The ethical responsibility to make clean, humane kills requires equipment that performs reliably under field conditions. An arrow that flies 3 inches off course at 30 yards might mean the difference between a clean harvest and a wounded animal.
The compounding effect:
Small tuning problems compound over distance. An arrow that leaves the bow with a 2-degree angle error might only miss by an inch at 10 yards, but that same error produces a 6-inch miss at 30 yards and a 12-inch miss at 60 yards. This is why competitive archers obsess over tuning, at tournament distances, tiny misalignments become magnified into scoring zone differences.
Both compound bows and recurve bows require tuning, but the specific adjustments and complexity differ significantly between the two bow types. Compound bows have more adjustable components and tighter tolerances, making tuning more complex but also more precise, while recurve bows have fewer adjustable parts but require careful attention to arrow spine and plunger tuning.
Compound bow tuning considerations:
Compound bows feature cams, cable systems, adjustable rests, and multiple mounting points that all affect arrow flight. Tuning involves adjusting rest position, nocking point height, cam timing (ensuring both cams rotate synchronously), centershot alignment, and draw length. The mechanical advantage and let-off of compounds mean that small misalignments can cause significant arrow flight problems.
Modern compound bows with drop-away rests are generally more forgiving of tuning errors than older models, but still require proper setup for optimal performance. The good news is that once a compound bow is properly tuned, it tends to hold that tune well unless components are changed or strings stretch.
Recurve bow tuning considerations:
Recurve bows have simpler mechanical systems but present their own tuning challenges. The primary adjustments involve plunger (button) tension and position, nocking point height, and arrow spine selection. Because recurve arrows must flex around the riser (archer’s paradox is more pronounced), matching arrow spine to bow weight and draw length becomes critical.
Olympic-style recurve archers often spend considerable time fine-tuning plunger tension to achieve perfect arrow clearance. Traditional recurve shooters without plungers must rely heavily on proper arrow spine selection and shooting technique, making “tuning” more about equipment matching than mechanical adjustment.
Which requires more tuning attention?
Compound bows generally require more initial setup time due to their complexity, but maintain tune better over time. Recurve bows need less mechanical adjustment but require more frequent verification because string stretch and limb settling affect tune more noticeably. Both benefit equally from proper tuning in terms of accuracy improvement.
Regardless of bow type, the fundamental principle remains the same: tuning aligns your equipment so arrows fly straight and consistently, allowing you to focus on developing proper shooting form rather than fighting your gear.
You should verify your bow’s tune at the beginning of each shooting season, after any equipment changes, and whenever you notice accuracy problems. Competitive archers typically tune before major tournaments, while recreational shooters and hunters can maintain good performance with tuning checks once or twice per year.
Recommended tuning schedule by archer type:
Situations that require immediate retuning:
Certain changes to your setup necessitate going through the tuning process again. These include changing arrow types or weights, adjusting draw weight, replacing strings or cables, adding or removing accessories (stabilizers, sights, rests), and after any bow repair or maintenance. Even switching from field points to broadheads often requires minor tuning adjustments.
Quick tune verification method:
Between full tuning sessions, you can verify your tune with a simple group shooting test. Shoot a 5-arrow group at 20 yards using your best form. If the group is tight (all arrows within a 3-4 inch circle) and centered on your aiming point, your tune is holding. If arrows scatter or show consistent directional bias, it’s time for a tuning session.
String stretch and settling:
New strings stretch during the first 100-200 shots, which can affect nocking point height and cam timing. Plan to check and possibly adjust tune after breaking in new strings. After this initial settling period, modern synthetic strings are quite stable and hold tune well.
Many experienced archers develop a feel for when their bow is shooting “right” versus when something feels off. Trust your instincts, if your bow suddenly feels or sounds different, or if your groups open up without explanation, a quick tune check is worthwhile even if you’re not on your regular schedule.
The most common mistake beginners make when tuning a bow for the first time is making multiple large adjustments simultaneously, which makes it impossible to determine which change actually improved (or worsened) arrow flight. Effective tuning requires changing one variable at a time in small increments, testing after each adjustment.
Frequent beginner tuning errors:
The “chasing your tail” syndrome:
Beginners often fall into a pattern of making an adjustment, seeing unexpected results, making another adjustment in a different direction, then another, until they’ve completely lost track of where they started. This random walk approach rarely produces good results. Instead, establish a baseline (paper tune or group), make one small change, test again, and evaluate whether that specific change helped or hurt.
Form consistency matters more than you think:
Your bow can only be tuned as well as you can shoot it. If you’re torquing the grip, punching the release, or dropping your bow arm, the resulting arrow flight will look like a tuning problem even if the bow is perfectly set up. Before diving deep into tuning adjustments, ensure you’re shooting with reasonably consistent form. Consider having an experienced archer or coach observe your shooting during tuning sessions.
The right sequence prevents mistakes:
Follow a logical tuning sequence: start with basic setup (correct draw length, appropriate draw weight, proper arrow spine), then rough tune with paper testing, followed by fine-tuning with group shooting and walk-back tests. Skipping steps or working out of sequence creates confusion and wasted effort.
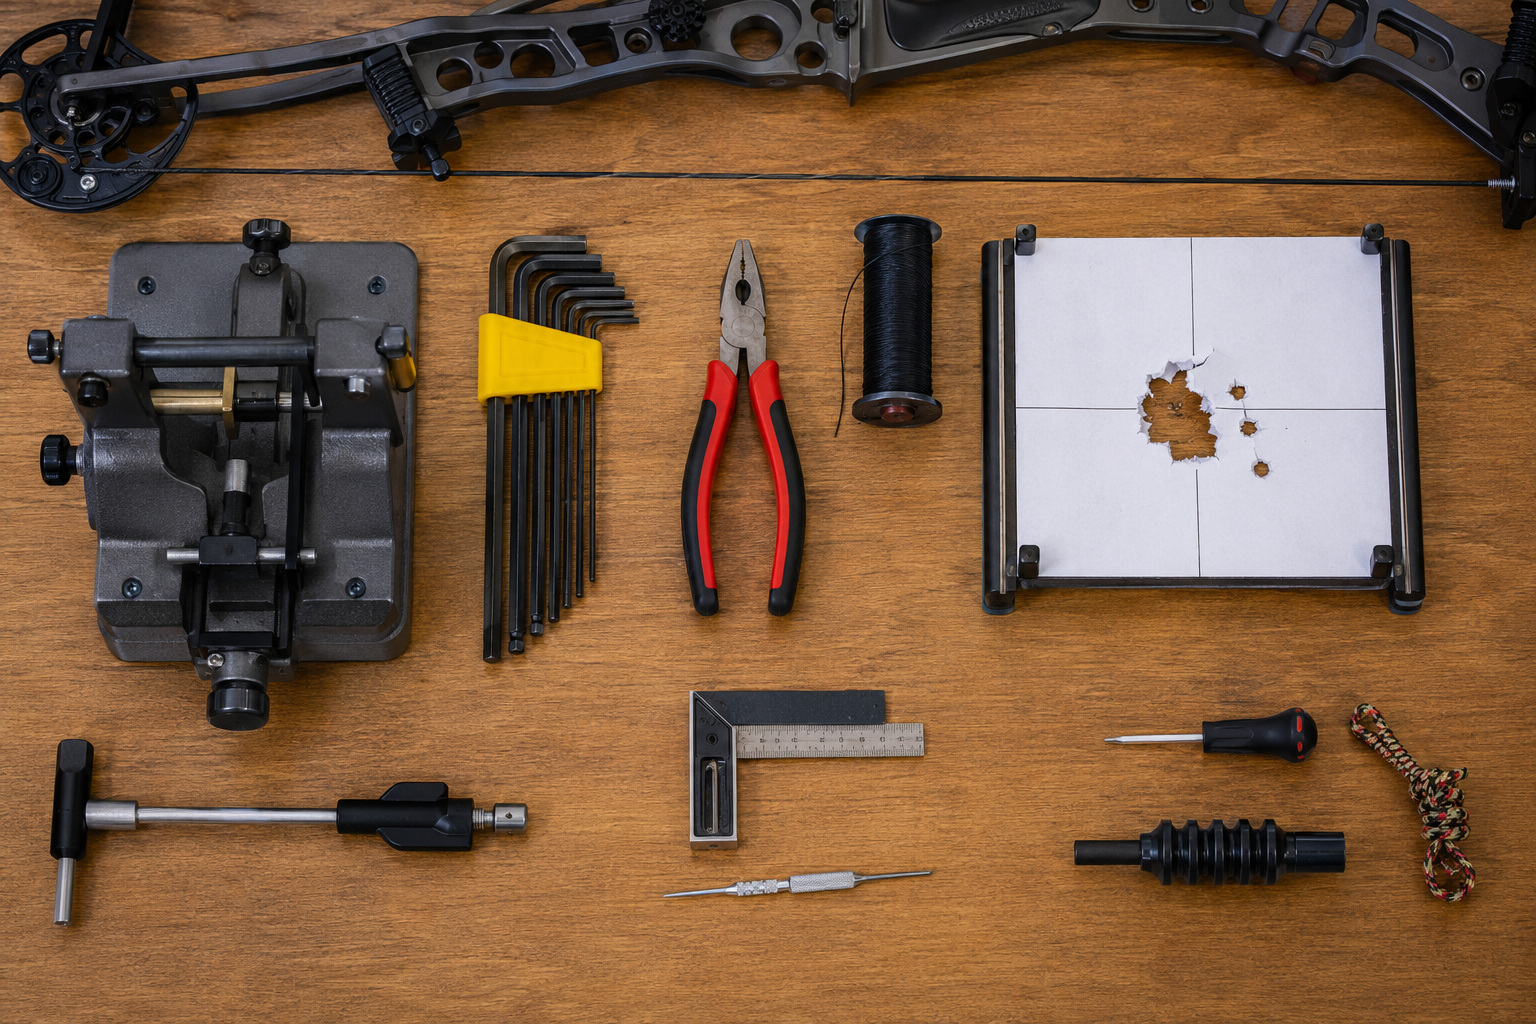
You need only basic tools to perform most bow tuning adjustments yourself, primarily a set of Allen wrenches, a bow square, and materials for paper tuning. These inexpensive items cover 90% of tuning tasks that beginners and intermediate archers will encounter, with more specialized tools only necessary for advanced adjustments or specific bow types.
Essential tuning toolkit (under $50 total):
Optional but helpful tools:
DIY alternatives:
Many tuning tools can be improvised. A paper tuning frame is simply a large cardboard box with paper stretched across an opening. A bow square can be approximated with a carpenter’s square and ruler, though a proper bow square is worth the small investment. Some archers even use smartphone apps with level and measurement functions to assist with tuning.
When tools aren’t the limiting factor:
Having the right tools helps, but knowledge and patience matter more. An experienced archer with just Allen wrenches and paper can achieve excellent tune, while a beginner with a full professional toolkit might struggle. Consider investing time in learning tuning principles through videos, articles, and practice before spending heavily on specialized equipment.
For most archers starting out, purchasing a basic Allen wrench set and bow square, then using shop services for complex adjustments requiring a bow press, represents the best balance of cost and capability. As your skills and interest grow, you can add more specialized tools to your collection.
Bow tuning principles remain the same whether you’re shooting for hunting or target archery, but hunters must account for broadhead flight and field conditions while target archers can optimize for maximum precision under controlled range conditions. Both applications benefit from proper tune, though the acceptable tolerance levels and specific priorities differ.
Hunting-specific tuning considerations:
Hunters must tune their bows with the actual broadheads they’ll use in the field, not just field points. Fixed-blade broadheads are particularly sensitive to tuning issues because their large cutting surfaces act like wings, magnifying any arrow flight problems. An arrow that flies perfectly with field points might plane or spiral with broadheads if tune isn’t precise.
The walk-back tuning method is especially valuable for hunters because it reveals tuning problems that only appear at longer distances. Shooting from 20, 30, 40, and 50 yards shows whether arrows maintain their trajectory or drift left/right as distance increases. This information is critical for ethical shot placement on game animals.
Target archery tuning priorities:
Target archers shooting at known distances under controlled conditions can achieve extremely tight tolerances. Indoor target shooters often use micro-adjustable rests and laser alignment tools to achieve precision measured in thousandths of an inch. The goal is absolute consistency and the tightest possible groups.
Outdoor target archers must also consider wind drift and longer distances, making arrow selection and tune optimization even more critical. Olympic recurve archers, for example, spend considerable time tuning plunger tension and arrow spine matching to achieve the consistency needed for 70-meter competition.
Broadhead tuning process:
After achieving good tune with field points, hunters should verify tune with broadheads by shooting groups at 30-40 yards. If broadheads impact differently than field points, minor rest adjustments (typically moving the rest in the direction the broadheads are hitting) can bring them into alignment. Some hunters use mechanical broadheads specifically because they fly more like field points and are less sensitive to tuning issues.
Common ground:
Regardless of your archery discipline, proper tuning improves accuracy, consistency, and confidence. A well-tuned bow performs better in both the tree stand and on the tournament line. The fundamental process, paper tuning, rest adjustment, verification shooting, applies universally.
Professional bow tuning typically takes 30 to 60 minutes at an archery shop, depending on the bow’s condition, complexity of adjustments needed, and whether any mechanical issues are discovered during the process. A basic tune on a bow that’s close to proper setup might take only 20-30 minutes, while a complete tune on a bow with multiple issues could extend to 90 minutes.
Typical timeline breakdown:
Factors that extend tuning time:
If your bow has mechanical problems (loose screws, worn strings, damaged components), the technician will need additional time to address these issues. Bows that are significantly out of tune or have never been properly set up require more iteration to dial in. Custom or unusual bow configurations might also take longer as the technician works through less common adjustment scenarios.
What to expect during your appointment:
Most shops ask you to bring your arrows so they can tune with your actual shooting setup. The technician will likely have you shoot a few arrows to observe your form and the bow’s behavior. They should explain what they’re finding and what adjustments they’re making, turning the session into a learning opportunity.
Scheduling considerations:
Call ahead to schedule tuning appointments, especially during peak seasons (pre-hunting season in late summer/early fall, and early spring). Walk-in tuning might be available during slow periods, but expect to wait or leave your bow for later pickup. Some shops offer while-you-wait service, while others prefer to keep the bow for a few hours or even overnight to ensure thorough work without time pressure.
The time investment is worthwhile, 45 minutes of professional tuning can solve problems that might take you several frustrating hours to diagnose and fix on your own, especially when you’re still learning the process.
Yes, bow tuning is absolutely worth it for casual archers because it dramatically improves accuracy and enjoyment with minimal time and cost investment. Even recreational shooters who only practice occasionally will notice tighter groups, more consistent performance, and greater satisfaction when their equipment is properly tuned.
Benefits for recreational archers:
Casual archers often assume that tuning is only for serious competitors or hunters, but this misconception prevents them from experiencing how much better archery becomes with properly tuned equipment. A well-tuned bow is simply more fun to shoot, arrows go where you aim, groups tighten, and you spend less time frustrated by unexplained misses.
The cost-to-benefit ratio strongly favors tuning even for occasional shooters. Spending $40-50 for professional tuning once per year represents a tiny fraction of what most archers invest in arrows, targets, and range fees. The accuracy improvement often exceeds what you’d gain from months of additional practice with an untuned bow.
The confidence factor:
Knowing your equipment is properly set up removes a major source of doubt. When you miss, you know it’s a form or execution issue, not an equipment problem. This clarity accelerates skill development because you can focus on improving your shooting rather than wondering if your bow is working against you.
When tuning matters less:
If you’re shooting at very close distances (under 10 yards) with a forgiving target, tuning issues might not be apparent. Similarly, if you’re genuinely satisfied with your current accuracy and have no aspirations to improve, the status quo might be acceptable. However, most archers who experience properly tuned equipment never want to go back to shooting an untuned bow.
The learning value:
Even if you have your bow professionally tuned initially, understanding the tuning process helps you maintain your equipment and troubleshoot problems. Many casual archers find that learning basic tuning transforms archery from a simple recreational activity into a more engaging hobby with technical depth.
For the minimal investment required, tuning delivers outsized returns in accuracy, consistency, and enjoyment. Whether you shoot once a month or every day, your arrows deserve to fly straight.
How do I know if my bow is properly tuned?
Your bow is properly tuned when arrows produce clean bullet-hole tears in paper tuning, group tightly at various distances, and fly without visible wobbling or fishtailing. You should hear a clean, quiet release with no contact noises, and arrows should impact the target with nocks level to the shaft.
Can I tune my bow without a bow press?
Yes, most basic tuning adjustments including rest position, nocking point height, and centershot alignment require only Allen wrenches and don’t need a bow press. You only need a press for cam timing adjustments, limb bolt changes beyond a few turns, or string replacement.
What is paper tuning and why is it important?
Paper tuning involves shooting an arrow through a sheet of paper stretched in a frame to reveal how the arrow is flying. The tear pattern shows whether the arrow is leaving the bow straight or at an angle, providing clear diagnostic information about what adjustments are needed.
Will tuning my bow make me a better archer?
Tuning won’t directly improve your shooting form or technique, but it removes equipment-related accuracy limitations that might be holding you back. With a properly tuned bow, your practice time becomes more productive because you’re developing skills rather than compensating for mechanical problems.
Do I need to retune after changing arrows?
Yes, changing arrow spine, weight, or length typically requires retuning because these factors affect how arrows flex and fly. Even switching between different arrow brands with supposedly identical specifications can sometimes necessitate minor tuning adjustments.
What’s the difference between bare shaft tuning and paper tuning?
Paper tuning shows how fletched arrows are flying by examining the tear pattern in paper, while bare shaft tuning involves shooting unfletched arrows alongside fletched ones to see if they impact the same point. Bare shaft tuning is more advanced and reveals dynamic spine issues that paper tuning might miss.
Can weather affect my bow’s tune?
Extreme temperature changes can affect string and cable length slightly, potentially impacting tune. However, modern synthetic strings are quite stable, and most archers won’t notice tune changes from normal weather variations. Humidity and temperature extremes are more likely to affect arrow spine than bow tune.
Should I tune my bow before or after sighting it in?
Always tune your bow before sighting it in. Tuning establishes proper arrow flight, then sighting adjusts your aiming reference to match where those properly flying arrows impact. Sighting an untuned bow builds compensation into your sight settings that will cause problems later.
How much does arrow spine affect tuning?
Arrow spine (stiffness) is critical to tuning success. Arrows that are too stiff or too weak for your bow’s draw weight and length will never tune properly regardless of mechanical adjustments. Proper spine selection is a prerequisite for effective tuning, not a substitute for it.
Can I tune a bow that’s too heavy for me to draw comfortably?
While you can mechanically tune any bow, tuning requires shooting it with consistent form. If the draw weight is too heavy for you to control properly, you won’t be able to execute consistent shots needed for tuning verification. Reduce draw weight to a comfortable level before attempting to tune.
What’s walk-back tuning and when should I use it?
Walk-back tuning involves shooting at a vertical line from increasing distances (20, 30, 40 yards) while aiming at the same point. If arrows drift left or right as distance increases, it indicates centershot misalignment. This method is excellent for fine-tuning after basic paper tuning is complete.
Do I need different tuning for indoor versus outdoor shooting?
The fundamental tune remains the same, but some competitive archers make minor adjustments for indoor versus outdoor conditions. Indoor shooters might prioritize absolute precision at short distances, while outdoor archers optimize for wind resistance and longer ranges. For most archers, one good tune works for both environments.
Bow tuning transforms archery from a frustrating guessing game into a rewarding pursuit of precision and skill. By aligning your bow’s mechanical components through systematic adjustments, you eliminate equipment-related accuracy problems and unlock your true shooting potential. Whether you’re a casual weekend archer, a dedicated target competitor, or a serious bowhunter, proper tuning delivers measurable improvements in consistency, grouping, and confidence.
The process doesn’t require expensive tools or expert-level knowledge, basic tuning with paper testing and rest adjustments is accessible to any archer willing to invest a few hours learning the fundamentals. For those who prefer professional service, the modest cost of shop tuning represents one of the best investments you can make in your archery experience.
Your next steps:
Start by assessing your current setup. Shoot a few groups at 20 yards and honestly evaluate your consistency. If arrows scatter unpredictably or you notice flight problems like fishtailing, it’s time to tune. Beginners should consider having their first tune done professionally while observing the process and asking questions. This establishes a proper baseline and provides hands-on learning.
Once your bow is tuned, maintain it by checking tune at the start of each season and after any equipment changes. Learn basic paper tuning so you can verify and adjust tune yourself as needed. Document your settings and adjustments in a notebook or phone app, this record becomes invaluable for troubleshooting and understanding your equipment.
Remember that tuning and shooting skill develop together. A perfectly tuned bow won’t compensate for poor form, but it removes equipment variables that mask or compound technique problems. As your skills progress, your ability to detect and correct subtle tuning issues will grow, creating a positive feedback loop of improvement.
The satisfaction of watching arrows fly straight and group tightly, knowing your equipment is dialed in and performing at its best, is one of archery’s great pleasures. Take the time to tune your bow properly, your targets will thank you.