Newsletter Subscribe
Enter your email address below and subscribe to our newsletter

All voices matter
All voices matter
 ByTravis
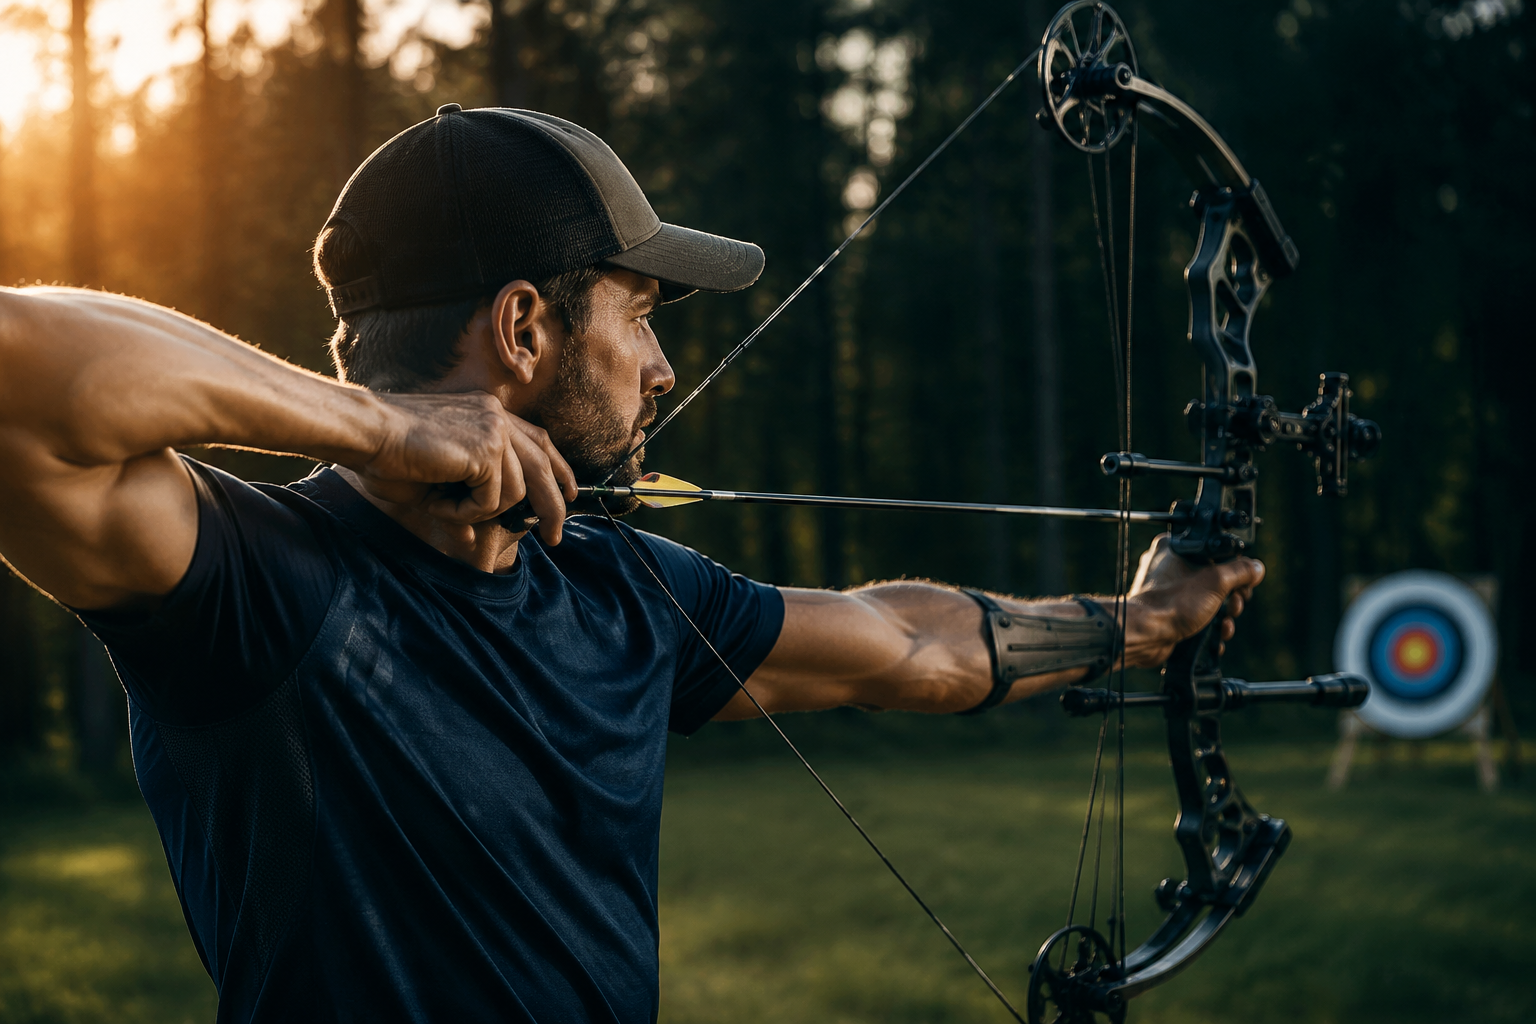
Drawing smoothly comes down to proper alignment, using your back and shoulder muscles rather than arm strength, and a fluid, unhurried motion from grip to full draw.
Affiliate Disclaimer: We are a participant in the Amazon Services LLC Associates Program, an affiliate advertising program designed to provide a means for sites to earn advertising fees by advertising and linking to Amazon.com. As an Amazon Associate I earn from qualifying purchases. We also participate in other affiliate programs.
Drawing a bow smoothly requires proper body alignment, controlled muscle engagement through the back and shoulders, and consistent anchor points. The key is using large back muscles rather than arm strength alone, maintaining steady breathing, and executing a fluid motion from initial grip to full draw without jerking or hesitation. Most archers achieve smooth draws by focusing on pushing the bow hand forward while pulling the draw hand back in one coordinated movement.
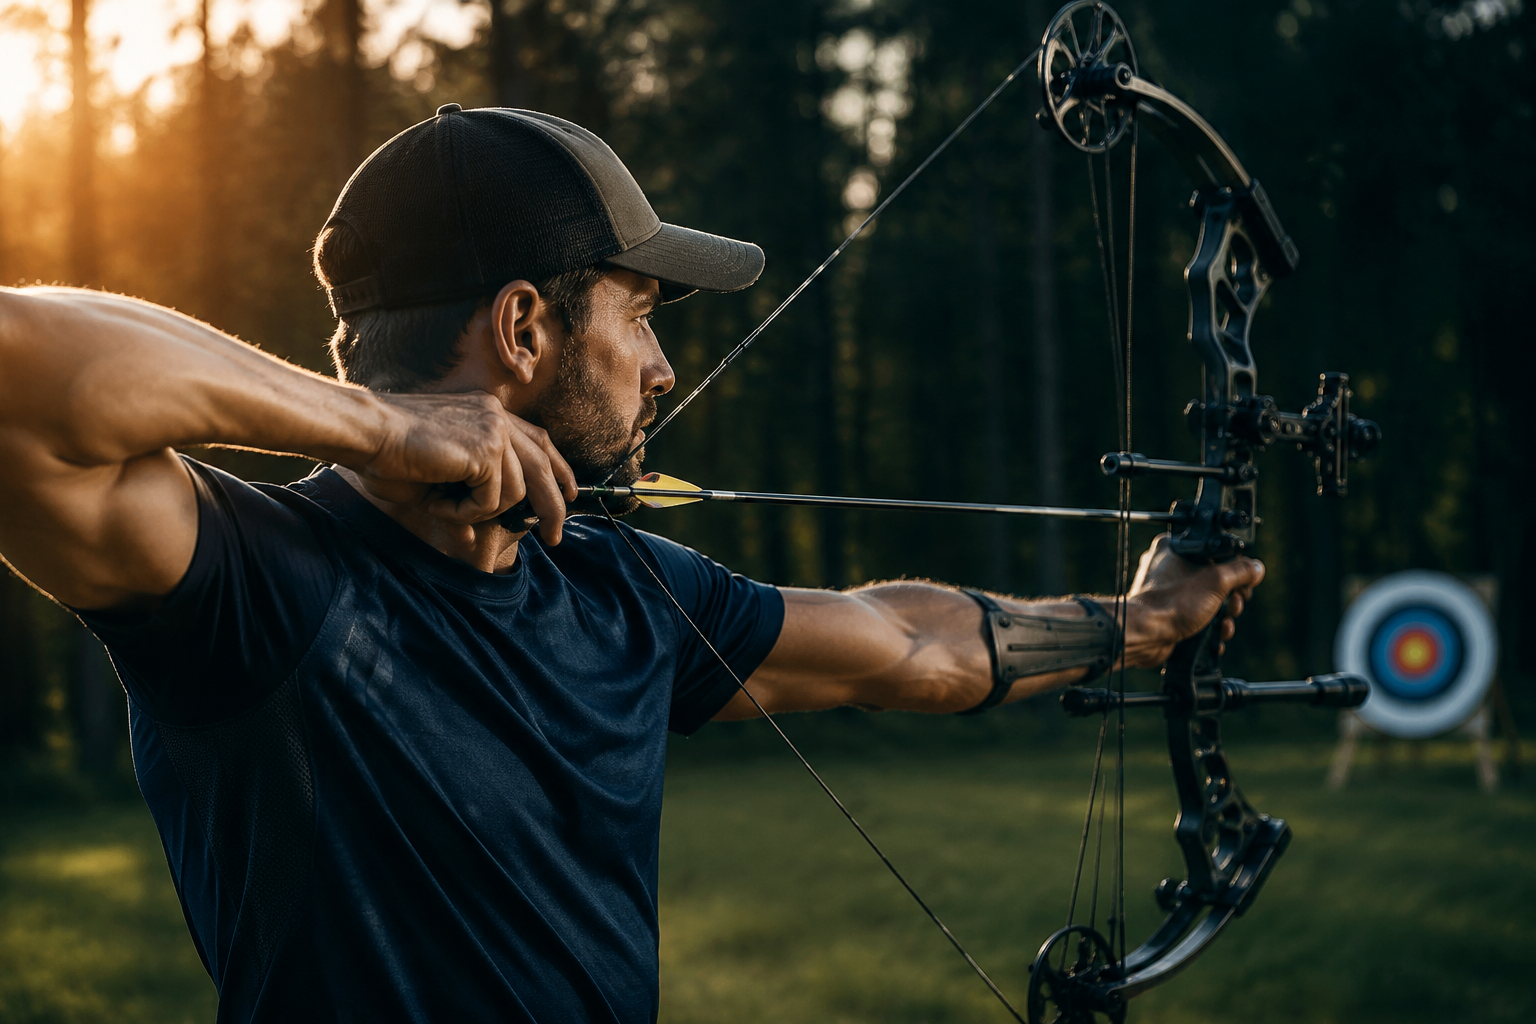
A smooth bow draw is a controlled, fluid motion from the initial grip to full anchor point without jerking, pausing, or shaking. The movement should feel continuous and effortless, with the bow coming back in one steady arc rather than in stages or with visible tremors.
Smooth drawing indicates proper muscle recruitment and body mechanics. When executed correctly, the archer engages large back muscles progressively throughout the draw cycle, distributing the load across multiple muscle groups rather than isolating smaller, weaker muscles that fatigue quickly.
Characteristics of a smooth draw:
Archers who draw smoothly maintain better shot consistency because their form remains repeatable. Jerky or uncontrolled draws introduce variables that change from shot to shot, making accurate shooting nearly impossible.
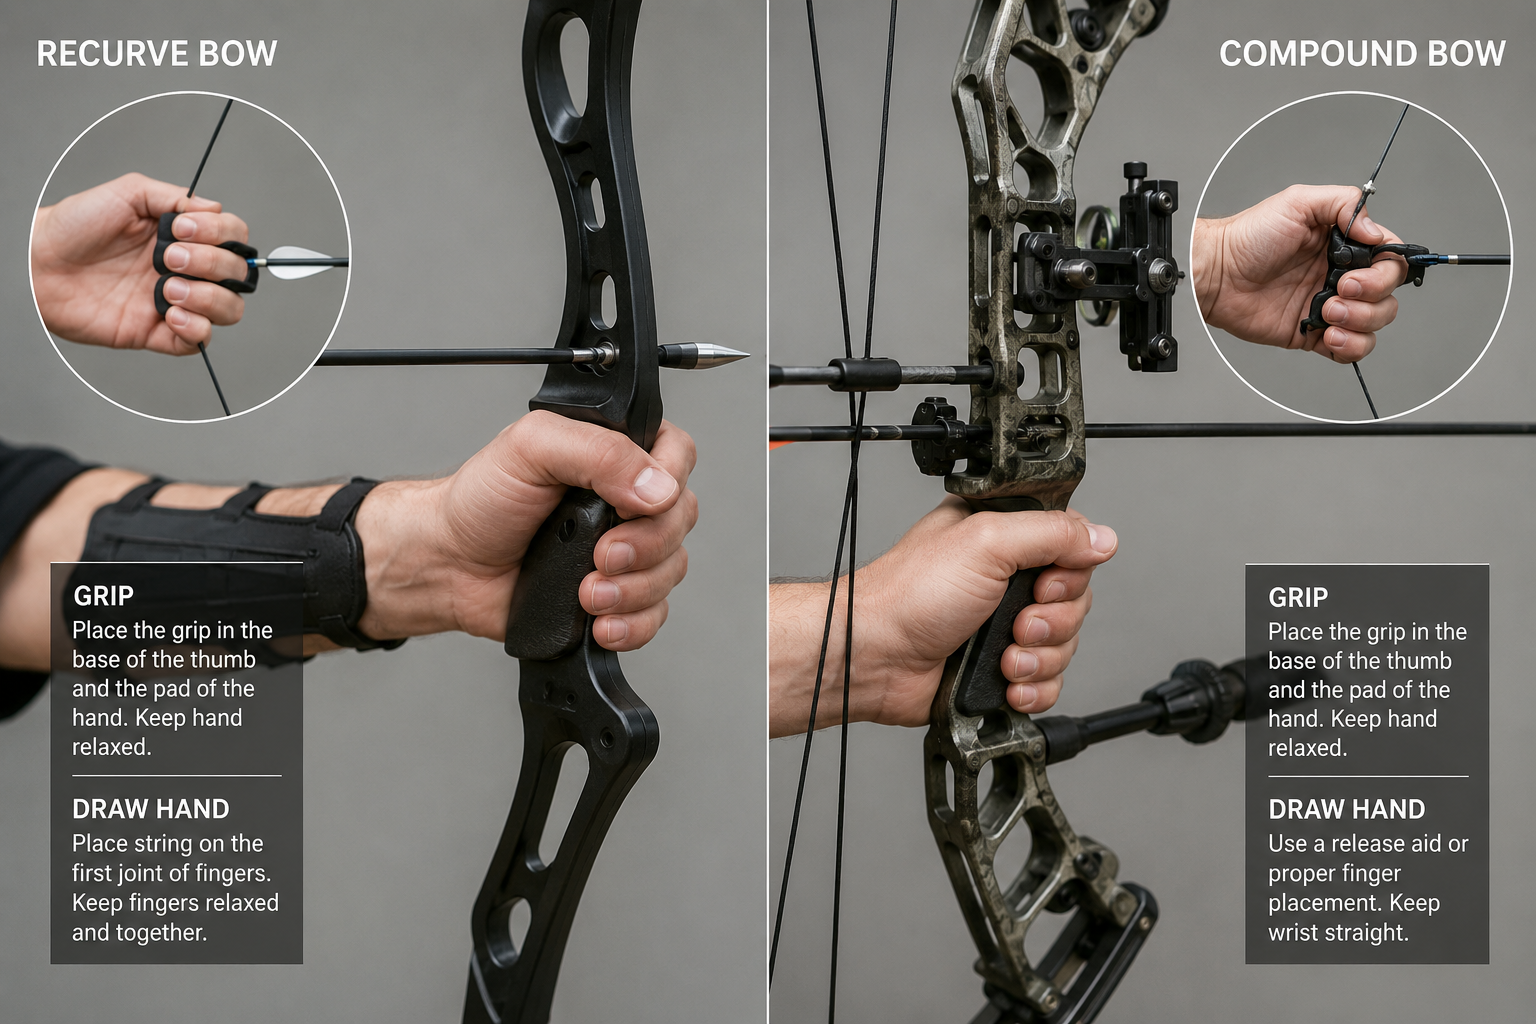
Correct bow grip is the foundation of smooth drawing. The bow hand should contact the grip at the meaty part of the thumb pad (the thenar eminence), creating a 45-degree angle between the bow and forearm. The grip should rest in the “V” formed between thumb and index finger, with fingers relaxed and curled naturally rather than gripping tightly.
For the draw hand, finger placement depends on your release method. Traditional archers using a Mediterranean draw place the index finger above the arrow nock and middle and ring fingers below, with the string resting in the first joint crease of each finger. The thumb should stay relaxed and tucked away from the string.
Bow hand positioning checklist:
Draw hand positioning checklist:
A common mistake is death-gripping the bow handle, which creates torque and causes the bow to twist during the draw. This tension travels up the arm and prevents smooth muscle engagement in the back and shoulders.
The difference between smooth and jerky draws lies in muscle recruitment patterns and timing. A smooth draw uses progressive back tension with coordinated movement between both arms, while a jerky draw relies on isolated arm muscles with inconsistent speed and multiple micro-pauses.
Jerky draws typically result from one or more technical flaws: starting the draw with arm muscles instead of back muscles, gripping too tightly, using excessive draw weight, or anticipating the shot (target panic). These draws often feature a fast initial pull followed by a struggle at the end, or multiple stop-and-start movements as the archer fights to reach full draw.
Comparison of draw types:
| Aspect | Smooth Draw | Jerky Draw |
|---|---|---|
| Muscle engagement | Back and shoulders primary | Arms and biceps primary |
| Speed consistency | Even throughout | Variable with pauses |
| Bow stability | Minimal movement | Visible shaking |
| Energy expenditure | Efficient | Exhausting |
| Shot consistency | High repeatability | Unpredictable results |
| Anchor point | Clean arrival | Adjustment needed |
Smooth draws allow archers to maintain better aim throughout the draw cycle because the sight picture remains relatively stable. Jerky draws cause the bow to bounce and waver, forcing the archer to re-establish aim after reaching full draw, which wastes time and mental energy.
The physical sensation differs dramatically. Smooth draws feel almost effortless despite the weight, with a sense of control and power. Jerky draws feel like a fight against the bow, with muscles burning and shaking even at moderate draw weights.
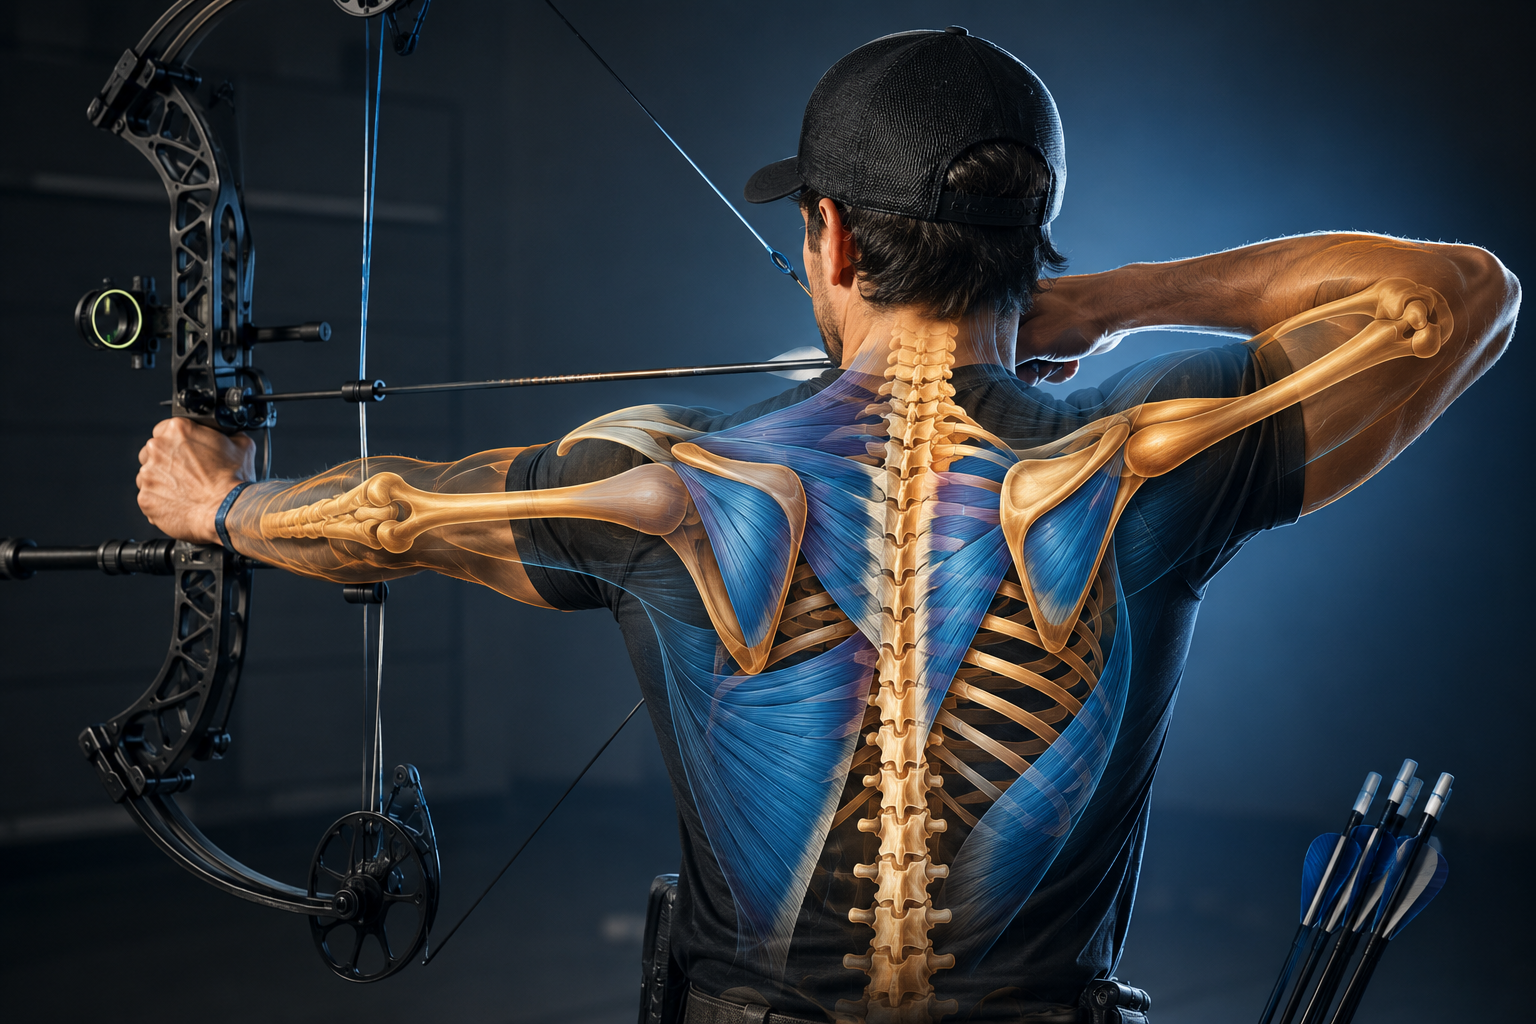
Strengthening the specific muscles used in drawing a bow improves smoothness and control. The primary muscles involved are the rhomboids, rear deltoids, rotator cuff muscles, and latissimus dorsi. These muscles work together to retract the shoulder blade and maintain proper draw alignment.
Resistance band exercises:
Bodyweight exercises:
Archery-specific training:
Consistency matters more than intensity. Training these muscles 3-4 times per week with moderate resistance produces better results than occasional heavy workouts. The goal is building endurance and muscle memory rather than maximum strength.
Bow shakiness during the draw typically stems from three causes: excessive draw weight, improper muscle engagement, or target panic. When draw weight exceeds your current strength capacity, smaller stabilizer muscles fatigue quickly and begin trembling as they struggle to control the load.
Using arm muscles instead of back muscles causes shaking because biceps and forearms lack the endurance needed for controlled draws. These smaller muscle groups fatigue within seconds under load, producing visible tremors. Proper back tension distributes the weight across larger, more fatigue-resistant muscle groups.
Common causes of shaky draws:
Target panic manifests as shakiness when the subconscious mind anticipates the shot and triggers premature muscle tension. This psychological response creates physical symptoms including trembling, rushed draws, and inability to hold at full draw.
Solutions for reducing shakiness:
Choose draw weight that allows you to reach full draw in 2-3 seconds and hold comfortably for 5-10 seconds. If you cannot hold steady at full draw for at least 5 seconds, reduce draw weight by 5-10 pounds. Focus on initiating the draw with back muscles by thinking about pulling your shoulder blades together rather than pulling with your arm. Practice controlled breathing, exhaling slowly during the draw cycle to prevent tension buildup.
If shakiness persists despite proper weight and technique, consider target panic treatment including blank bale shooting, draw length verification, and mental game training.
Beginners should start with draw weights that feel almost too light: 15-20 pounds for recurve bows and 20-30 pounds for compound bows. This allows focus on technique development without fighting excessive weight. The ability to draw smoothly and hold steadily at full draw for 10-15 seconds indicates appropriate starting weight.
Draw weight that’s too heavy forces beginners to develop compensatory bad habits including jerky draws, poor anchor points, and target panic. These habits become deeply ingrained and require significant effort to correct later. Starting light and adding weight gradually as strength and technique improve produces better long-term results.
Draw weight guidelines by archer profile:
These ranges assume target archery applications. Hunters require higher draw weights (typically 40-50 lbs minimum for deer-sized game), but should still master technique at lower weights before increasing to hunting weight.
Increase draw weight in 2-5 pound increments only after consistently shooting smooth, controlled shots for several weeks. Rushing weight increases compromises form and increases injury risk, particularly to rotator cuff and shoulder structures.
Compound bows generally provide smoother draws for most archers due to mechanical advantage from cams and let-off at full draw. The cam system reduces holding weight by 65-80% at full draw, allowing archers to hold steadily without muscle fatigue. The draw cycle on compounds follows a predictable force curve, building to peak weight at mid-draw then dropping to holding weight.
Recurve bows require holding the full draw weight throughout the aiming process, demanding greater strength and endurance. The draw weight increases linearly from start to finish with no mechanical assistance. This makes recurve draws feel heavier and more demanding, though some archers prefer the direct feedback and connection to the bow.
Draw characteristics comparison:
Compound bows:
Recurve bows:
For beginners focused on developing smooth draw technique, compounds offer advantages by reducing the strength requirement at full draw. This allows more time and mental bandwidth for focusing on form. However, recurves teach better muscle engagement patterns because they demand proper back tension throughout the entire shot cycle.
Choose based on your goals and physical capacity. If smooth draws feel impossible with a recurve at appropriate hunting weight, a compound bow provides a viable alternative. If building traditional archery skills and muscle engagement patterns matters more than immediate success, recurve bows offer better feedback.
The most frequent mistake is initiating the draw with arm muscles instead of back muscles. Archers who pull with their biceps and forearms exhaust quickly and develop jerky, inconsistent draws. Proper technique involves pushing the bow arm forward while simultaneously pulling the draw arm back, creating opposing forces that engage the back muscles.
Critical mistakes that prevent smooth draws:
Gripping too tightly: Creates tension throughout the arm and shoulder, preventing fluid movement. The bow hand should maintain light, consistent pressure with fingers relaxed.
Rushing the draw: Pulling back quickly to “get it over with” prevents proper muscle sequencing. Smooth draws take 2-3 seconds from start to full draw.
Dropping the bow arm: Allowing the bow arm to sag during the draw changes geometry and creates inconsistent anchor points. The bow arm should remain level and steady throughout.
Hunching shoulders: Elevating or rolling shoulders forward during the draw reduces back muscle engagement and creates tension. Shoulders should stay down and back.
Holding breath: Breath-holding creates tension and reduces oxygen to muscles. Exhale slowly during the draw for better control.
Inconsistent anchor point: Changing where the draw hand contacts the face from shot to shot destroys consistency. Establish one anchor point and use it every time.
Creeping forward: Allowing the draw hand to drift forward after reaching full draw indicates insufficient back tension. The draw hand should remain locked at anchor until release.
Many archers combine multiple mistakes, compounding the problem. Video recording your draw cycle from the side reveals these errors clearly. Watch for shoulder movement, bow arm stability, and draw hand path consistency.
Release aids improve draw smoothness for compound bow shooters by eliminating finger pressure inconsistencies and allowing better back tension engagement. The mechanical release attaches to the bowstring’s D-loop, removing direct finger contact and the associated tension patterns that cause jerky draws.
Wrist-strap releases (caliper style) are most popular for hunting and recreational shooting because they’re comfortable and intuitive. Handheld releases (thumb trigger, hinge, resistance) offer better precision for target archery but require more training to master. Back-tension releases activate automatically when proper pulling motion is achieved, making them excellent training tools for developing smooth draws.
Benefits of using a release aid:
Drawbacks to consider:
For compound bow shooters struggling with smooth draws despite proper technique, a release aid often provides immediate improvement. The mechanical advantage removes one variable (finger tension) and allows complete focus on body mechanics and back engagement.
Traditional recurve and longbow archers cannot use release aids in most competition settings and should focus instead on finger tab quality, hand position, and back tension development. A properly fitted finger tab with smooth leather reduces friction and improves release consistency.
Target panic is a psychological condition where anticipation of the shot triggers involuntary responses including rushed draws, freezing at full draw, or inability to aim properly. It affects the draw cycle by creating tension and urgency that prevent smooth, controlled movement.
Fixing target panic requires retraining the subconscious mind through deliberate practice that removes outcome focus. Blank bale shooting (shooting at a blank target from 3-5 yards with no aiming point) allows focus entirely on draw execution without the pressure of hitting a target.
Target panic treatment protocol:
Phase 1 – Blank bale foundation (2-4 weeks):
Phase 2 – Controlled aiming (2-3 weeks):
Phase 3 – Distance progression (3-4 weeks):
Additional techniques:
Target panic rarely resolves quickly. Expect 2-3 months of dedicated practice to see significant improvement. The key is removing pressure and rebuilding the shot sequence from scratch with emphasis on process rather than outcome.
Smooth draw technique remains fundamentally identical for hunting and target shooting. Both applications require proper back tension, consistent anchor points, and controlled muscle engagement. The biomechanics of an efficient draw don’t change based on the target type.
However, hunting scenarios introduce variables that test draw smoothness under pressure. Cold weather reduces muscle flexibility, elevated heart rate from hiking affects control, and the presence of game animals creates psychological pressure. Hunters must maintain smooth draw technique despite these challenges.
Hunting-specific considerations:
Target shooting considerations:
Practice smooth draws in hunting clothing and positions during off-season to ensure technique transfers when it matters. Many hunters develop excellent form on the range but struggle in the field because they haven’t practiced under realistic conditions.
Back tension drawing is a technique that engages the rhomboid and trapezius muscles by focusing on squeezing the shoulder blades together rather than pulling with the arm. This method distributes draw weight across larger, more fatigue-resistant muscle groups and creates a more stable, controlled draw cycle.
To execute back tension properly, think about pulling your draw-side shoulder blade toward your spine rather than pulling your hand toward your face. The arm serves as a connection between the string and your back muscles, not as the primary source of power. This mental shift changes muscle recruitment patterns dramatically.
Step-by-step back tension draw:
Common back tension errors:
The sensation of proper back tension feels like squeezing a pencil between your shoulder blades. Your draw arm should feel relatively relaxed while your upper back muscles work hard. If your bicep burns and your back feels uninvolved, you’re not using back tension.
Practice back tension with resistance bands before applying it to your bow. Stand with band anchored in front of you, hold handles at chest height, and squeeze shoulder blades together while keeping arms relatively straight. This isolates the back tension movement without the complexity of holding a bow.
A smooth bow draw should take 2-3 seconds from initial movement to full anchor point. This timing allows proper muscle sequencing, controlled breathing, and stable bow arm positioning. Draws completed faster than 2 seconds typically rely on arm strength and momentum rather than proper back tension.
Extremely slow draws (4+ seconds) can cause muscle fatigue and trembling, particularly for archers shooting near their maximum comfortable draw weight. The ideal timing balances control with efficiency, preventing both rushed execution and excessive muscle strain.
Draw timing by experience level:
Timing consistency matters more than the exact duration. Varying draw speed from shot to shot introduces inconsistency in muscle engagement patterns and anchor point arrival. Use a metronome or count silently to develop consistent timing.
Factors affecting optimal draw time:
Practice draw timing without releasing by drawing to anchor, holding briefly, and letting down safely. This builds muscle memory for consistent timing without the pressure of shot execution. Perform 10-20 draw-and-let-down repetitions before each shooting session.
How do I know if my draw weight is too heavy?
If you cannot draw smoothly in 2-3 seconds, hold steadily at full draw for 5-10 seconds, or complete 30-50 shots without significant fatigue or shaking, your draw weight is too heavy. Reduce by 5-10 pounds and reassess.
Can I improve draw smoothness without changing my bow?
Yes, most draw smoothness issues stem from technique rather than equipment. Focus on back tension engagement, proper grip pressure, and consistent timing. Strengthening exercises for back and shoulder muscles also improve smoothness without equipment changes.
Why does my draw feel smooth on some shots but jerky on others?
Inconsistent draws typically result from variable mental focus or physical fatigue. Develop a pre-shot routine that ensures consistent mental state for each shot. Monitor fatigue levels and stop shooting when form deteriorates.
Should I practice drawing without releasing the arrow?
Yes, draw-and-let-down practice (drawing to full anchor then safely returning to rest position) builds muscle memory for smooth draws without the pressure of shot execution. Perform 10-20 repetitions before each shooting session.
How does breathing affect draw smoothness?
Holding your breath creates tension that prevents smooth draws. Exhale slowly during the draw cycle to maintain relaxation and oxygen flow to working muscles. Establish a consistent breathing pattern for every shot.
Will a lighter bowstring improve draw smoothness?
Bowstring weight has minimal effect on draw smoothness compared to technique factors. Focus on proper muscle engagement and timing before considering equipment modifications.
Can target panic cause physical shaking during the draw?
Yes, target panic triggers subconscious tension and anticipation that manifests as physical symptoms including shaking, rushed draws, and inability to aim. Treatment requires systematic retraining through blank bale shooting and mental game work.
How long does it take to develop consistently smooth draws?
Beginners typically require 3-6 months of regular practice (3-4 sessions weekly) to develop consistently smooth draws. Archers correcting bad habits may need 6-12 months to fully retrain muscle memory patterns.
Is it normal for my bow arm to shake during the draw?
Slight tremor in the bow arm is common when learning or when shooting at the upper limit of comfortable draw weight. Significant shaking indicates either excessive draw weight or improper bow arm structure. Reduce weight or focus on maintaining firm but not rigid bow arm position.
Should I use a clicker to improve draw consistency?
Clickers (draw check devices) help compound and recurve archers achieve consistent draw length, which indirectly improves smoothness by providing a clear endpoint. They’re particularly useful for Olympic recurve shooting but less common in other disciplines.
Can I draw too slowly?
Yes, draws longer than 4 seconds can cause muscle fatigue and trembling, particularly at higher draw weights. The ideal timing balances control with efficiency, typically 2-3 seconds for most archers.
How do I maintain smooth draws when hunting in cold weather?
Warm up muscles thoroughly before hunting, wear layers that don’t restrict movement, and practice drawing in hunting clothing during off-season. Consider slightly reducing draw weight for cold-weather hunting to maintain control.
Mastering how to draw a bow smoothly transforms archery performance by establishing the foundation for consistent, accurate shooting. The key principles, engaging back muscles through proper shoulder blade rotation, maintaining light grip pressure, using appropriate draw weight, and executing draws in a controlled 2-3 second timeframe, apply universally across all archery disciplines.
Start by assessing your current draw weight honestly. If you cannot hold steadily at full draw for 5-10 seconds or complete 30 shots without significant fatigue, reduce weight by 5-10 pounds. This temporary step backward enables proper technique development that will serve you for years.
Implement a structured practice routine that includes strengthening exercises for back and shoulder muscles 3-4 times weekly, blank bale shooting to isolate draw mechanics from outcome pressure, and video analysis to identify specific technical errors. Focus on one improvement area at a time rather than attempting to fix everything simultaneously.
For archers struggling with target panic or persistent shakiness despite proper technique, seek guidance from experienced coaches or sports psychologists who specialize in archery. These issues rarely resolve through willpower alone and benefit from systematic intervention.
Remember that smooth draws result from proper muscle sequencing and mental focus, not from fighting the bow with brute strength. The sensation should feel controlled and almost effortless, with power coming from your back rather than your arms. Practice patience with the learning process, developing truly smooth draws takes months of consistent work, but the improvement in accuracy and shooting enjoyment makes the investment worthwhile.